Introduction
When it comes to web development, choosing the right tools and technologies is crucial for creating robust and scalable applications. If you're working with a Next.js app based on TypeScript and searching for a reliable database solution, combining PlanetScale,Drizzle ORM, and Kysely can be a mighty stack.
- PlanetScale offers a highly available and scalable MySQL-based database, ideal for horizontallyscalable applications.
- Drizzle ORM is a TypeScript ORM for SQL databases, ensures maximum type safety, and provides a convenient CLI tool, Drizzle Kit, for defining table schemas and generating SQL migrations effortlessly.
- Kysely is a type-safe TypeScript SQL query builder that complements the stack by simplifying the process of constructing SQL queries.
You can develop scalable, type-safe, and efficient applications by combining PlanetScale, Drizzle ORM, and Kysely with Next.js based on TypeScript. Whether your project is small or large-scale, this stack empowers you to handle complex data operations while maintaining a clean and maintainable codebase.
What is PlanetScale?
PlanetScale is a super cool database-as-a-service platform based on Vitess, the same technology that powers YouTube, Slack, and other mega-scale companies. It gives you a serverless MySQL-compatible database with an awesome Git-like development experience. Managing databases becomes a breeze with PlanetScale, and it scales like a champ while delivering top-notch performance.
Here are some benefits of using PlanetScale:
- Horizontal sharding: Scale your data horizontally across multiple servers effortlessly.
- Non-blocking schema changes: Make schema changes without impacting or locking database availability.
- Branching workflow: Manage different branches for development, testing, and production environments, just like Git.
- Multiple regions: Optimize performance by distributing your database closer to users in the different areas, reducing latency at the edge.
Setup PlanetScale account and create your first database
To get started, we need to create a PlanetScale account. You have two options: visit the official website and click the Get Started button or follow this link.
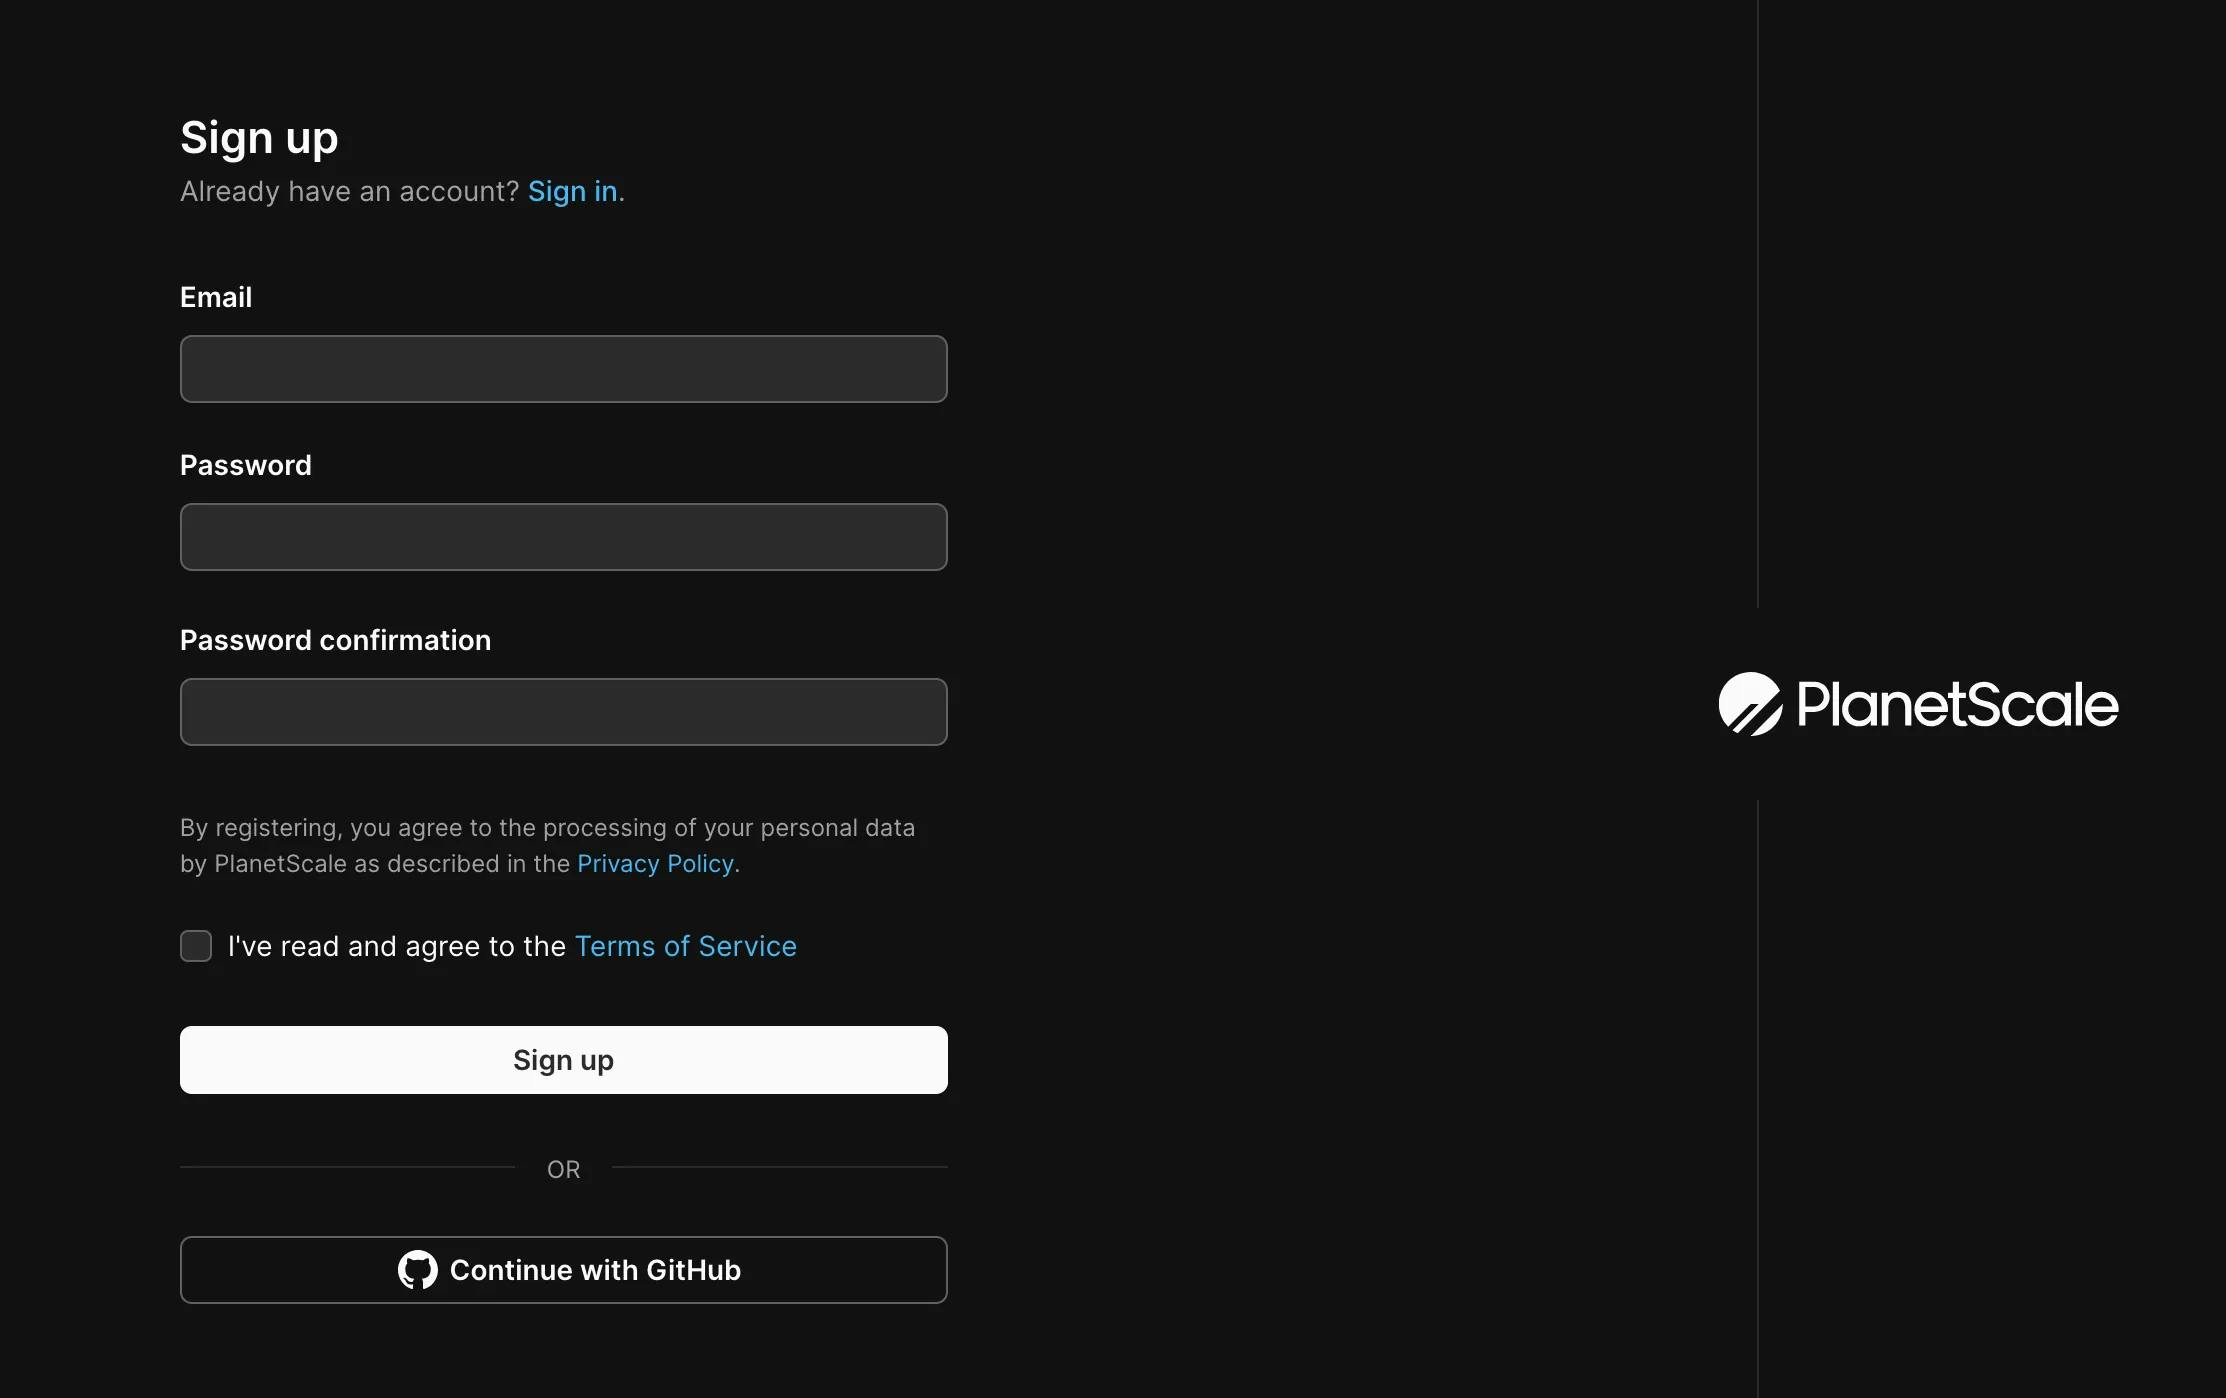
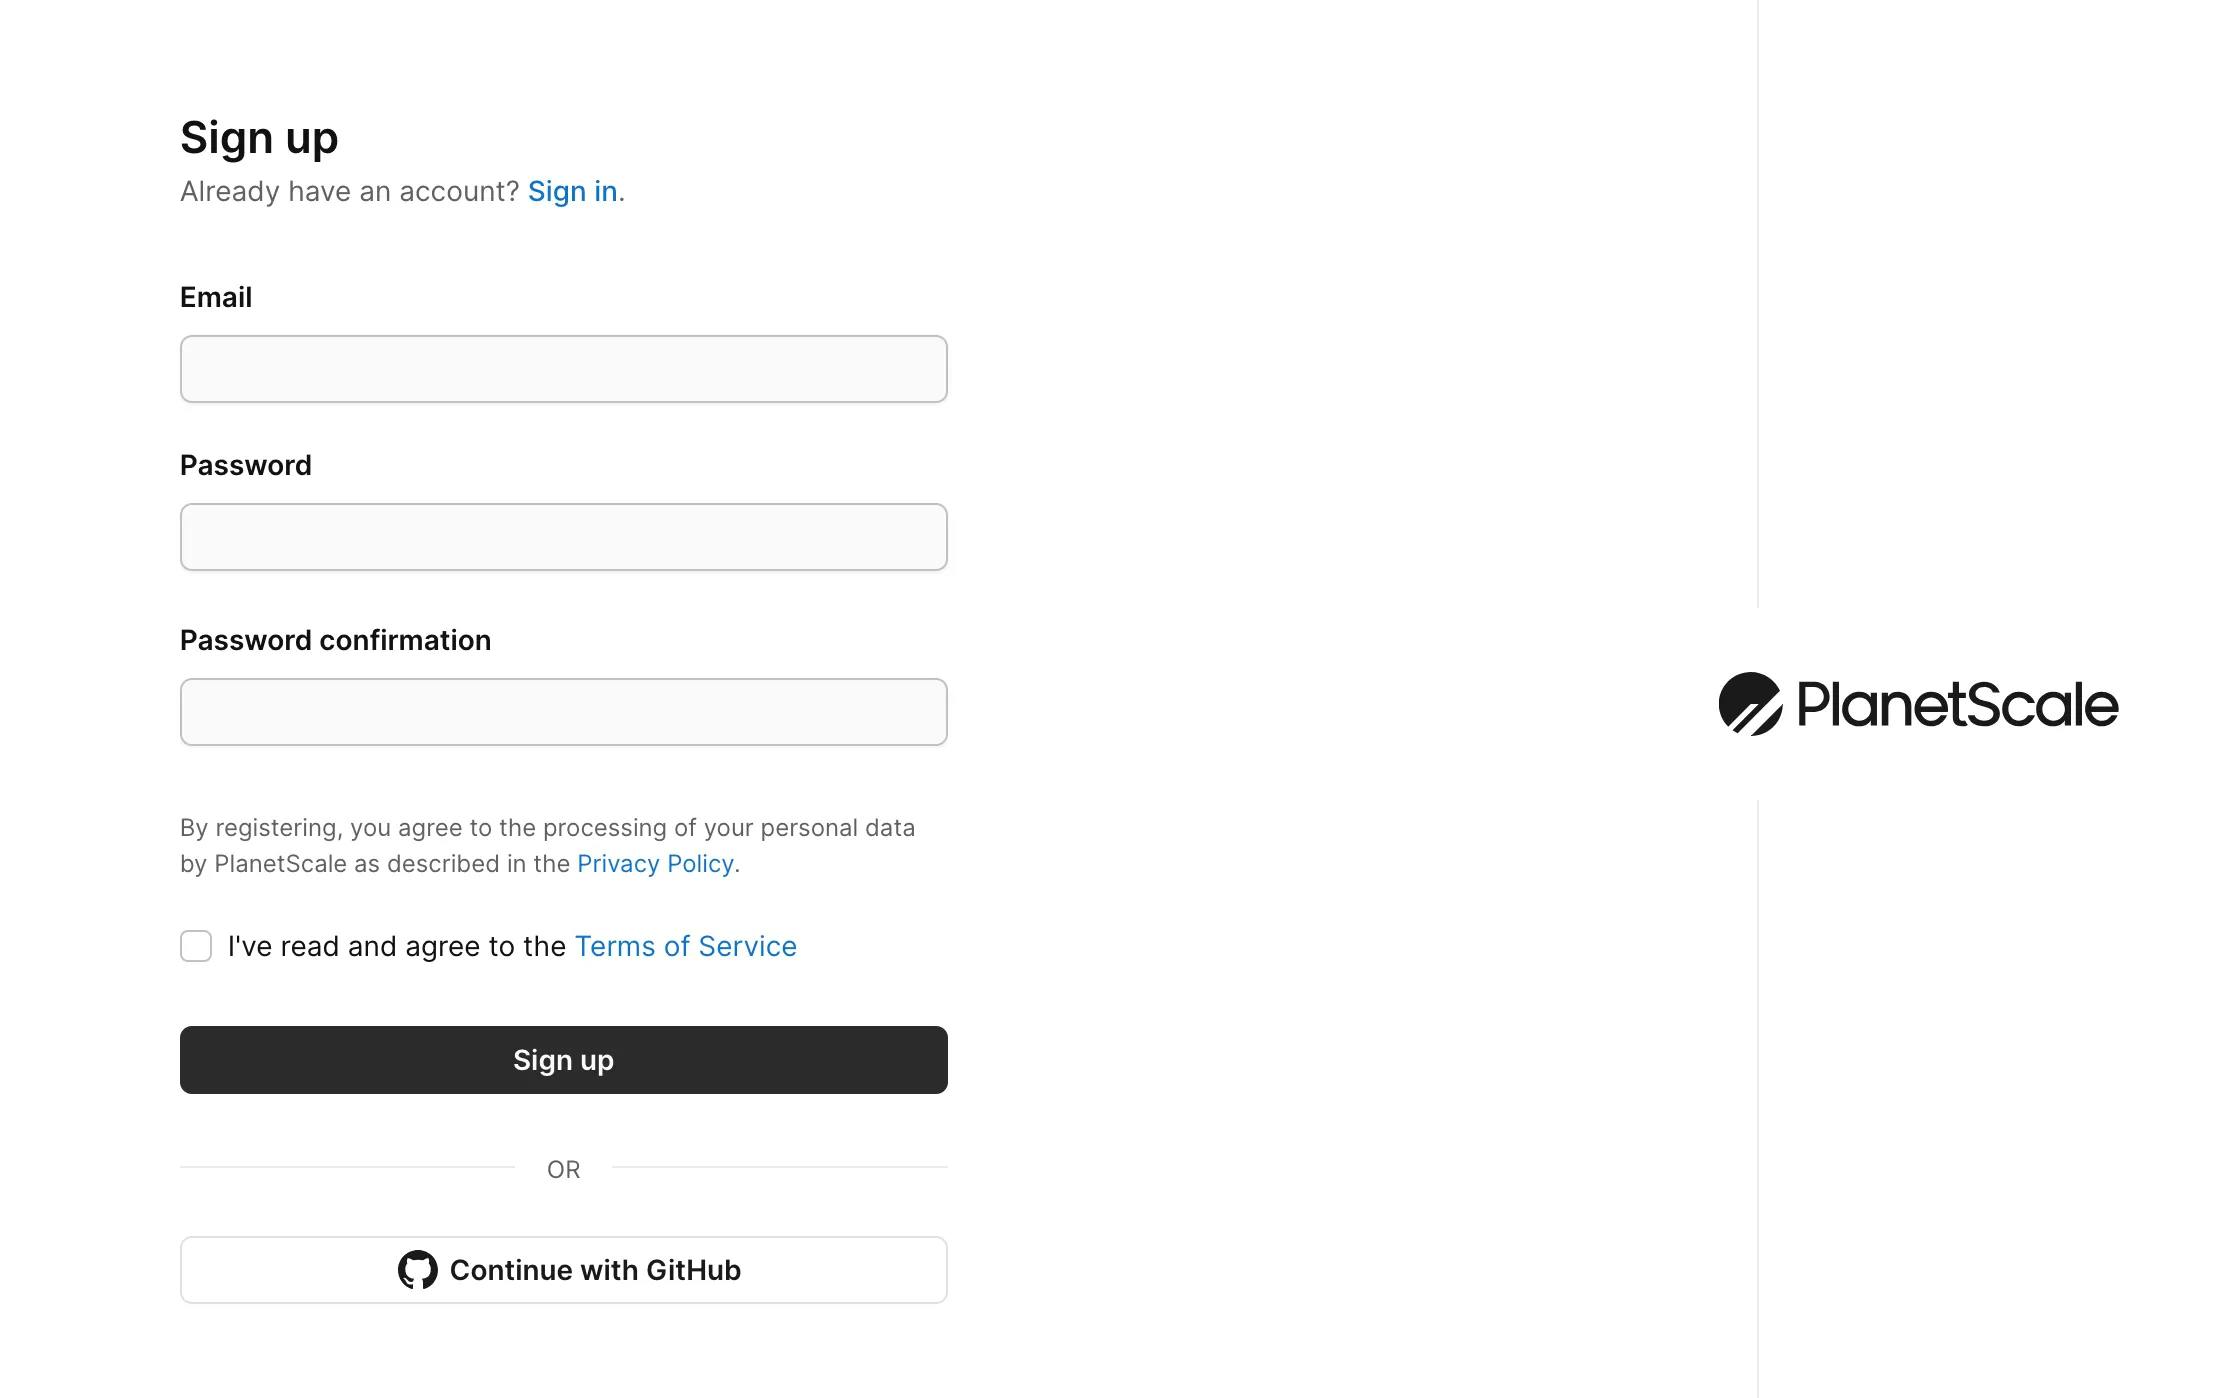
You have two options for creating an account: sign up with your email and password or use your GitHub account. In this tutorial, I'll be using the GitHub account signup method.
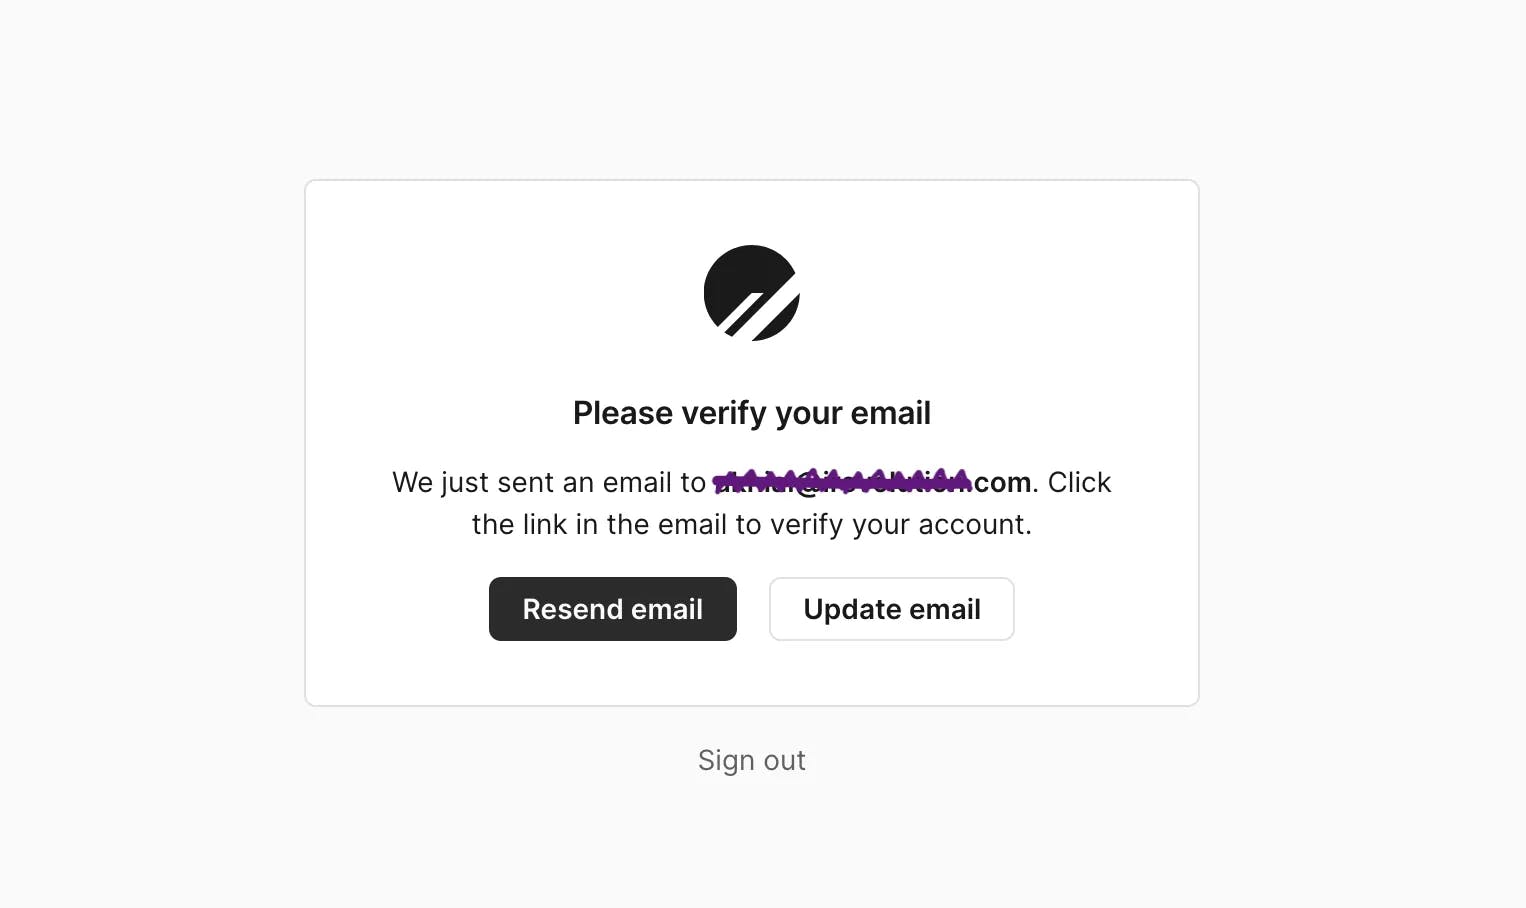
Upon signing up, you will receive a verification email. Click on the link within the email to confirm your account, regardless of your chosen signup method.

Once you click on the confirmation link, you'll be taken through an onboarding flow that highlights the amazing features of PlanetScale and provides guidance on how to use them. At the end of the flow, you'll see a button that says, Create your first database. Click on it and give your database a name (I'll go with movies).
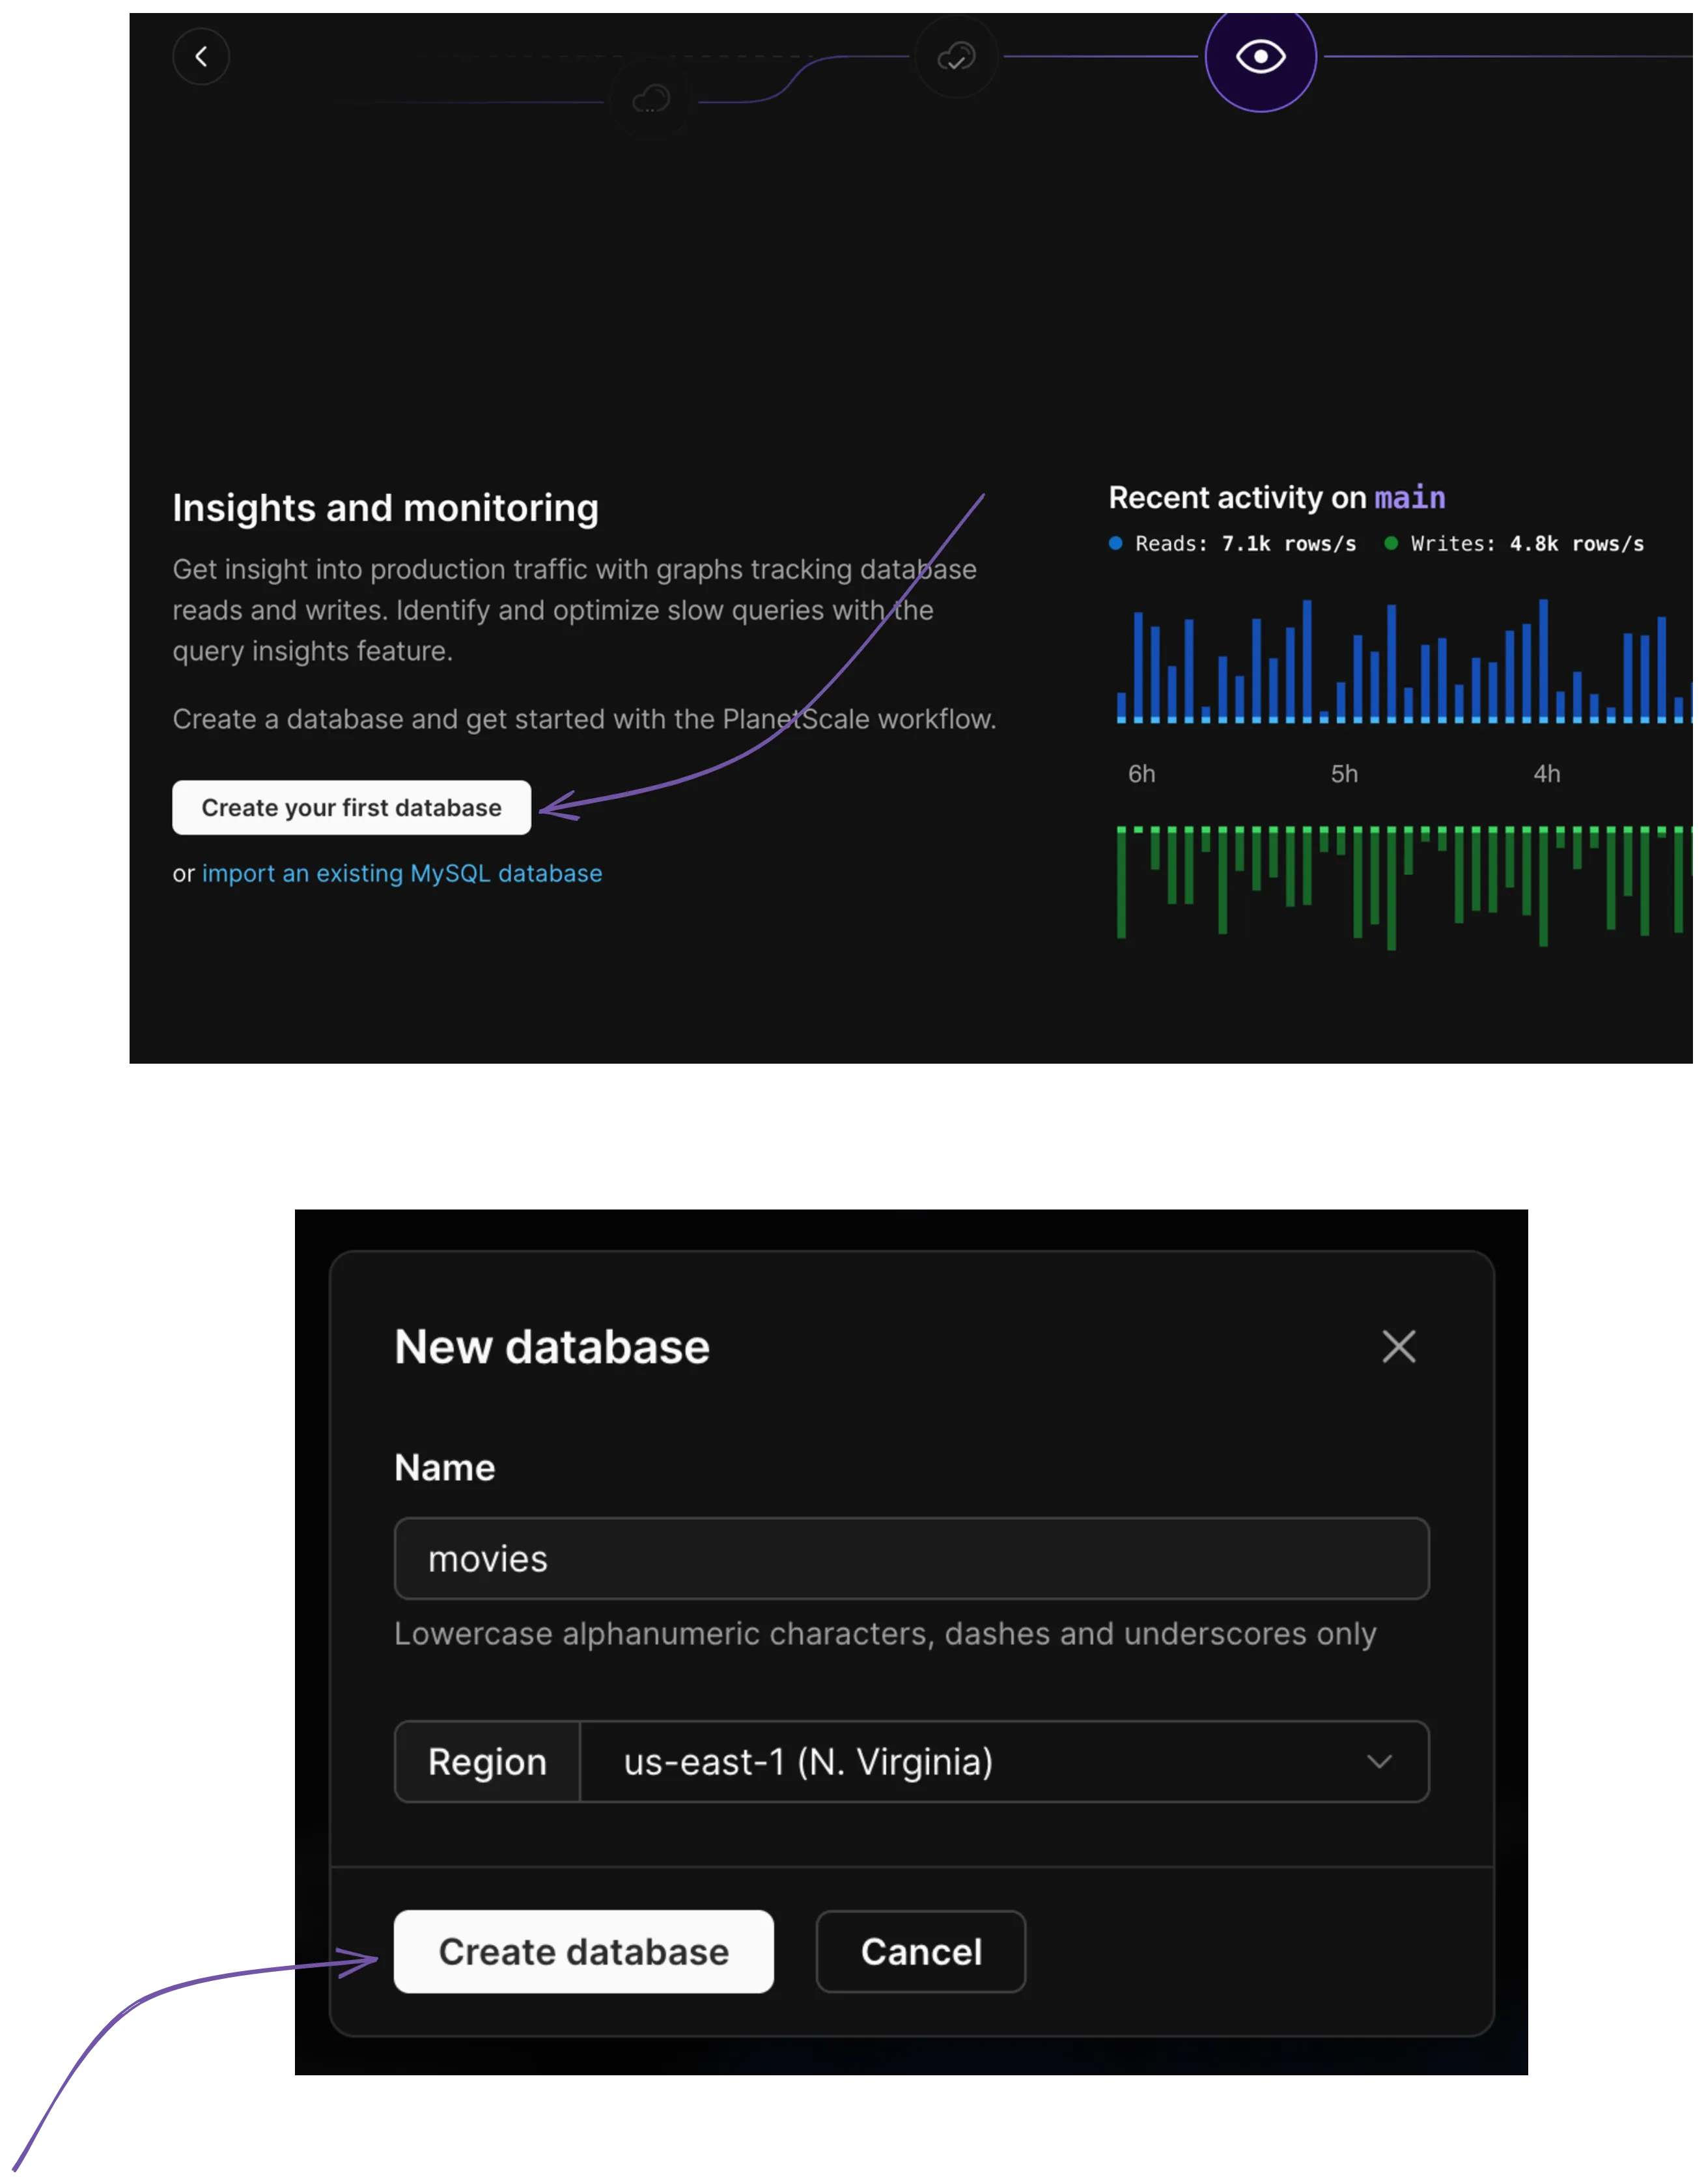
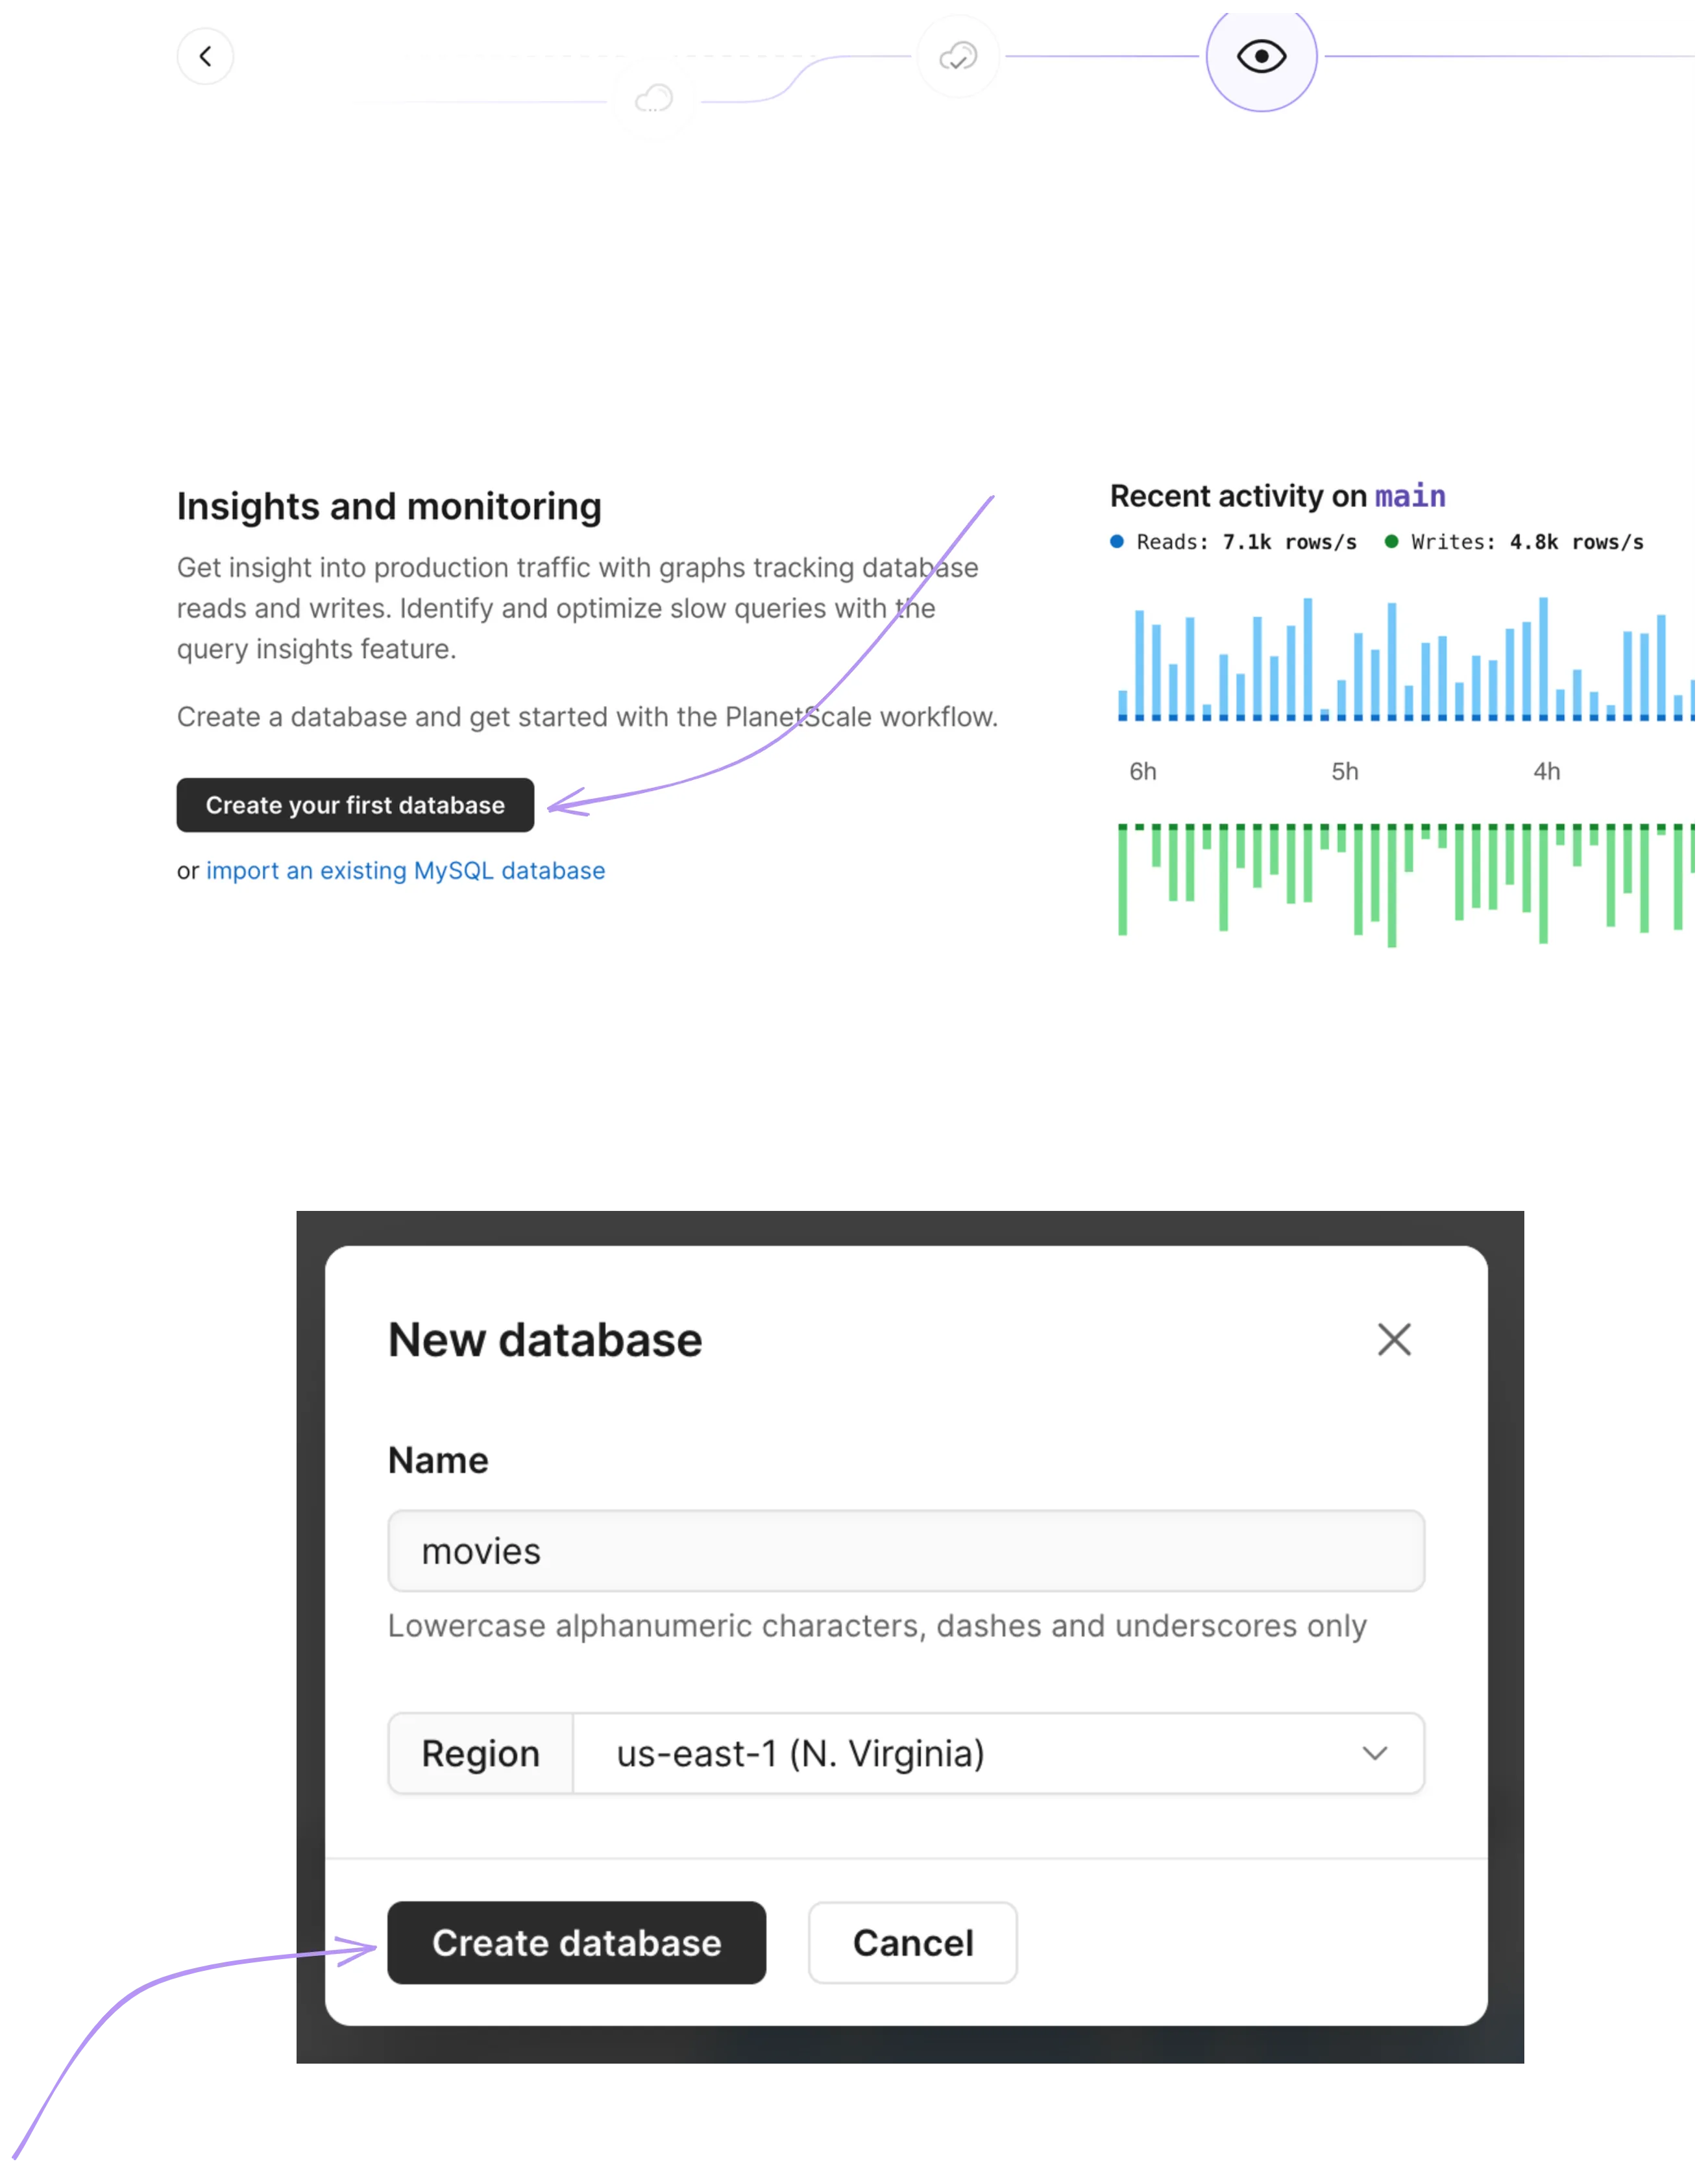
Once you've provided a name for your first database, PlanetScale will start the initialization process. This may take a couple of minutes to complete.
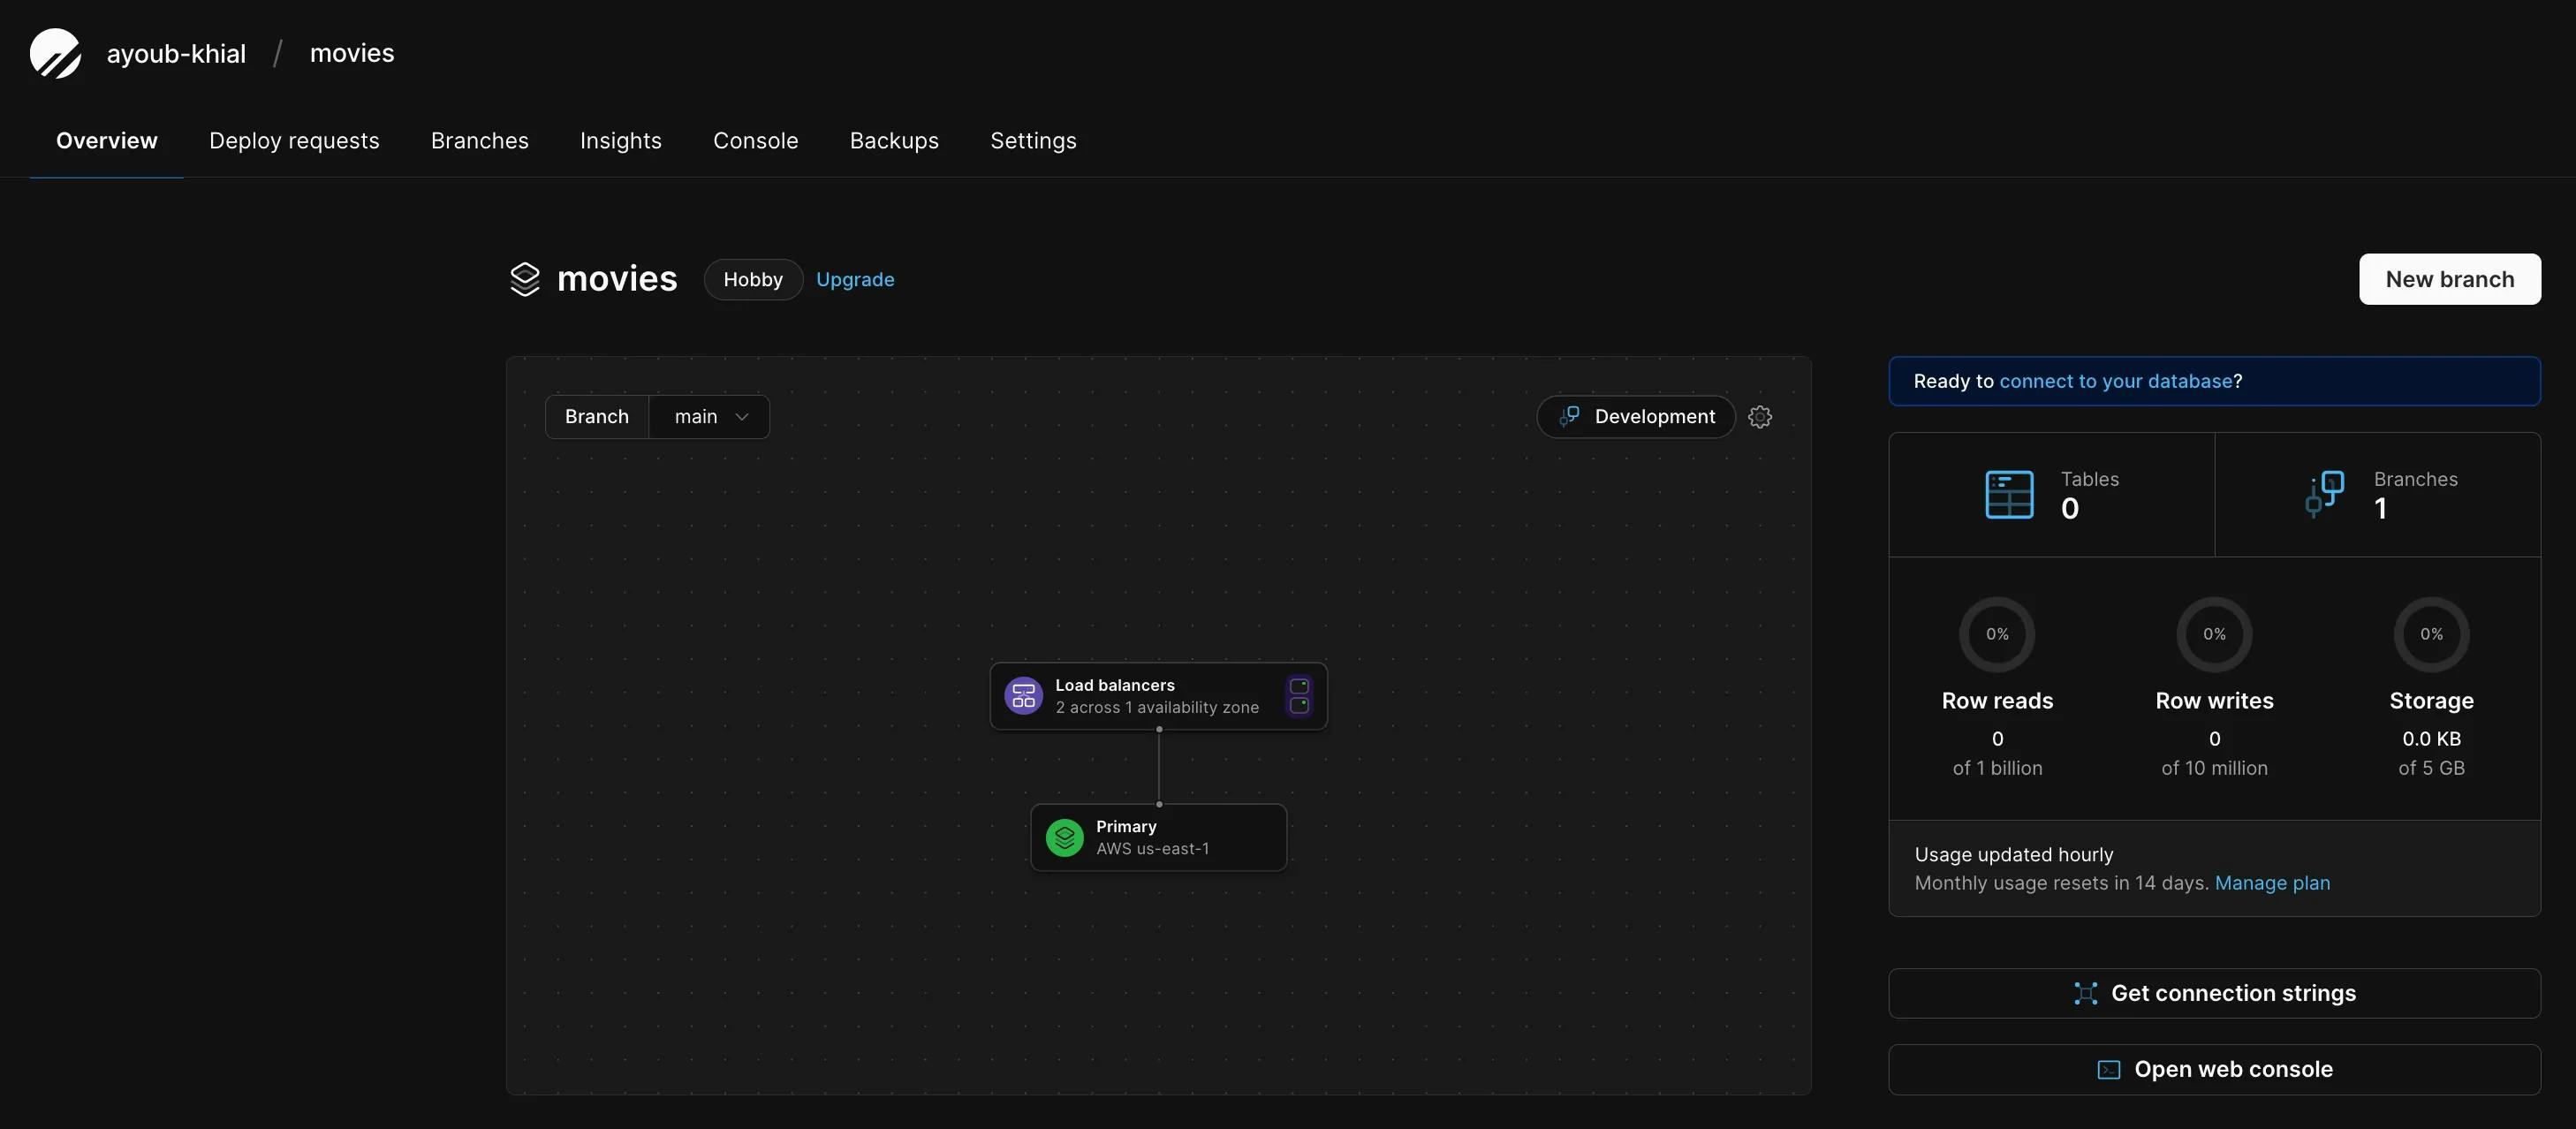
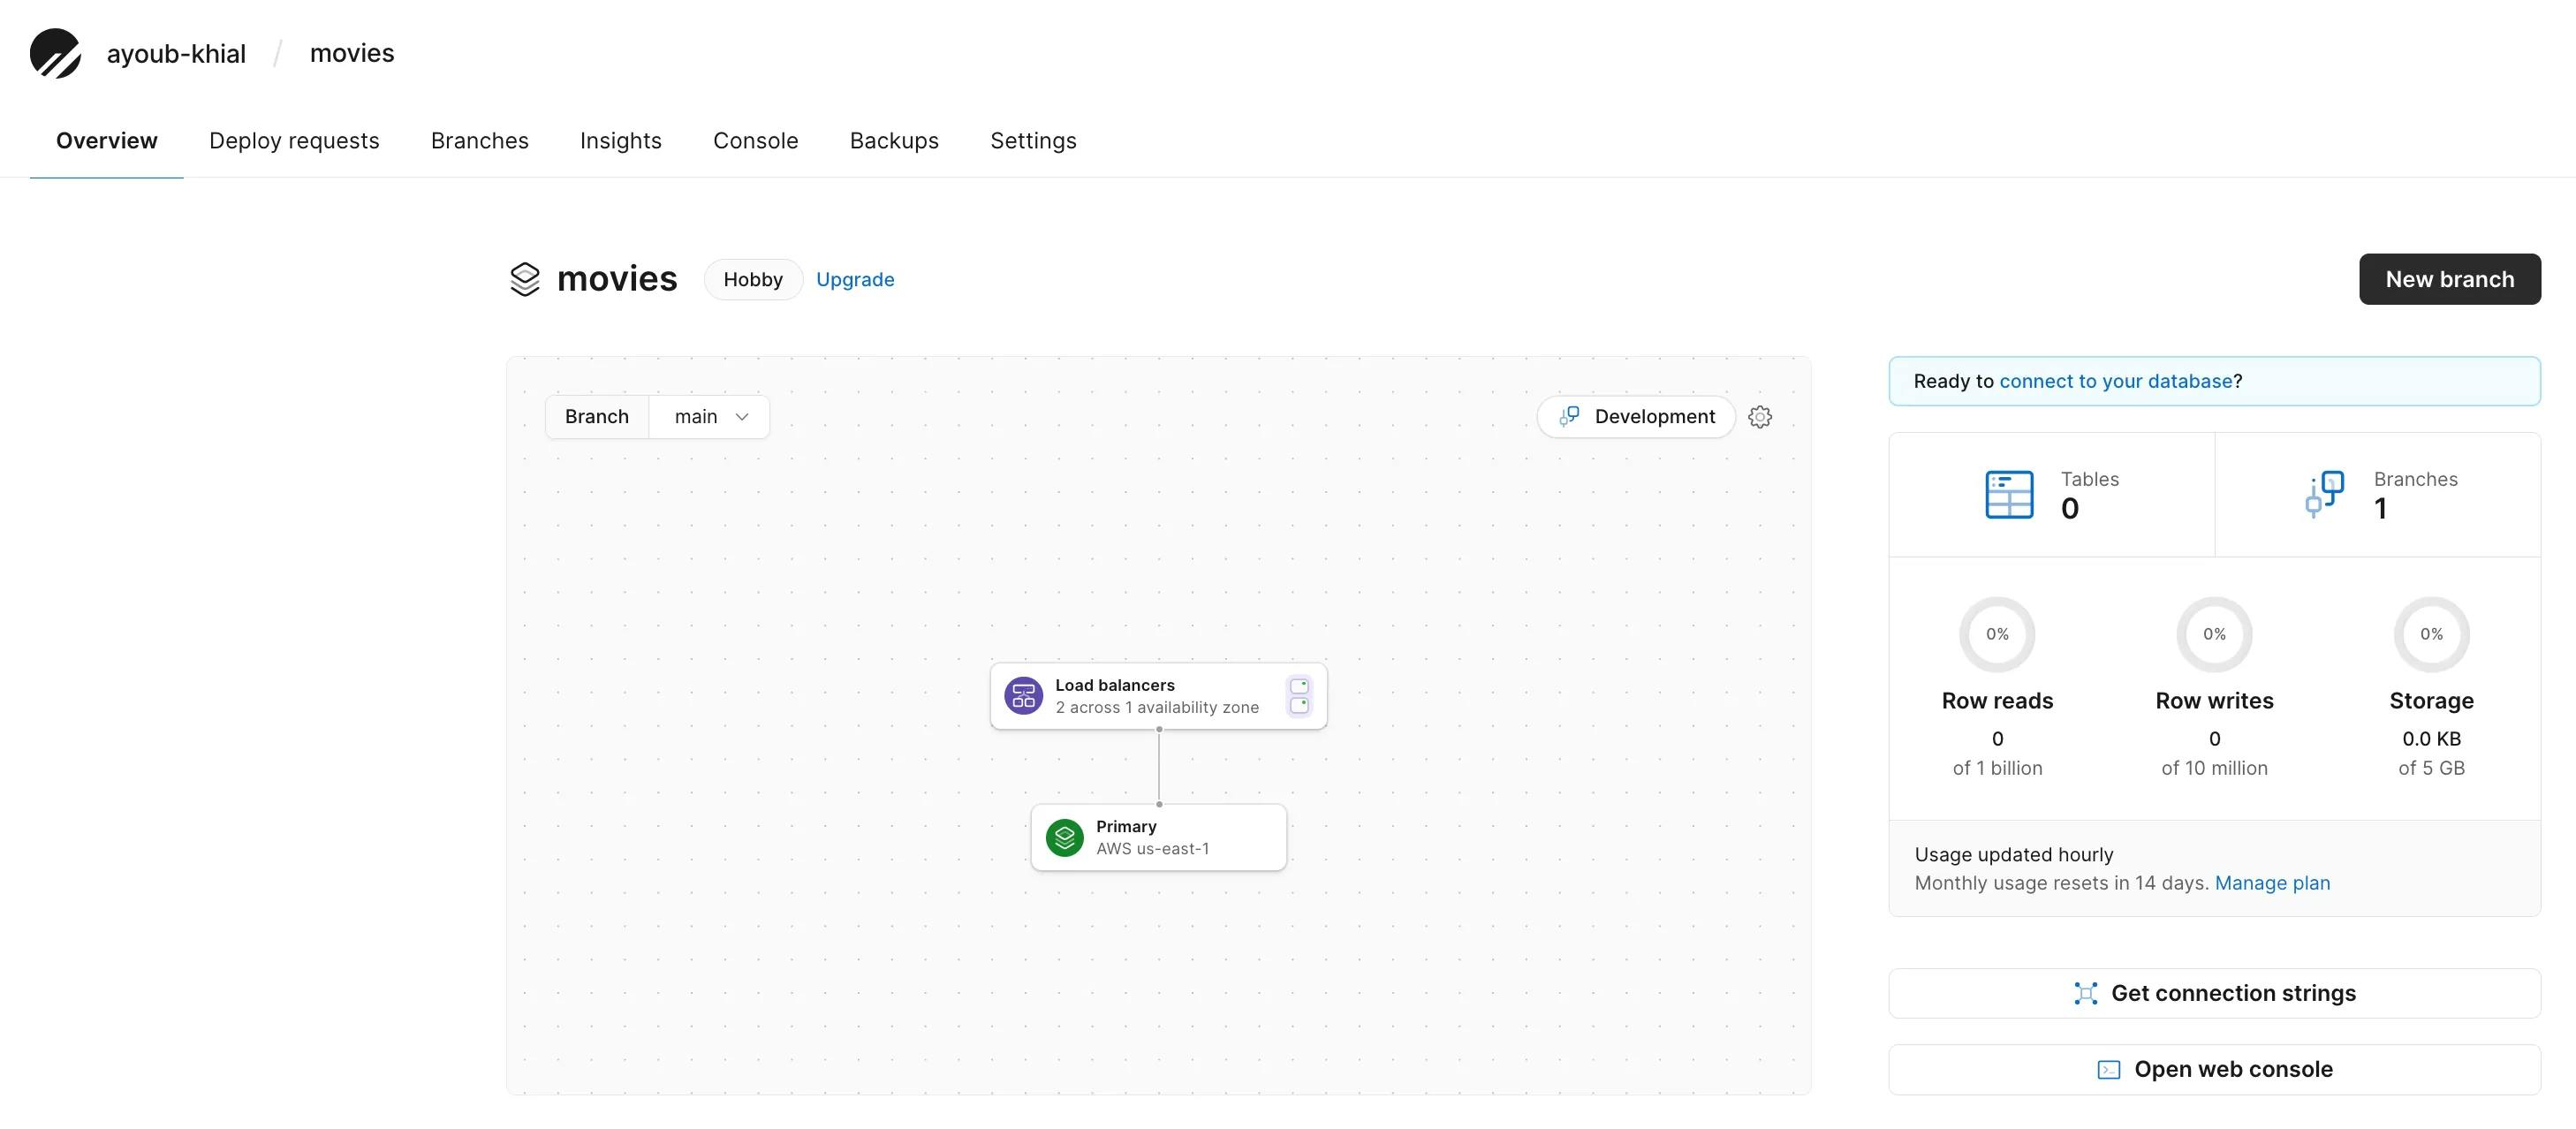
After the initialization is done, you'll land on the homepage of your database. This page provides an overview of your database and relevant details. It is the central hub for managing and interacting with your database within the PlanetScale platform.
PlanetScale CLI
The PlanetScale CLI is a handy command-line tool provided by PlanetScale to make your life easier. Its user-friendly interface allows you to interact with your PlanetScale databases, perform various operations, and seamlessly manage your databases, branches, and deployments. With the CLI, you can execute schema changes, create deploy requests, and more effortlessly. It's a valuable companion that streamlines your workflow and enhances your overall experience with PlanetScale databases.
Using macOS, you can conveniently install the PlanetScale CLI using the Brew package manager. Just run the following command:
brew install planetscale/tap/pscalebrew install planetscale/tap/pscalePlease follow the instructions for non-macOS users to install the PlanetScale CLI on your respective operating system.
To confirm that the installation process was successful, you can run the following command:
pscale versionpscale versionUpon running this command, you should see the version of your PlanetScale CLI printed in the terminal, similar to the following output:
pscale version 0.146.0 (build date: 2023-06-06T15:12:18Z commit: 48fec66)pscale version 0.146.0 (build date: 2023-06-06T15:12:18Z commit: 48fec66)To authenticate and log in to your PlanetScale account using the CLI, execute the following command:
pscale auth loginpscale auth loginAfter executing the command, a new browser tab will open and prompt you to sign in via the browser. You will be asked to verify the device confirmation code displayed in your terminal.
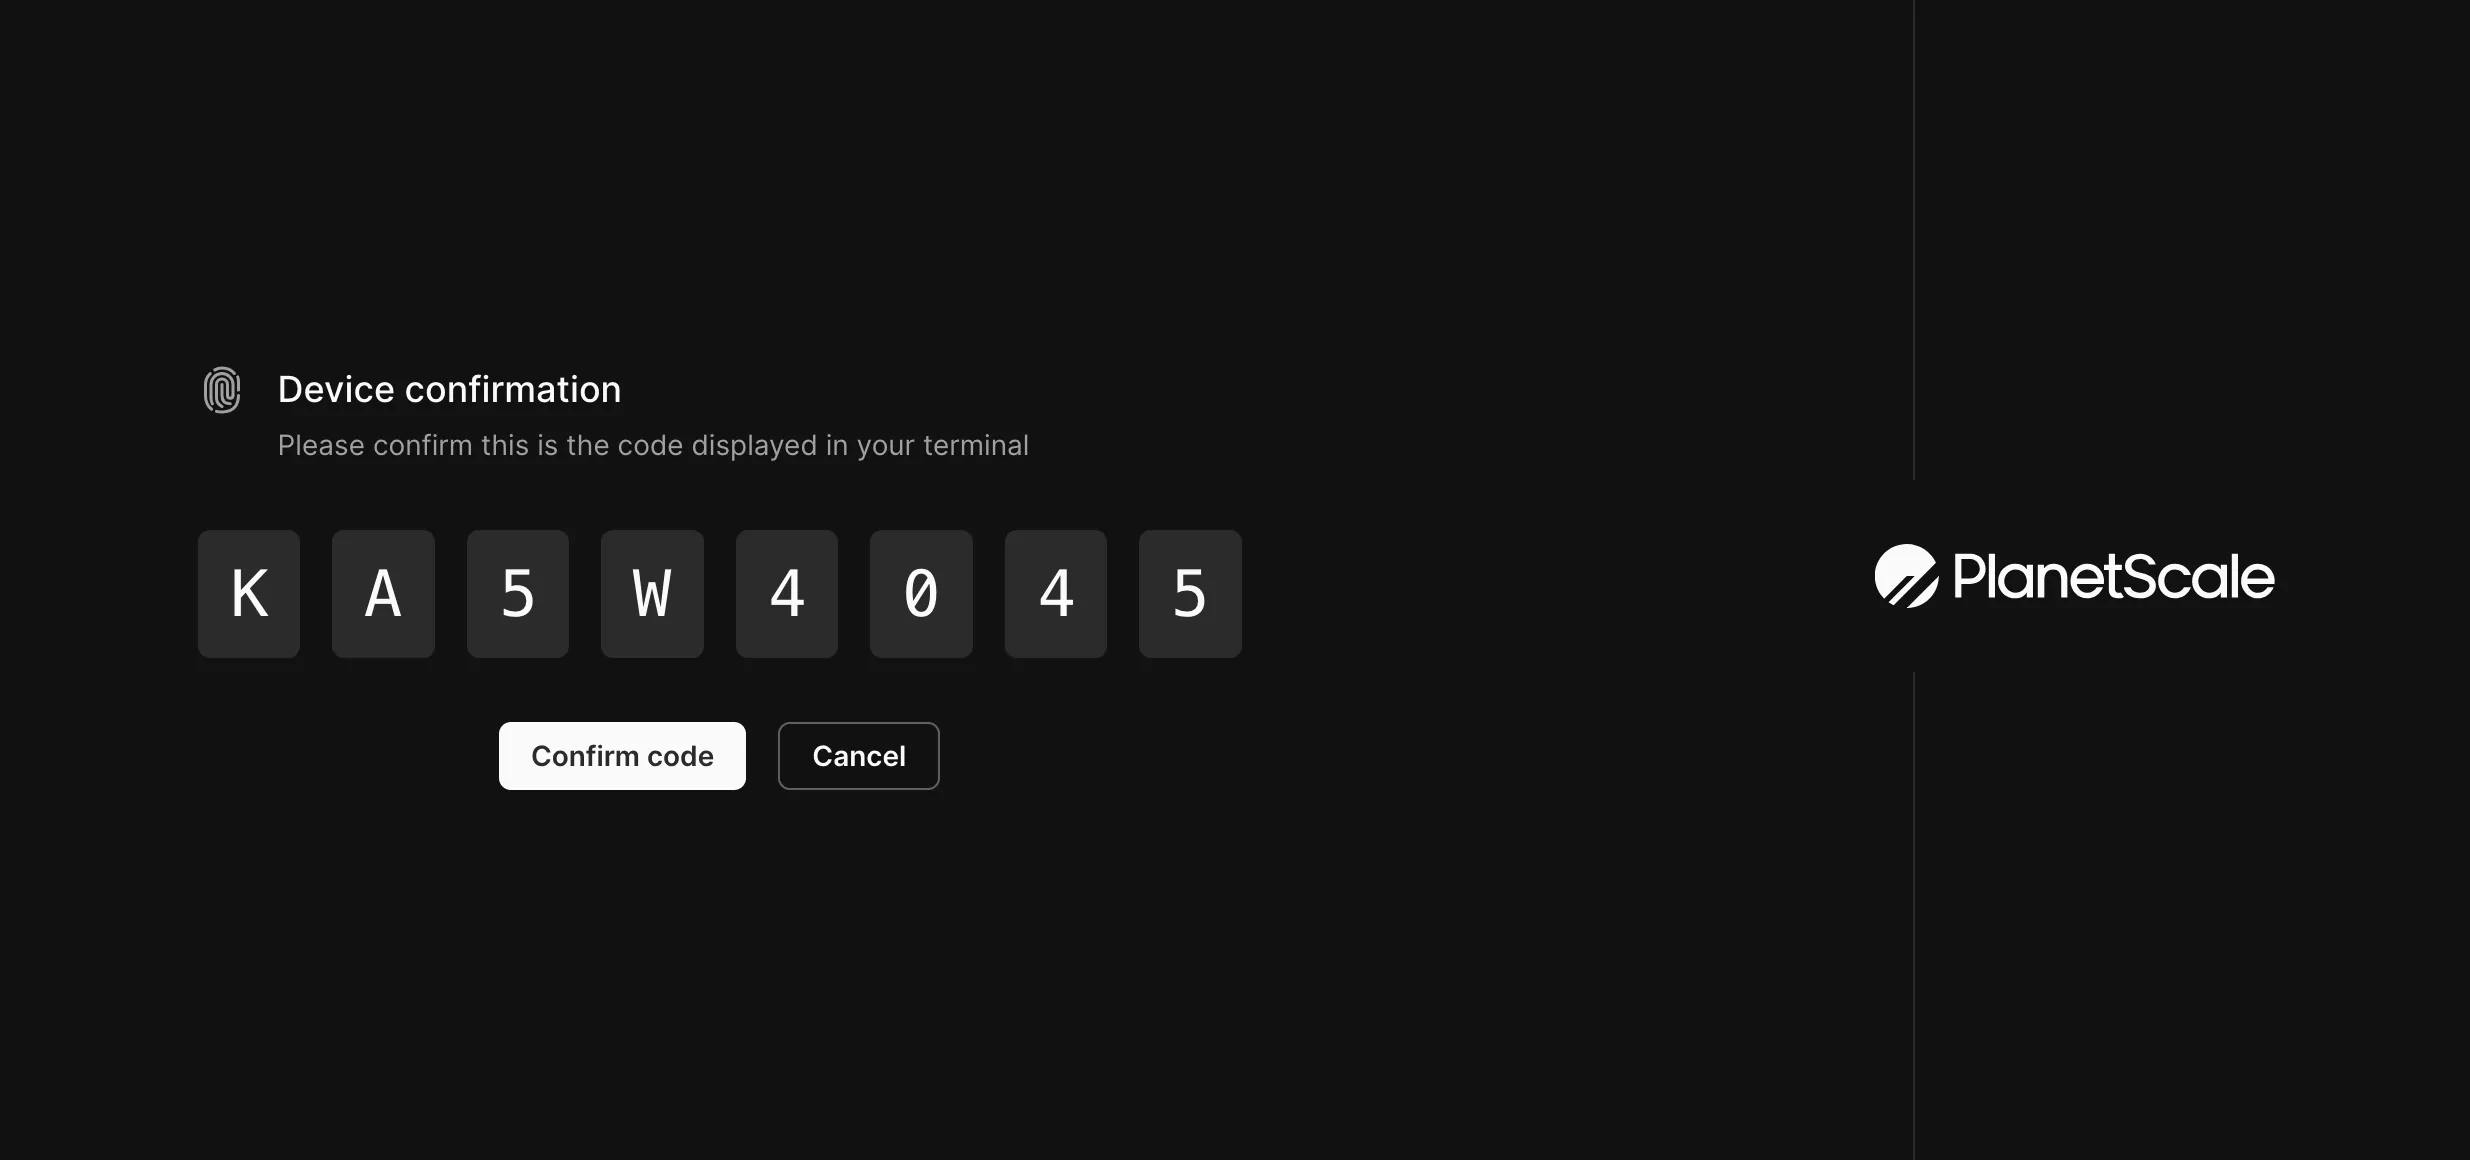
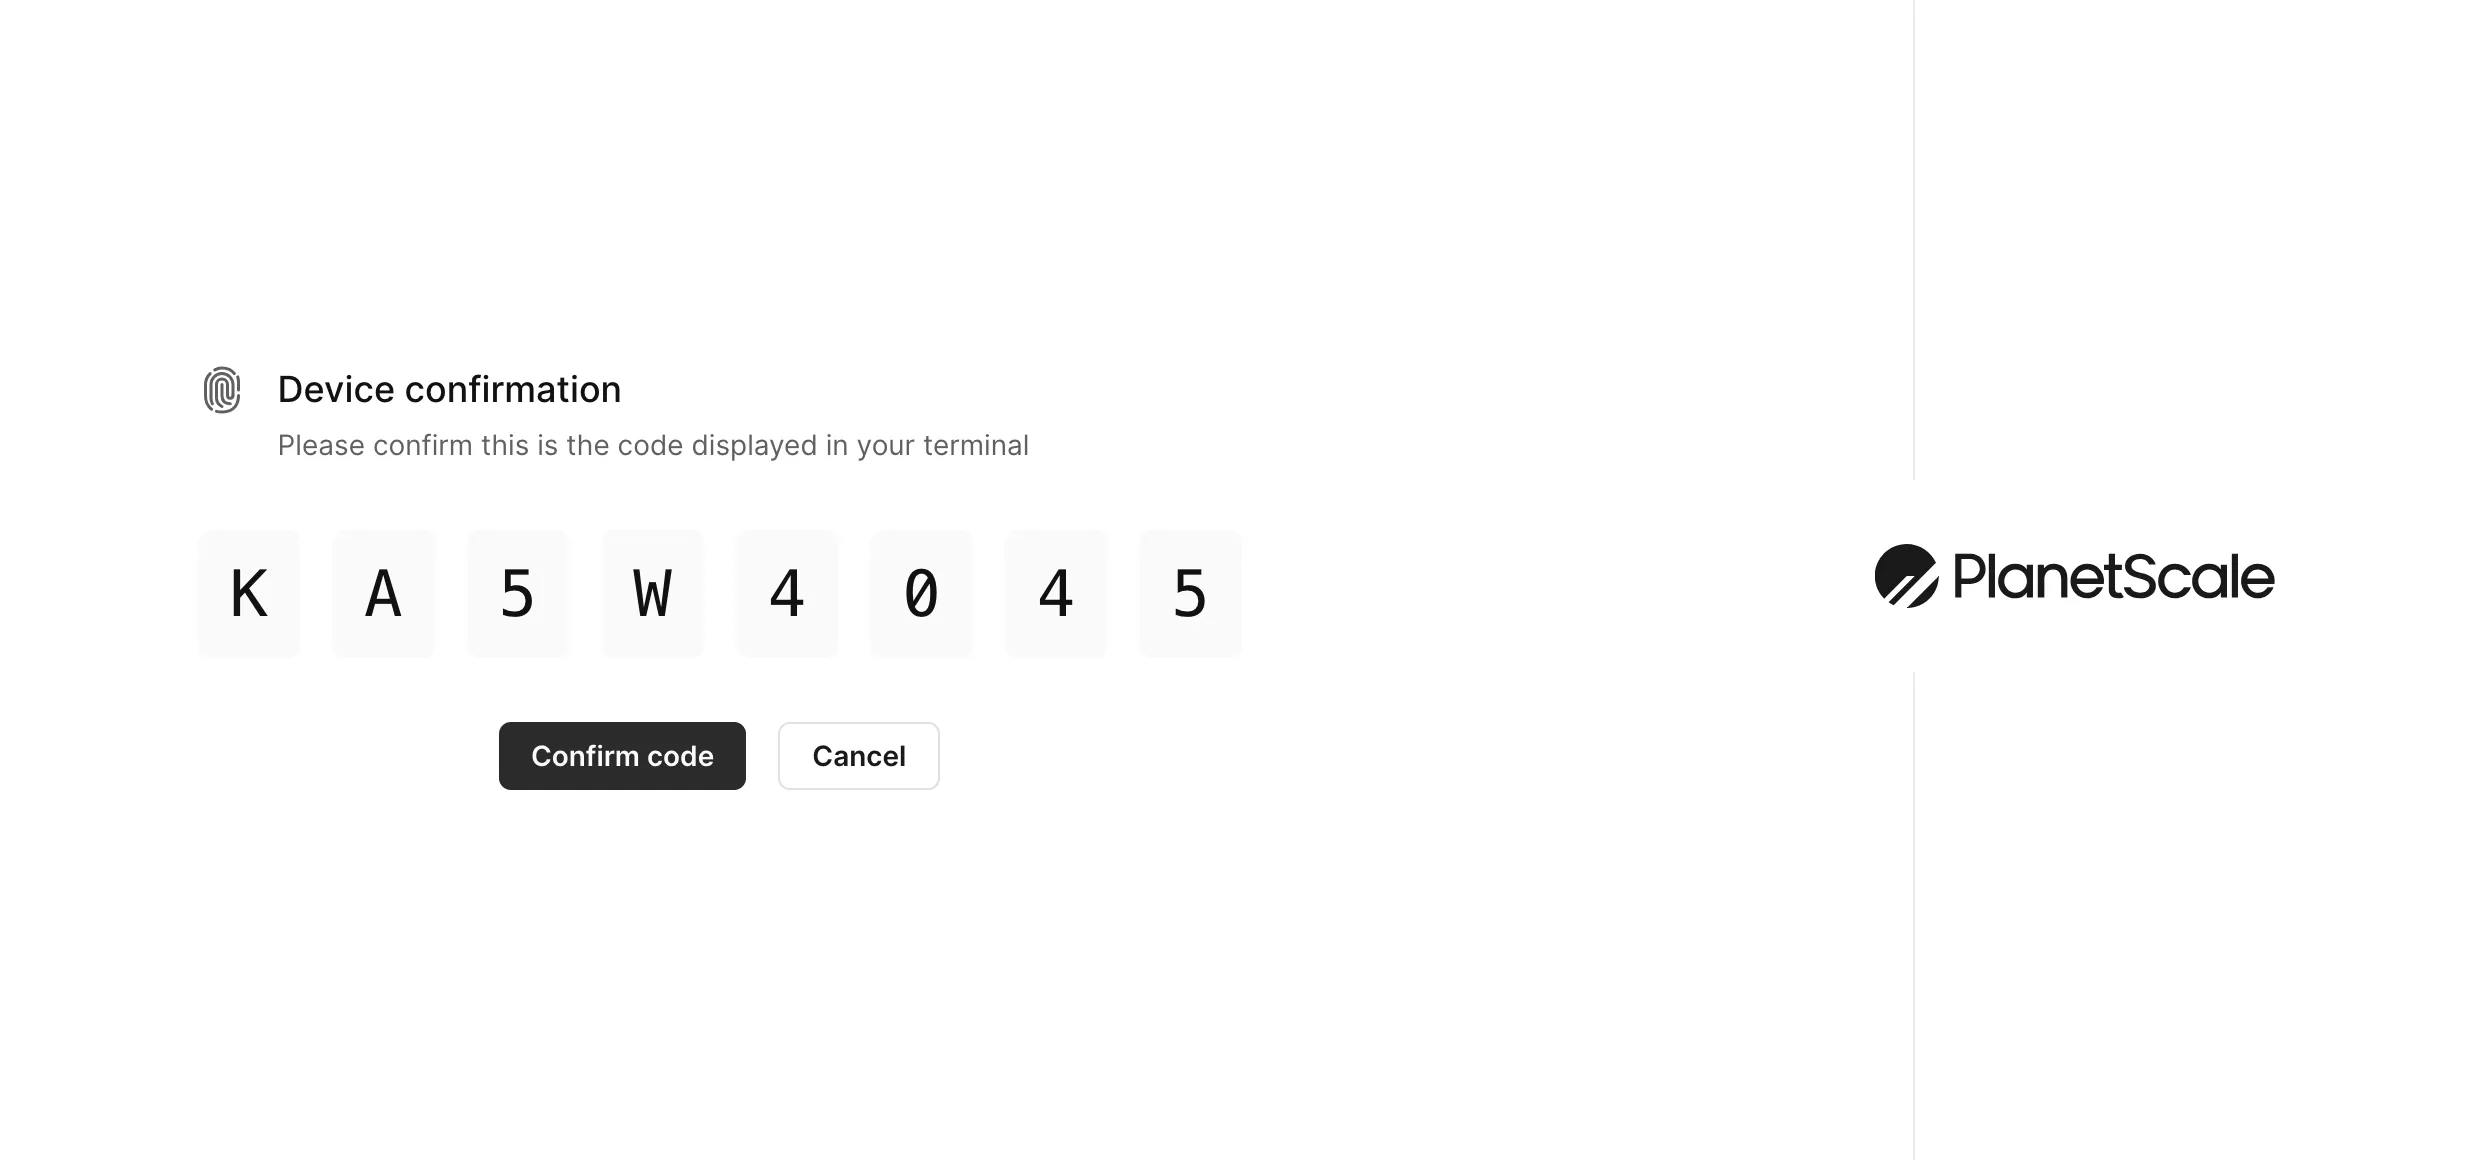
You should see a Successfully logged-in message displayed in your terminal once you click the Confirm code button.
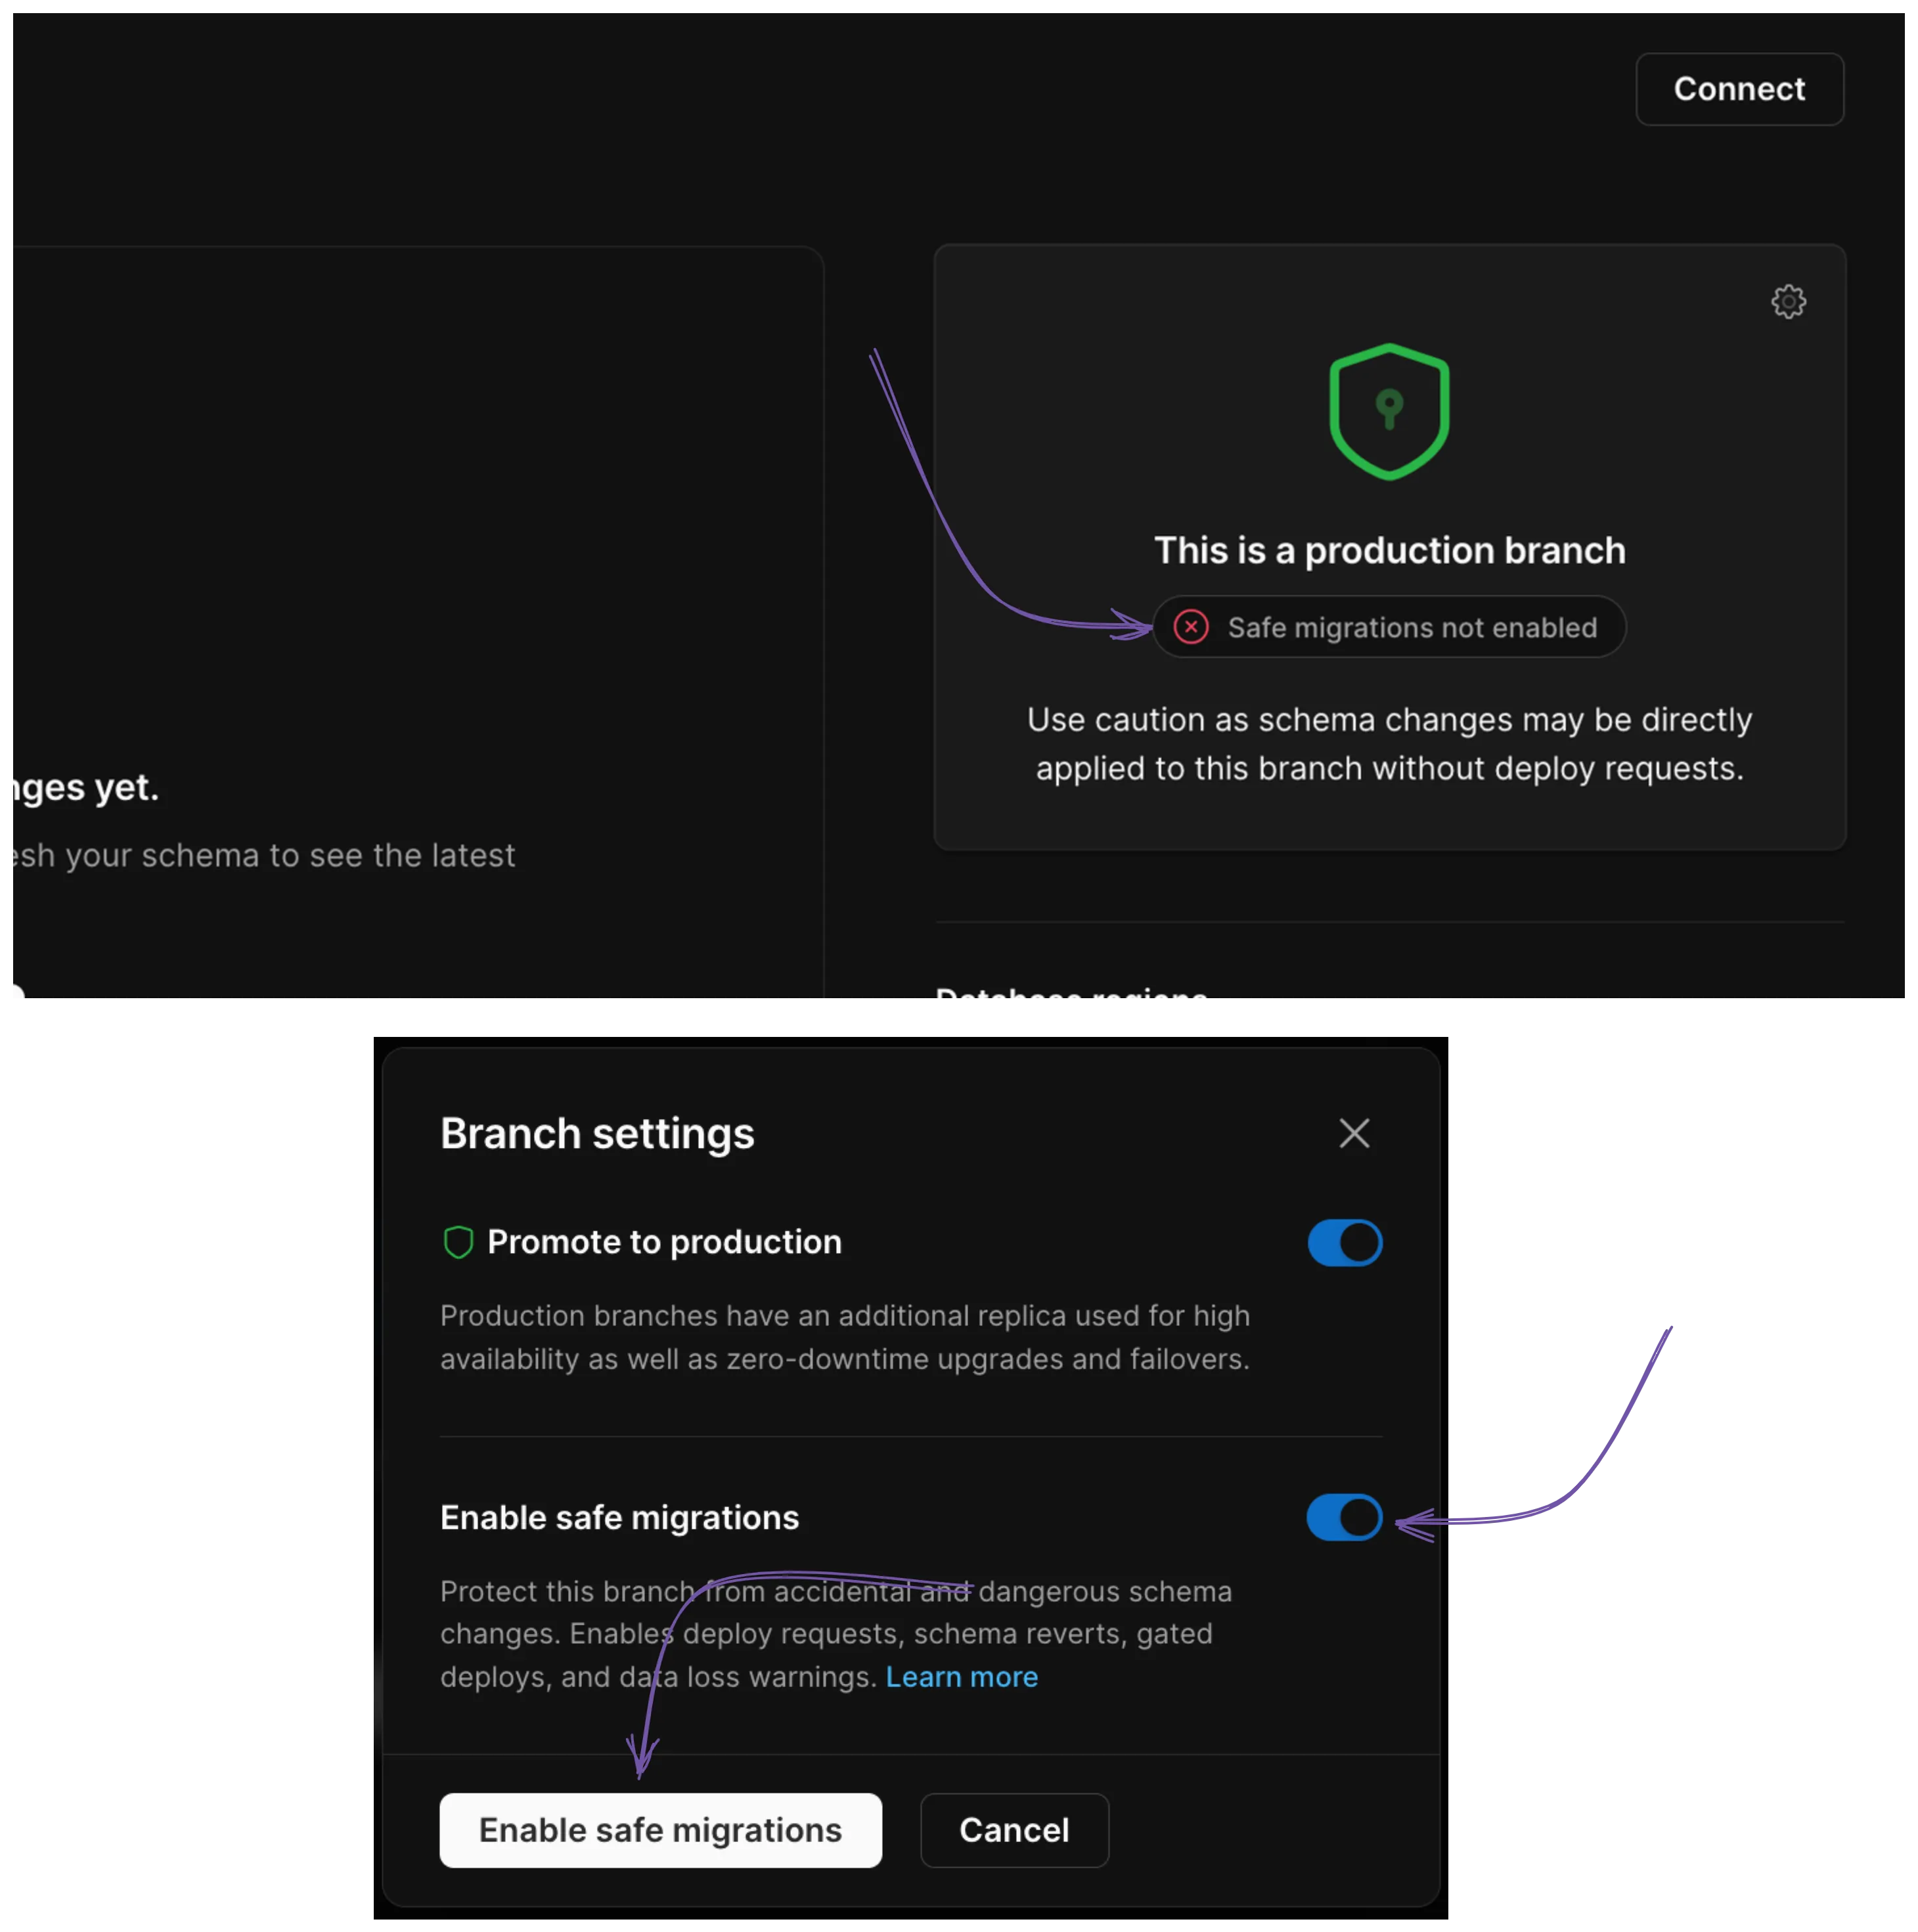
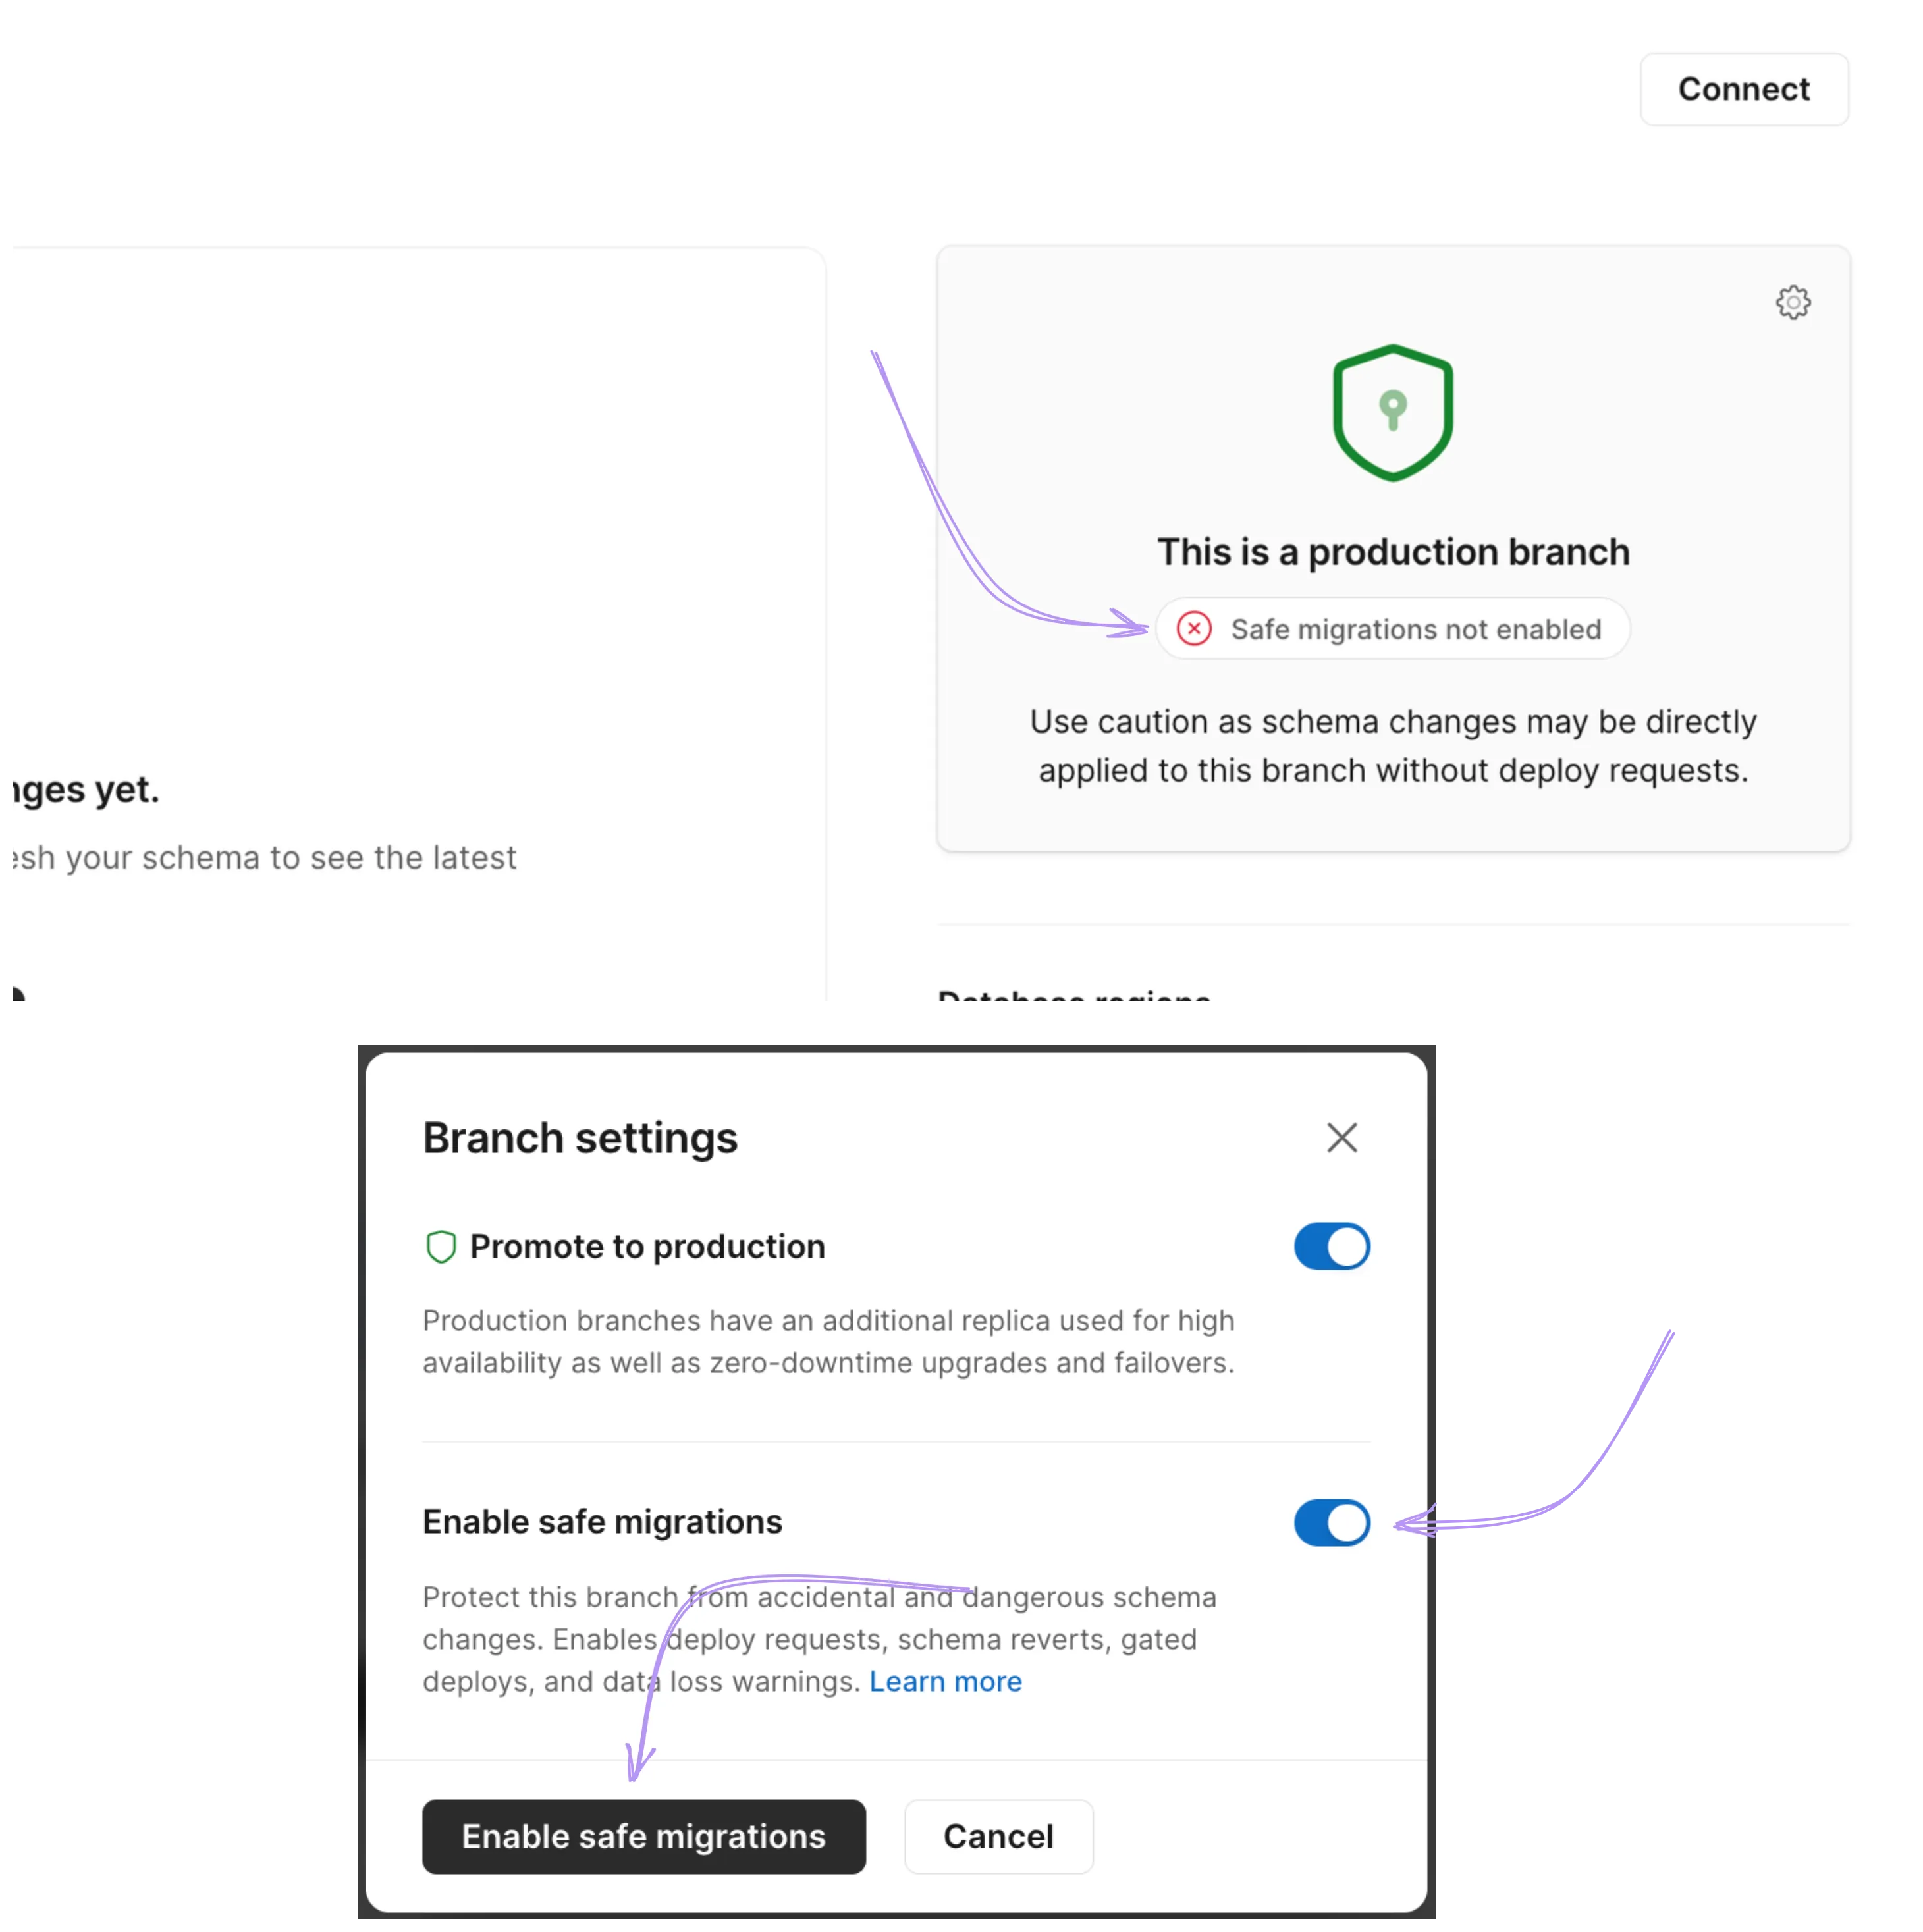
When we created a movies database in the previous section, it came with a default development branch called main. As mentioned, you can have one production and one development branch in the free plan. Let's promote the main branch as a production branch.
pscale branch promote movies mainpscale branch promote movies mainEnsure that you enable safe migrations on your production branch as well. This will grant you or your team the ability to create deploy requests.
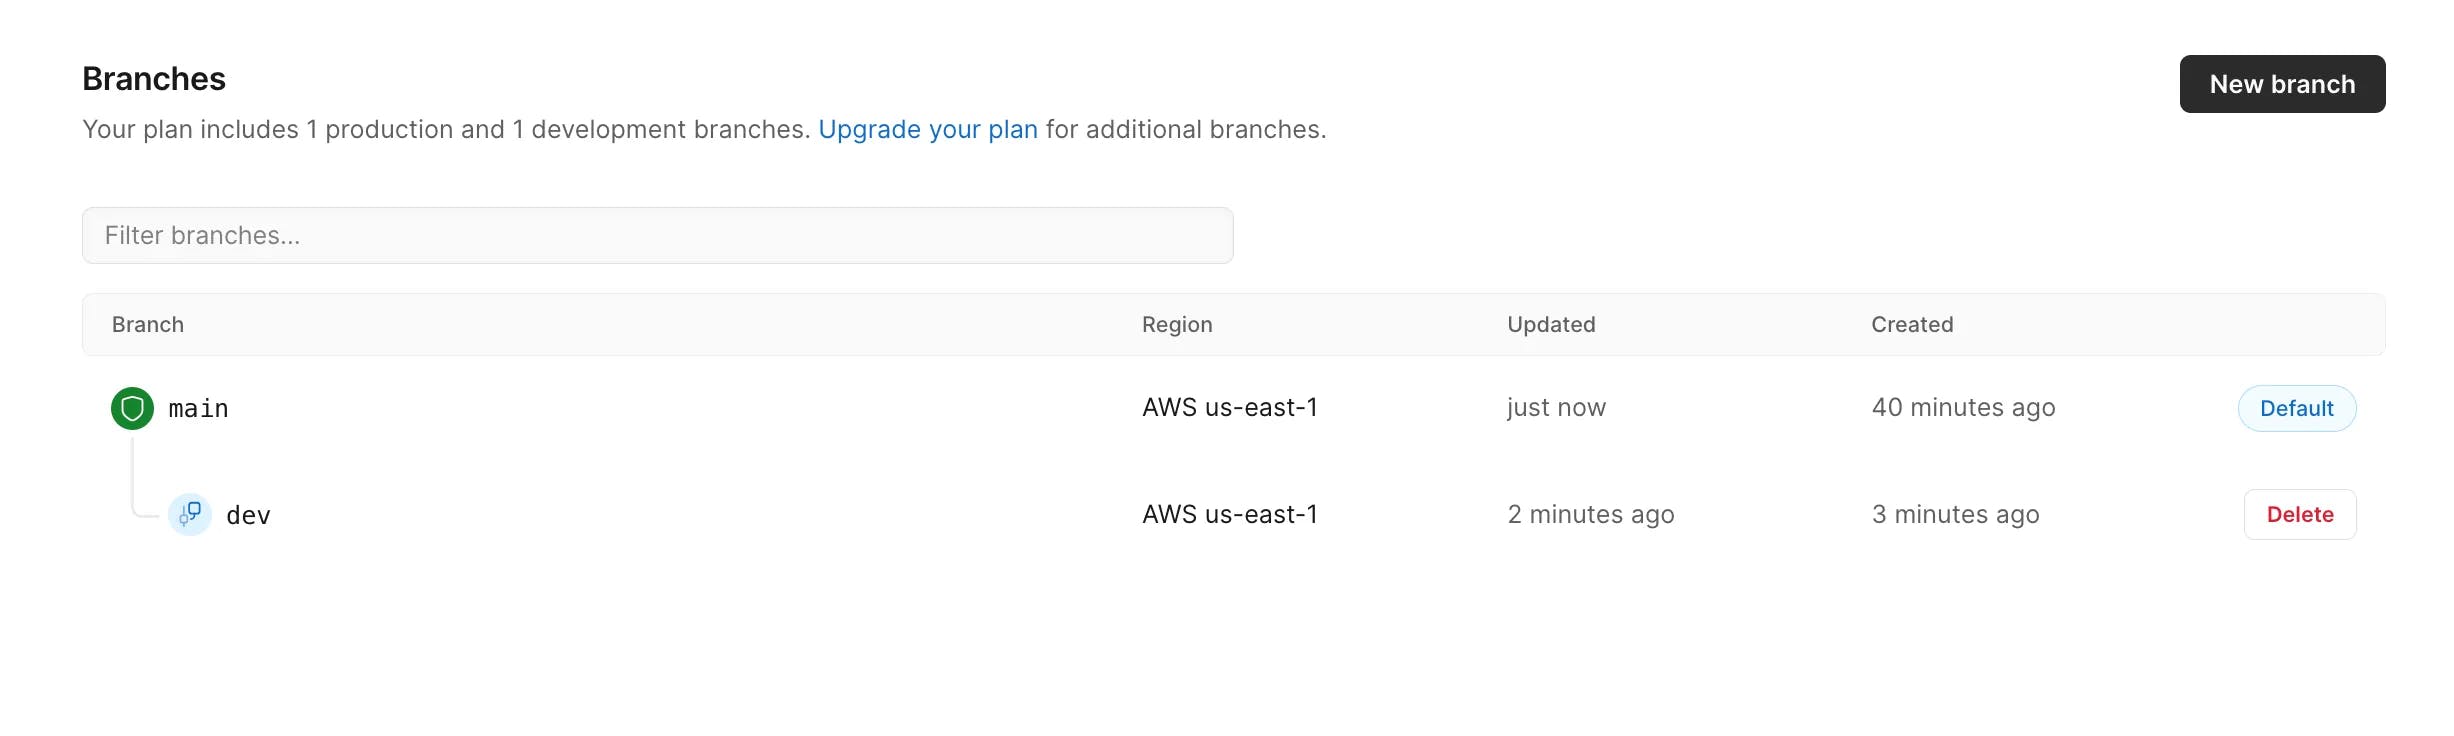
Now, let's create a new dev branch for our development environment. This branch will be specifically dedicated to our development work and experimentation.
pscale branch create movies devpscale branch create movies devIf you go to your PlanetScale dashboard, you can view the newly created dev branch listed among your branches.

Here are some other helpful pscale commands worth noting:
pscale shell: Open a MySQL shell for a specific branch and database. Here, you can execute various MySQL commands likeshow databases.pscale database: Manage the entire lifecycle of your database. Think of it as your database's CRUD interface.pscale branch: Manage your branches and make schema changes.
These commands, among others, offer valuable functionality that can simplify your database management tasks.
See the complete command list with the documentation on PlanetScale CLI reference.
Create a TypeScript-based Next.js app
Create a new Next.js app by executing the following command:
npx create-next-app@latestnpx create-next-app@latestDuring the installation process, you will encounter the following prompts:
Need to install the following packages:
  create-next-app@13.4.5
Ok to proceed? (y) y
✔ What is your project named? … favorite-movies
✔ Would you like to use TypeScript with this project? … No / Yes
✔ Would you like to use ESLint with this project? … No / Yes
✔ Would you like to use Tailwind CSS with this project? … No / Yes
✔ Would you like to use `src/` directory with this project? … No / Yes
✔ Use App Router (recommended)? … No / Yes
✔ Would you like to customize the default import alias? … No / Yes
Need to install the following packages:
create-next-app@13.4.5
Ok to proceed? (y) y
✔ What is your project named? … favorite-movies
✔ Would you like to use TypeScript with this project? … No / Yes
✔ Would you like to use ESLint with this project? … No / Yes
✔ Would you like to use Tailwind CSS with this project? … No / Yes
✔ Would you like to use `src/` directory with this project? … No / Yes
✔ Use App Router (recommended)? … No / Yes
✔ Would you like to customize the default import alias? … No / YesMake sure to select the TypeScript option during the app creation process, and feel free to include other technologies like ESLint and Tailwind CSS as per your needs.
Once you have responded to the prompts, the create-next-app command will create a new folder with the specified project name and automatically install the required dependencies.
To ensure the proper initialization of your app, run the following command in the root folder of your project.
npm run devnpm run devConnect your Next.js app to a PlanetScale database
Go to your PlanetScale dashboard and find the dev branch in the Branches tab. Click on the Connect button located at the top right corner. You will be asked to choose a name for your connection password. Leave the Branch and Role settings as they are by default.
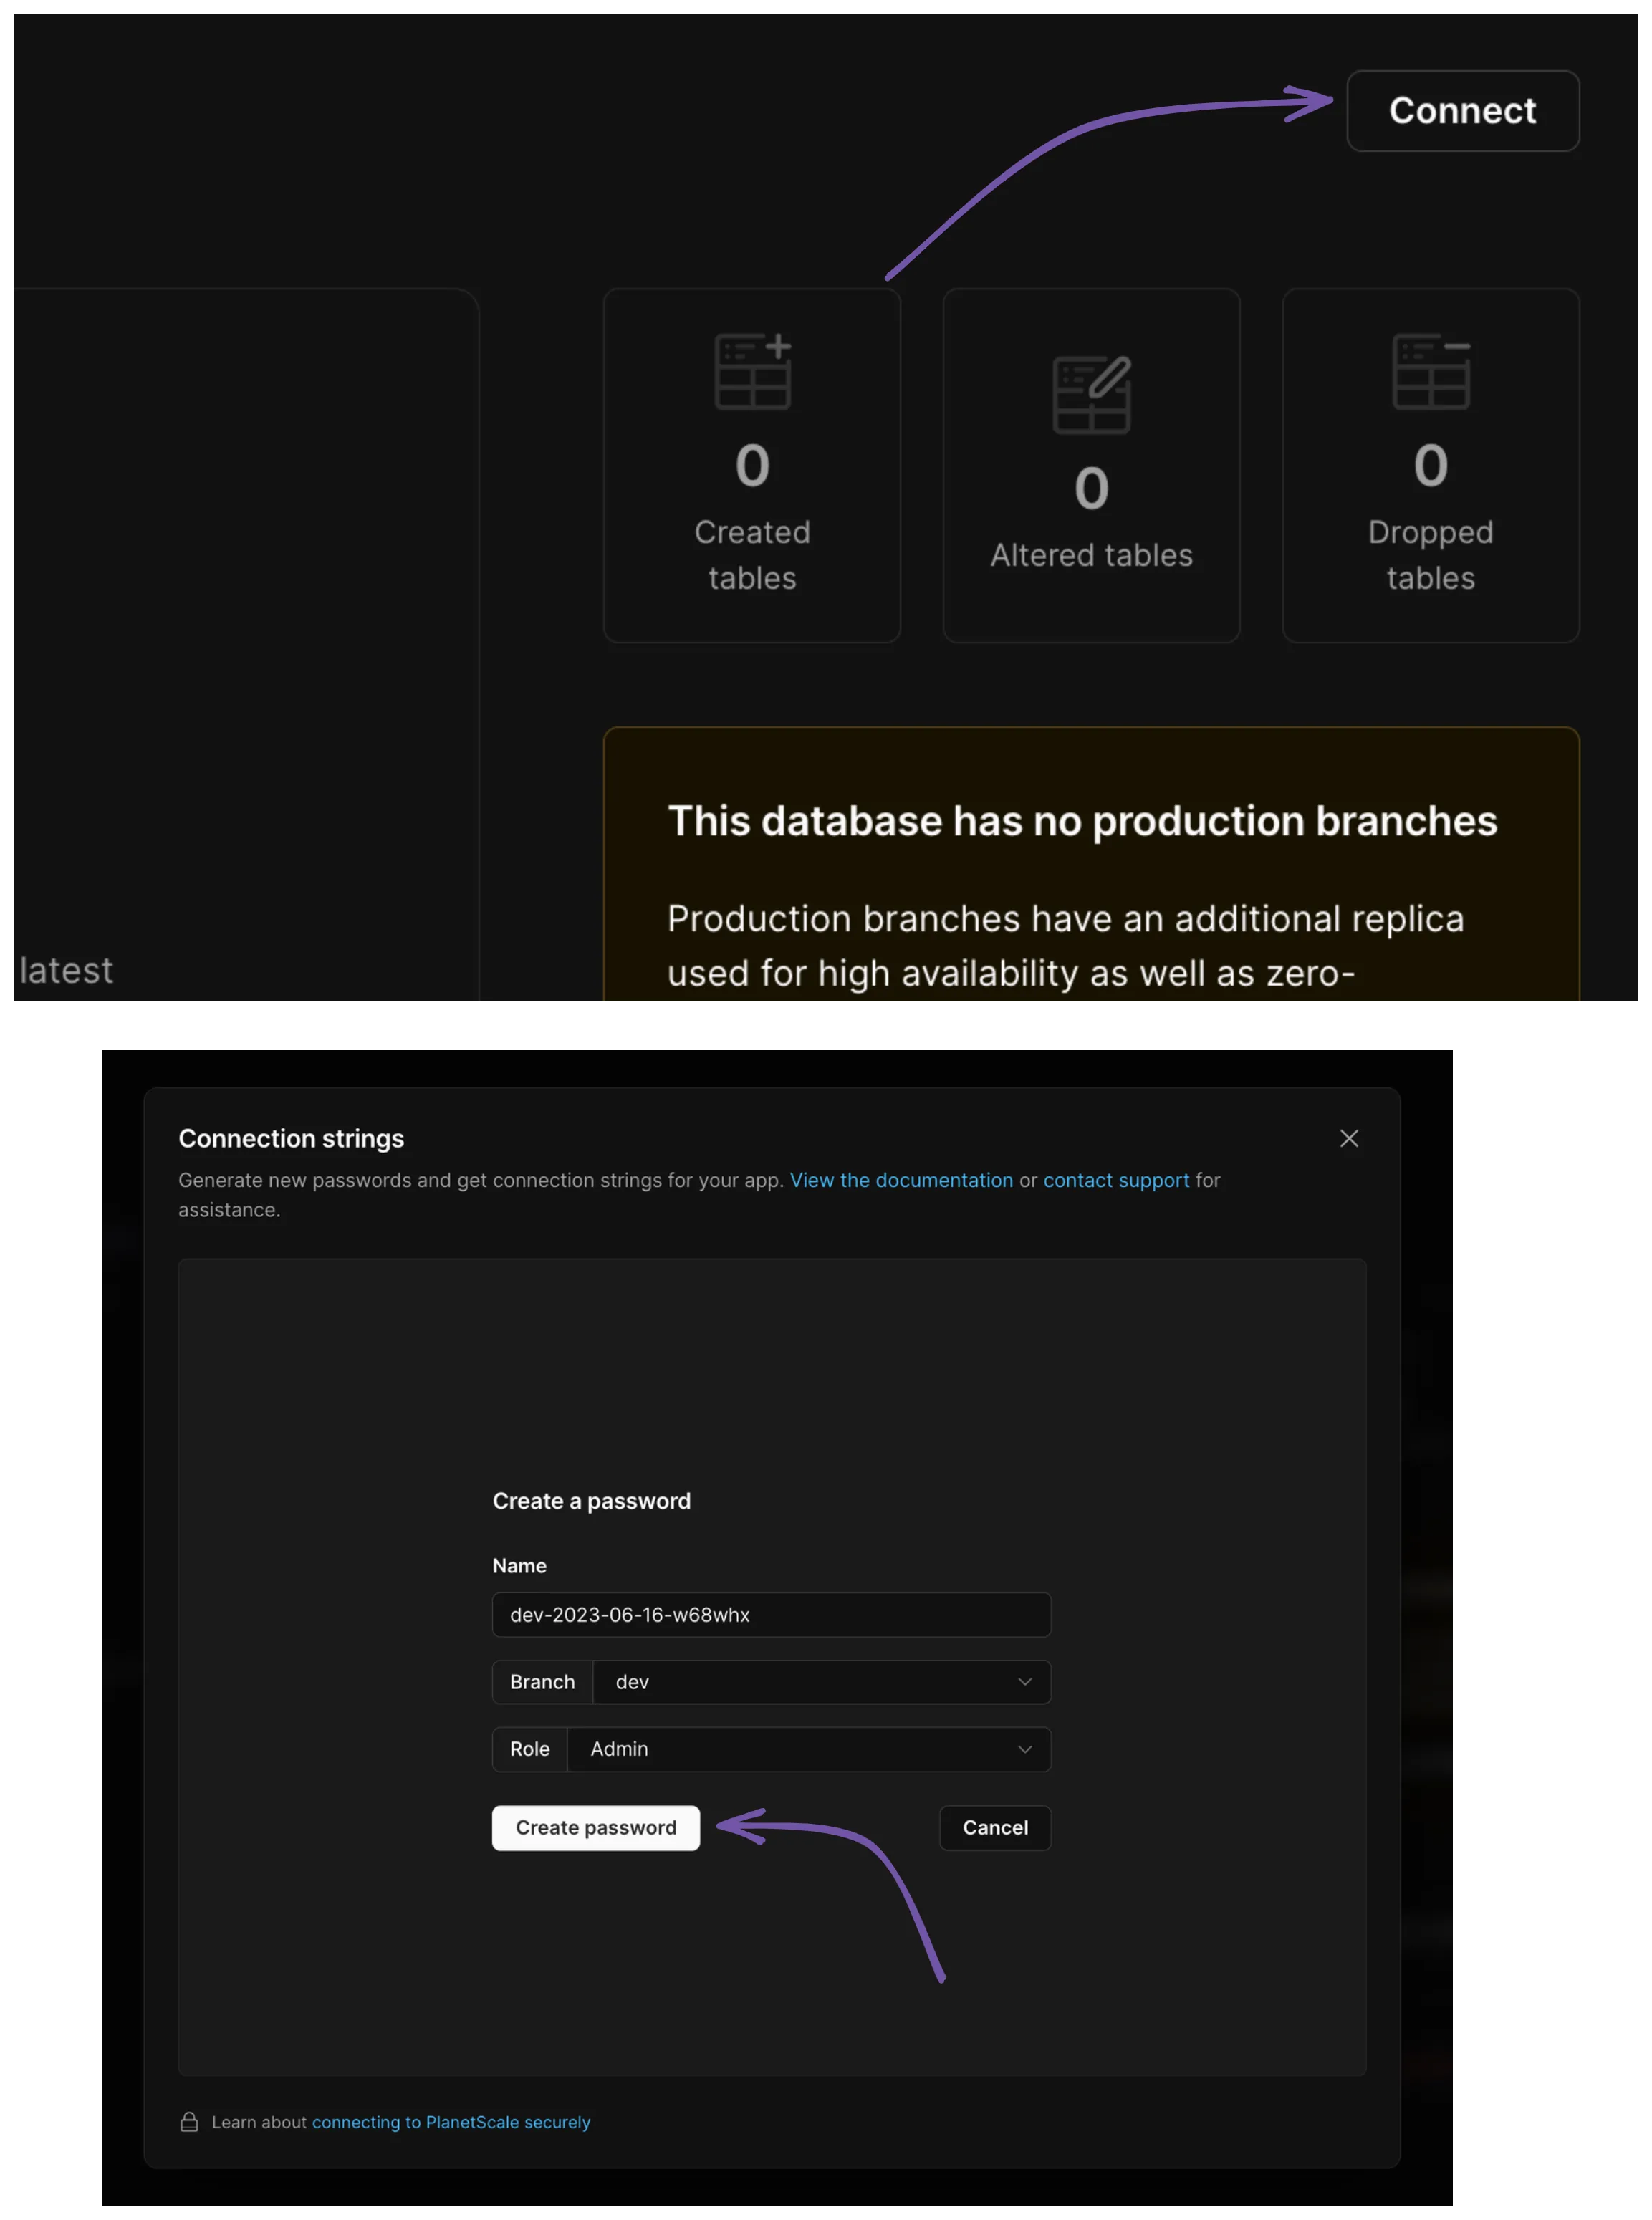
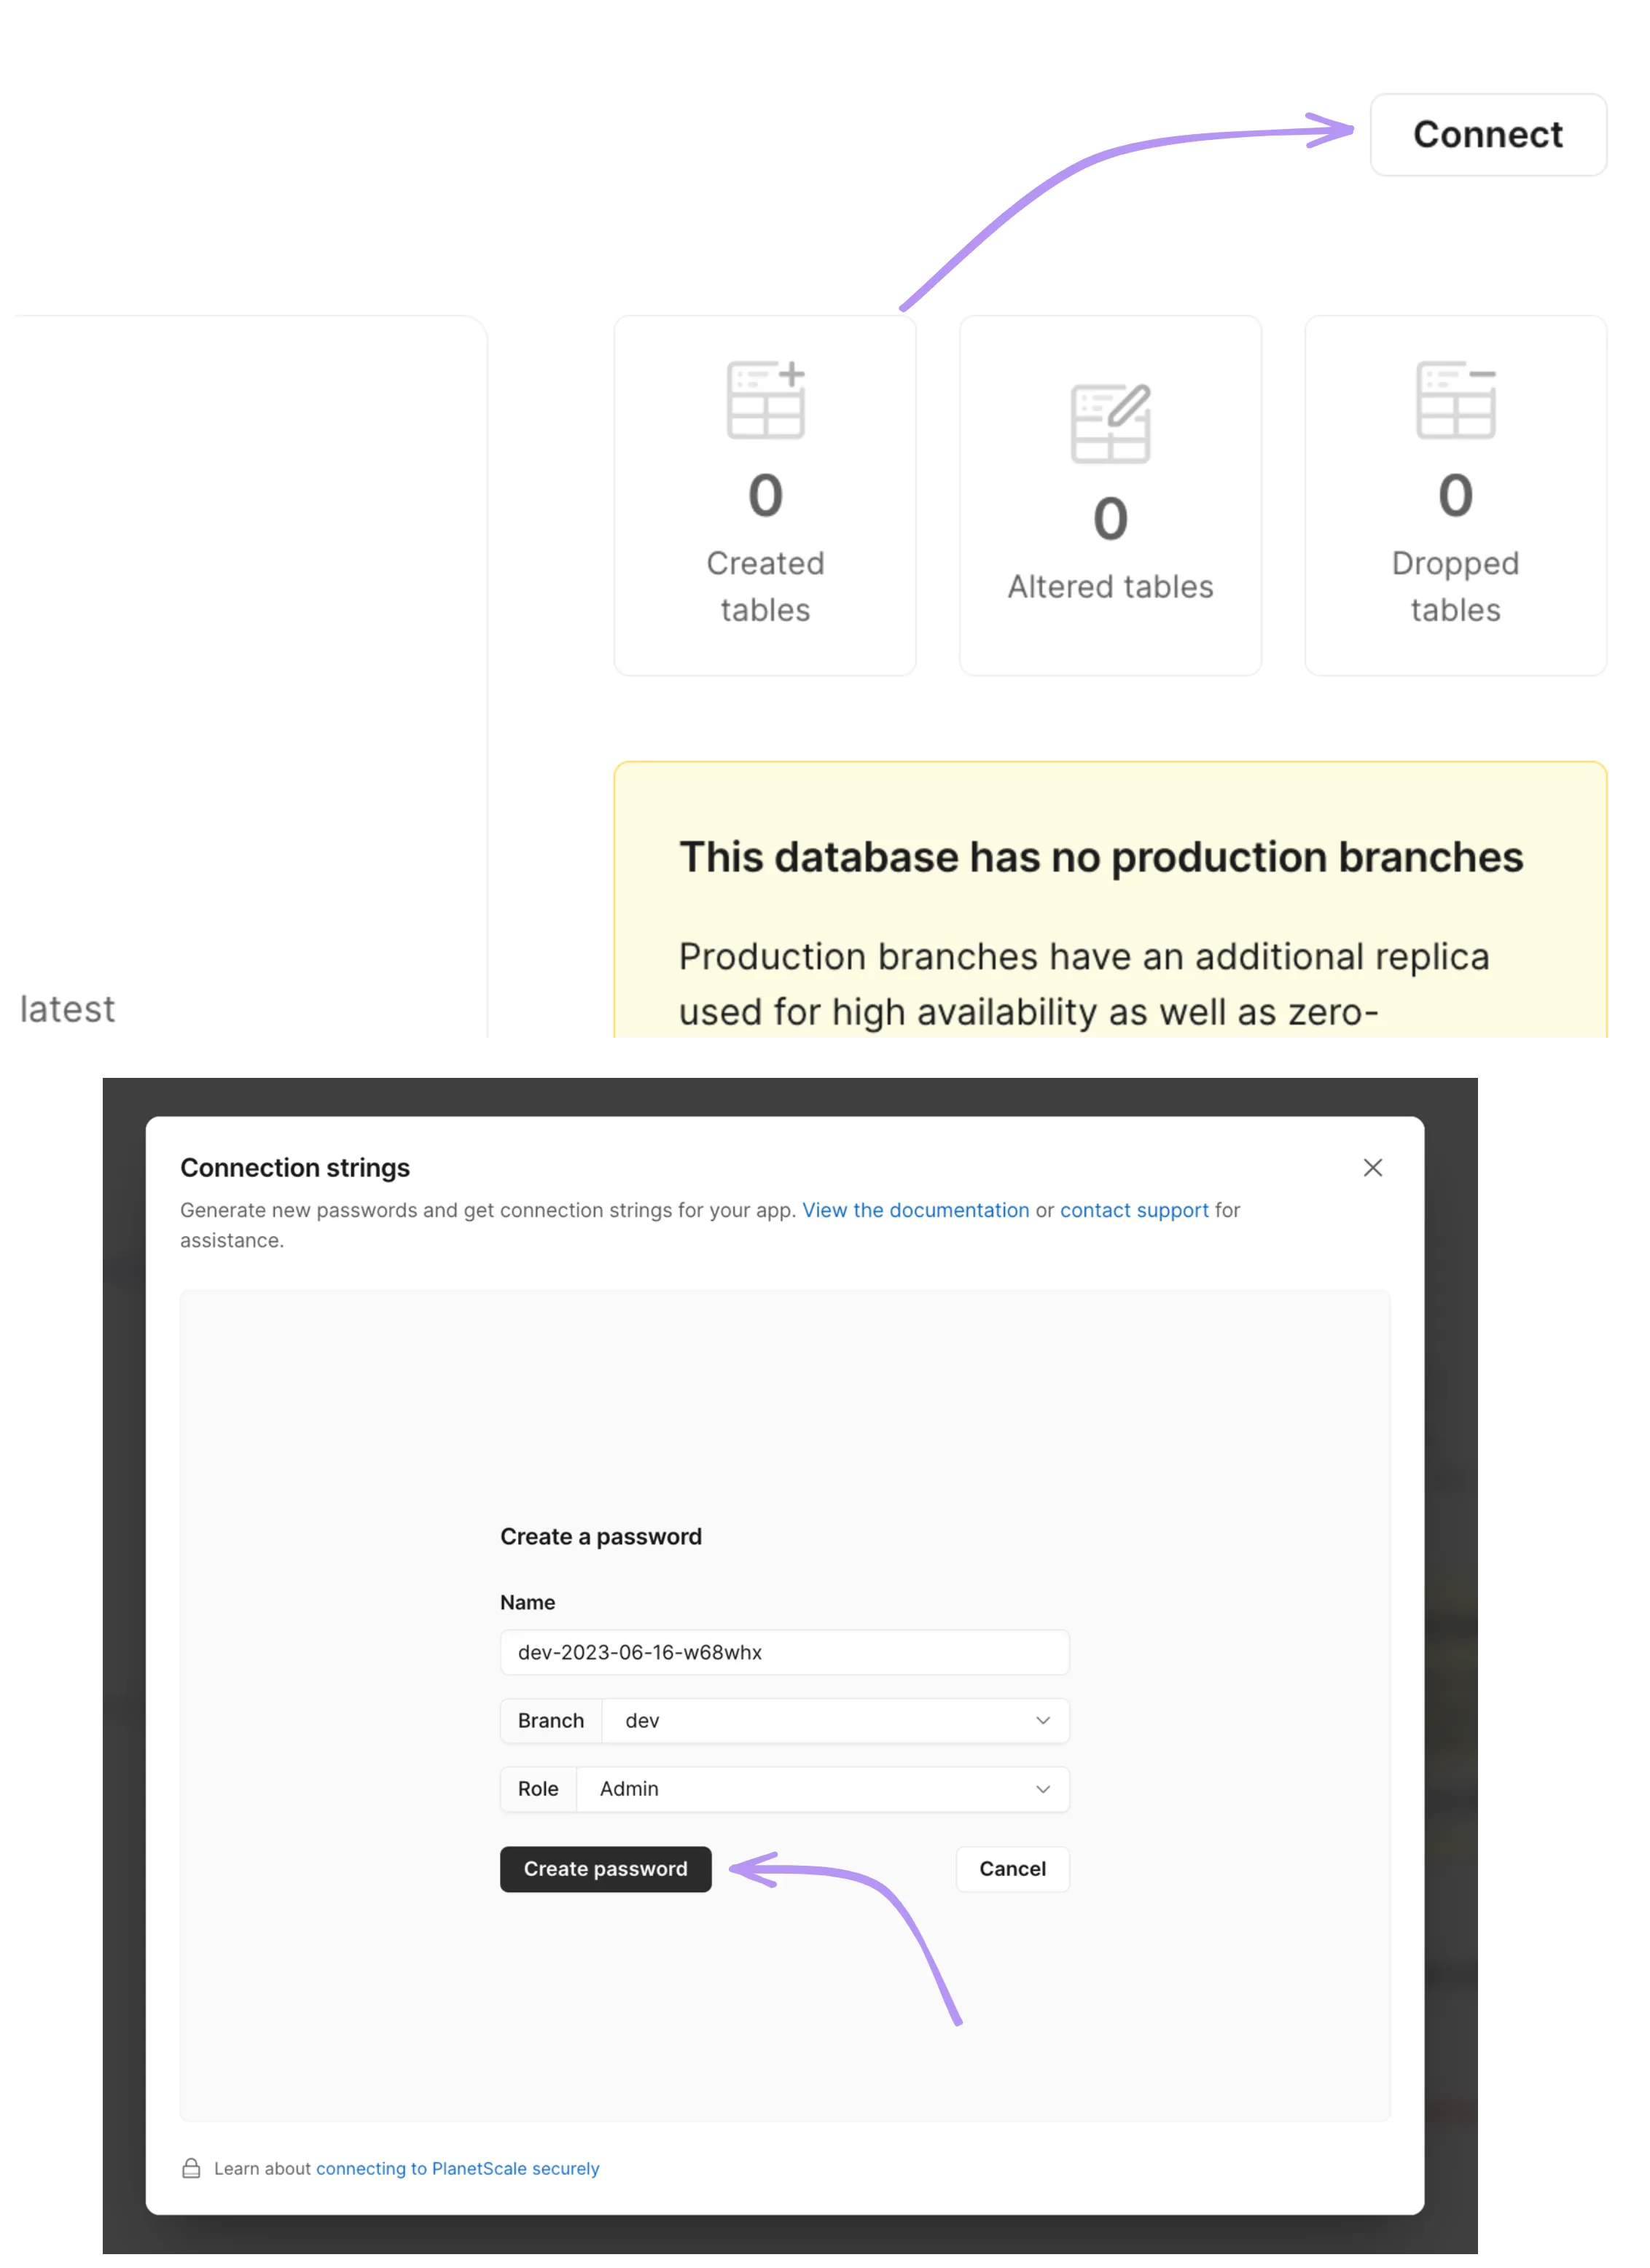
Choose the Connect with Node.js option and securely save the provided string. This string will be required when connecting your Next.js application to the PlanetScale database.
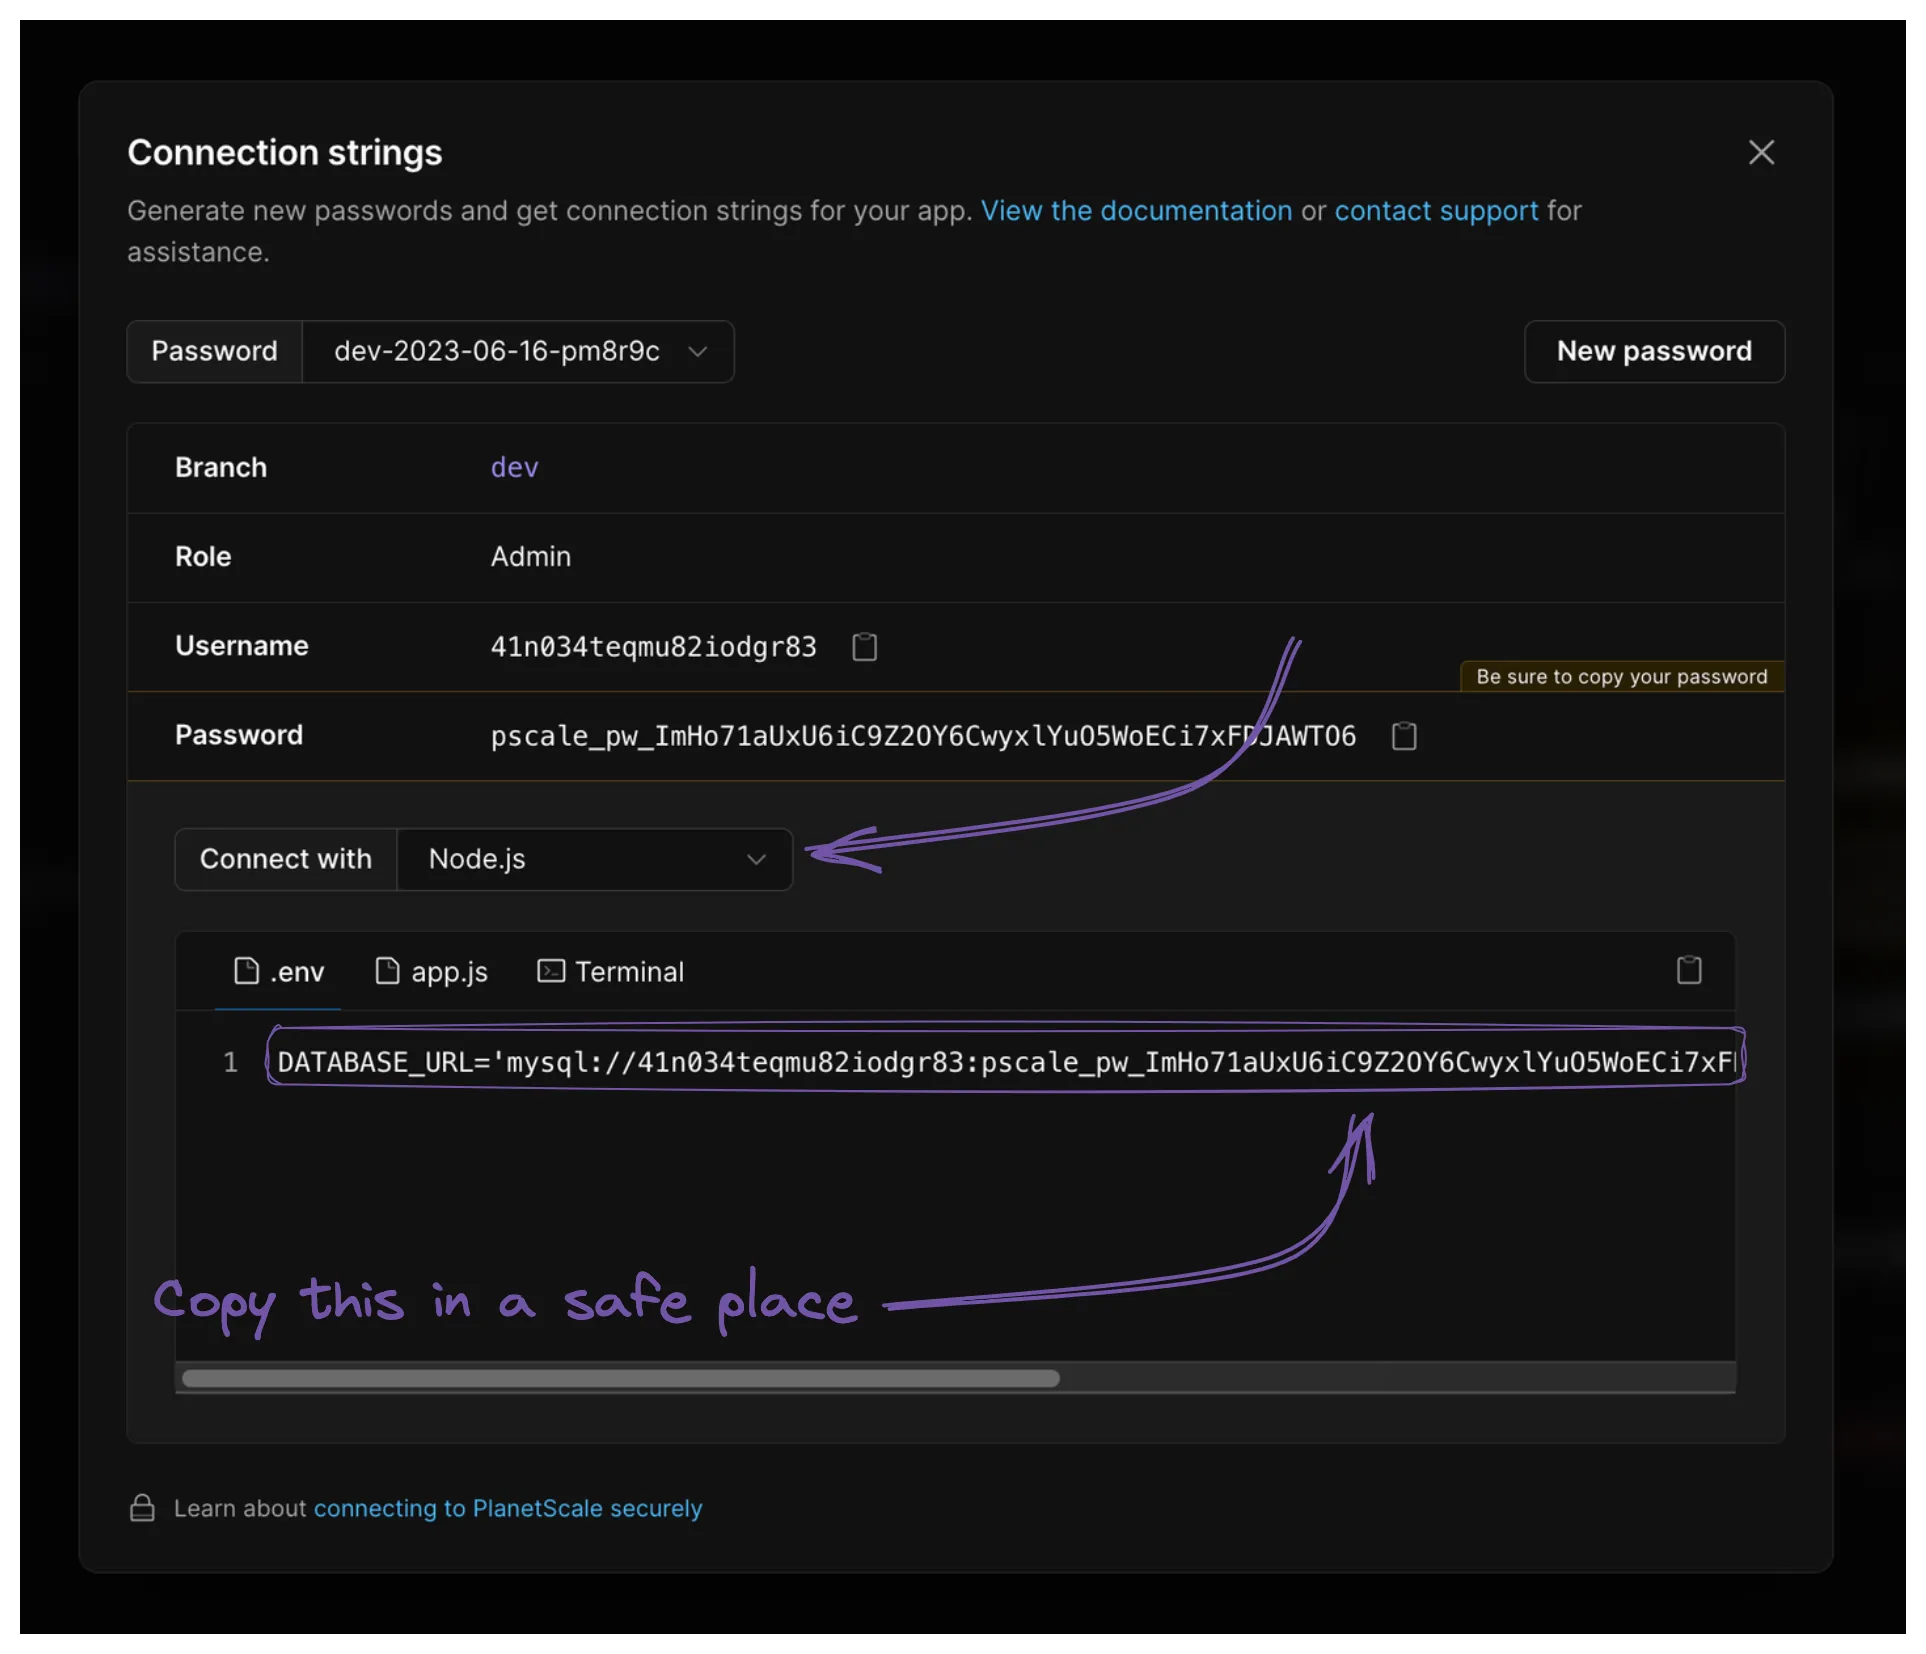
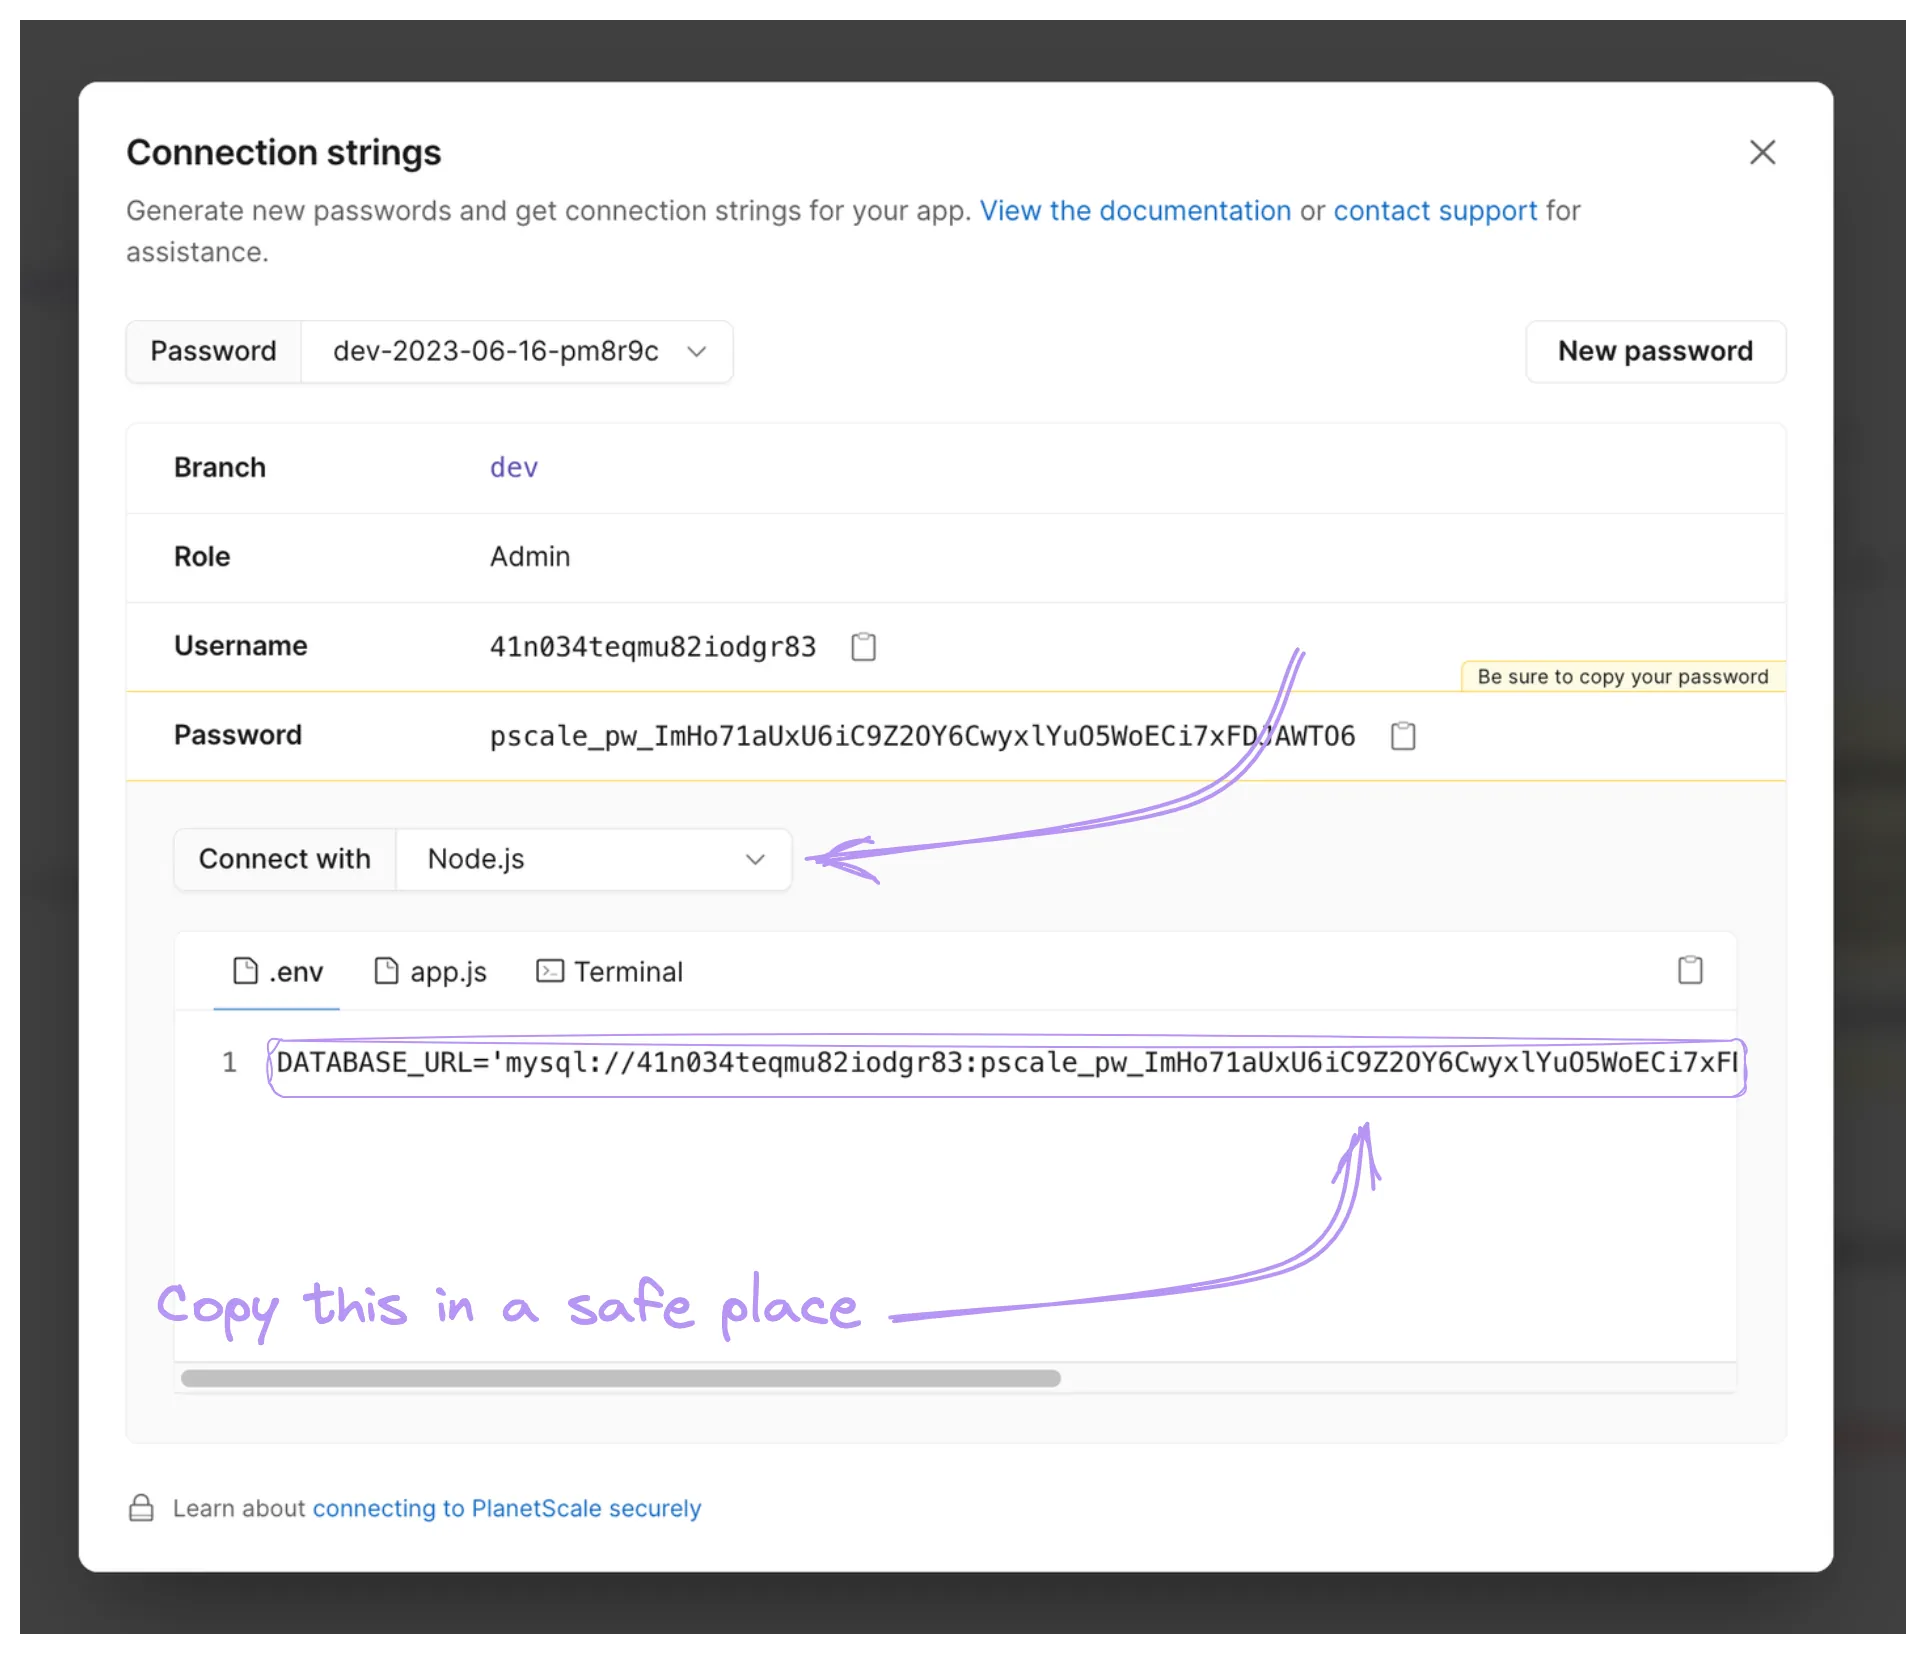
Create a .env file at the root of your project folder. In this file, store the database string obtained from PlanetScale. This string will securely establish the connection between your project and the PlanetScale database.
DATABASE_URL='mysql://41n034teqmu82iodgr83:pscale_pw_ImHo71aUxU6iC9Z2OY6CwyxlYuO5WoECi7xFDJAWTO6@aws.connect.psdb.cloud/movies?ssl={"rejectUnauthorized":true}'DATABASE_URL='mysql://41n034teqmu82iodgr83:pscale_pw_ImHo71aUxU6iC9Z2OY6CwyxlYuO5WoECi7xFDJAWTO6@aws.connect.psdb.cloud/movies?ssl={"rejectUnauthorized":true}'Drizzle ORM
Drizzle ORM is a TypeScript ORM for SQL databases that prioritizes type safety. It follows a familiar SQL-like syntax and catches errors at compile time. With Drizzle ORM, you can enjoy the convenience of automatic SQL migrations and seamless integration with any TypeScript project.
Instead of manually creating tables using the PlanetScale CLI (pscale shell), we can define our table schemas using Typescript interfaces. With the help of the Drizzle Kit (more on this later), we can effortlessly push these defined tables into our PlanetScale database. This approach provides a convenient and efficient way to manage and synchronize our table structures.
Let's begin by installing the following dependencies:
npm install @planetscale/database drizzle-ormnpm install @planetscale/database drizzle-ormNext, we'll create a schema file called schema.ts within the lib folder.
import { InferModel } from 'drizzle-orm';
import { int, mysqlTable, serial, varchar } from 'drizzle-orm/mysql-core';

export const movies = mysqlTable('movies', {
	id: serial('id').primaryKey(),
	title: varchar('title', { length: 256 }).notNull(),
	releaseYear: int('releaseYear'),
	rating: int('rating'),
});

export type Movie = InferModel<typeof movies>;import { InferModel } from 'drizzle-orm';
import { int, mysqlTable, serial, varchar } from 'drizzle-orm/mysql-core';
export const movies = mysqlTable('movies', {
id: serial('id').primaryKey(),
title: varchar('title', { length: 256 }).notNull(),
releaseYear: int('releaseYear'),
rating: int('rating'),
});
export type Movie = InferModel<typeof movies>;Here, we are defining a schema for the movies table using the mysql-core package provided by drizzle-orm. This package offers the necessary data types to define our schema.
Additionally, it is necessary to install Drizzle Kit, a CLI tool that complements Drizzle ORM. Drizzle Kit enables the generation of migrations and facilitates database prototyping.
Install it as a dev dependency, as we will use it through the terminal.
npm install -D drizzle-kitnpm install -D drizzle-kitTo configure Drizzle Kit, we need to create a Drizzle configuration file. This file specifies the schema file location and the database connection URI. It enables Drizzle Kit to generate SQL prototyping and migrations.
Create a new file named drizzle.config.ts in the root folder of your application:
import type { Config } from 'drizzle-kit';

export default {
	schema: './lib/schema.ts',
	out: './drizzle-output',
	connectionString: process.env.DATABASE_URL,
} satisfies Config;import type { Config } from 'drizzle-kit';
export default {
schema: './lib/schema.ts',
out: './drizzle-output',
connectionString: process.env.DATABASE_URL,
} satisfies Config;We specify the schema file, connection string, and the desired location for the generated migration file.
The generated migration file will have an SQL extension and contain the SQL commands required to create the table.
CREATE TABLE `movies` (
	`id` serial AUTO_INCREMENT PRIMARY KEY NOT NULL,
	`title` varchar(256) NOT NULL,
	`releaseYear` int,
	`rating` int DEFAULT 1);
CREATE TABLE `movies` (
	`id` serial AUTO_INCREMENT PRIMARY KEY NOT NULL,
	`title` varchar(256) NOT NULL,
	`releaseYear` int,
	`rating` int DEFAULT 1);
The drizzle kit offers various commands, and we'll use the push command to push the movies table into our PlanetScale database.
Add a new script called db:push in the list of scripts in your package.json file.
{
	...
	"scripts": {
		"dev": "next dev",
		"build": "next build",
		"start": "next start",
		"lint": "next lint",
		"db:push": "drizzle-kit push:mysql --config=drizzle.config.ts"
	},
	"dependencies": {
		...
	},
	"devDependencies": {
		...
	}
}
{
...
"scripts": {
"dev": "next dev",
"build": "next build",
"start": "next start",
"lint": "next lint",
"db:push": "drizzle-kit push:mysql --config=drizzle.config.ts"
},
"dependencies": {
...
},
"devDependencies": {
...
}
}Now, to execute the script, run the following command:
npm run db:pushnpm run db:pushYou should see a successful message in your terminal indicating the changes have been applied.
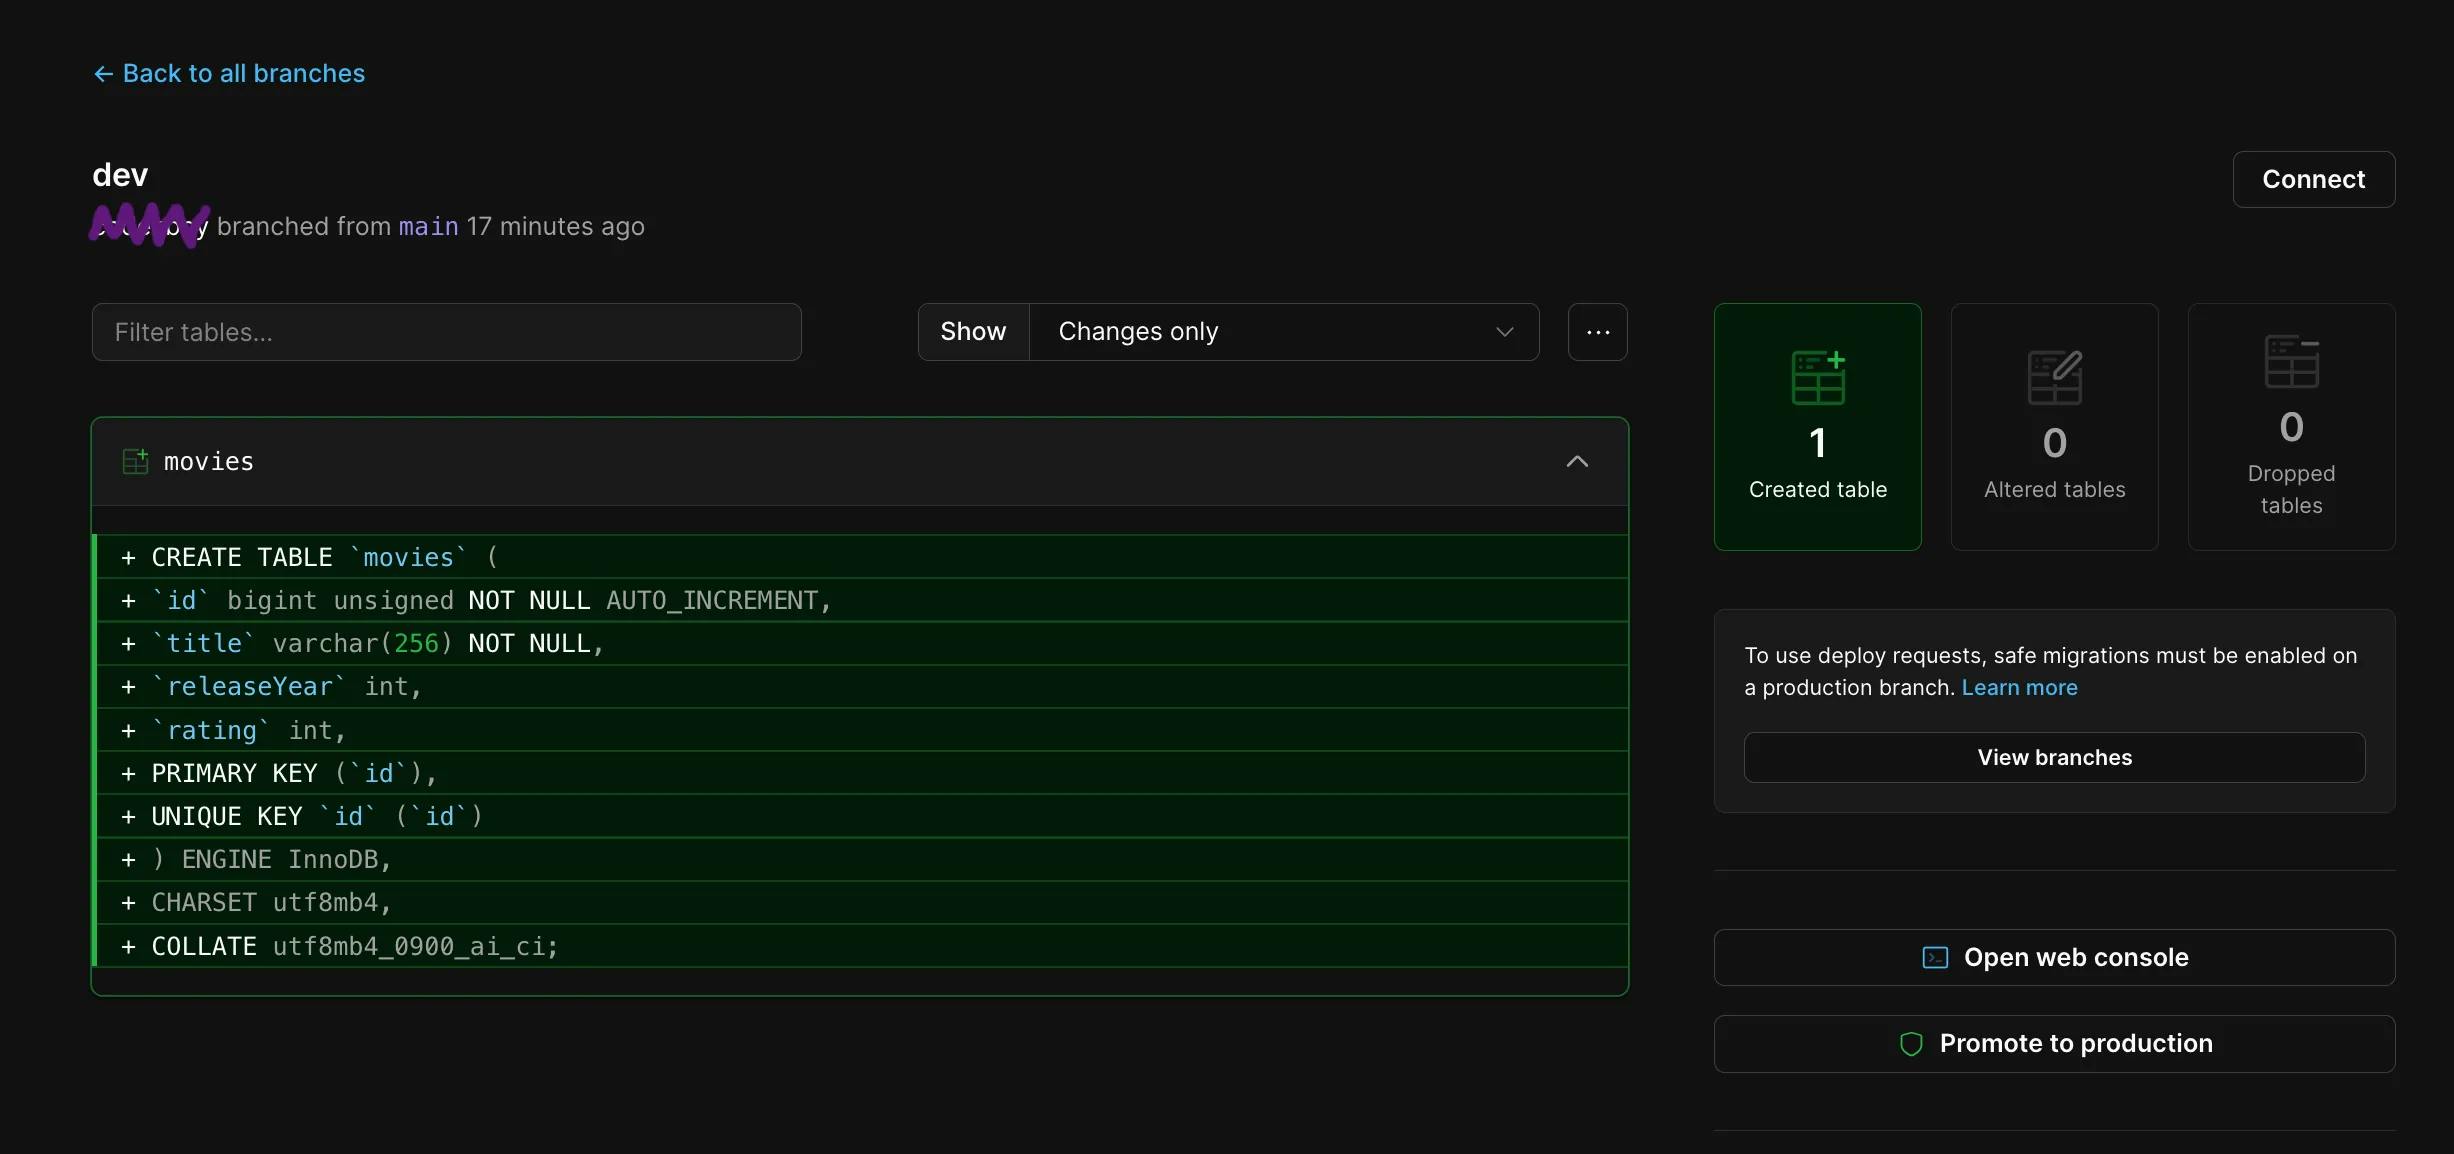
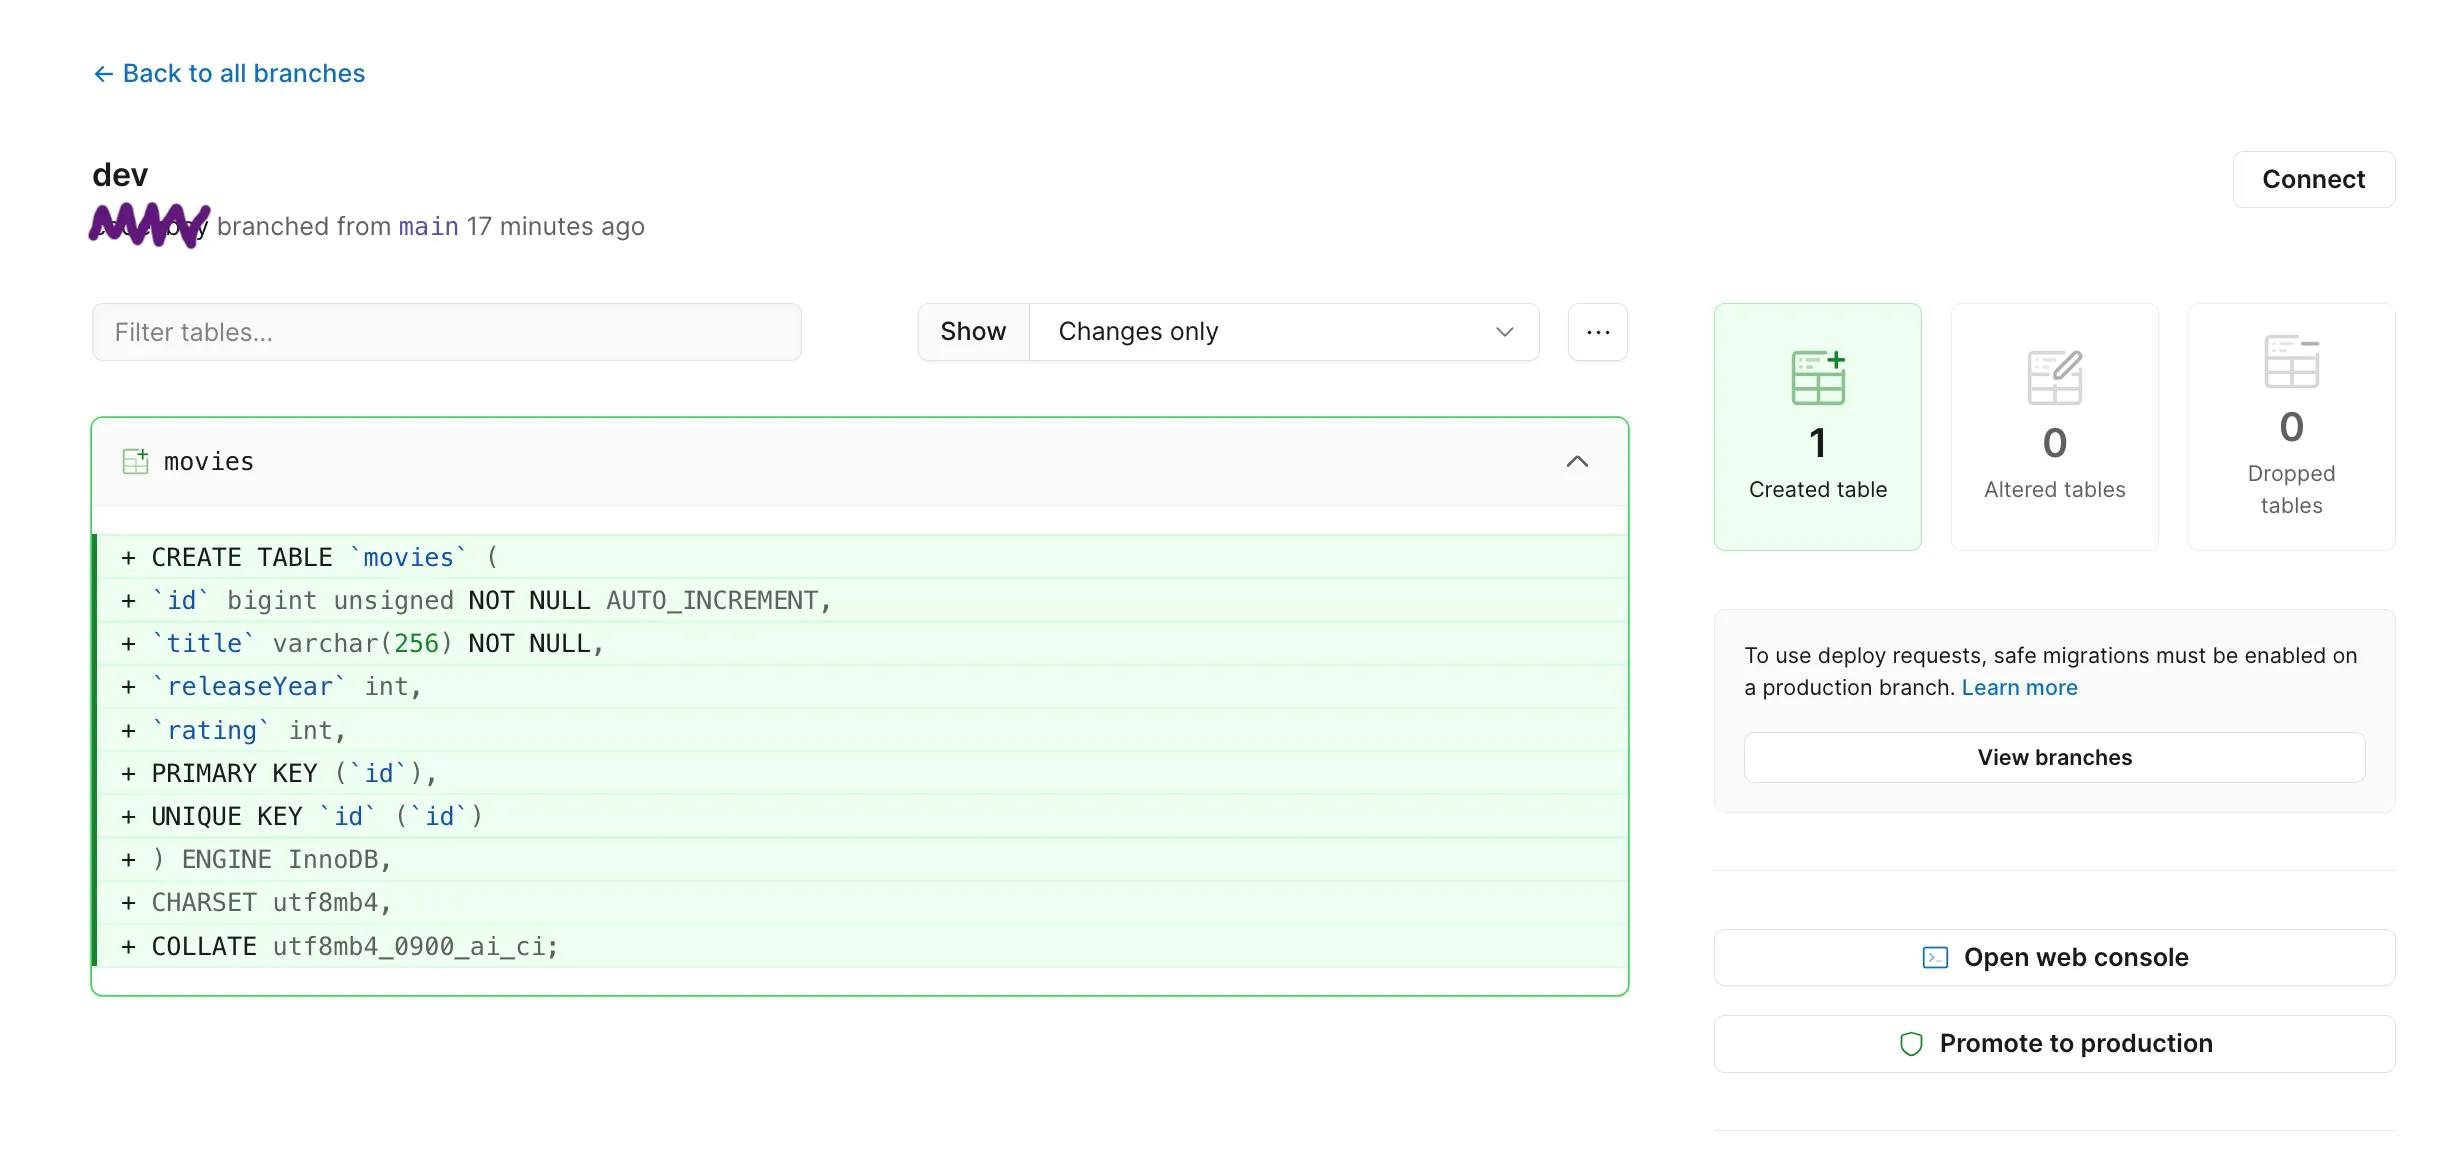
Go to the PlanetScale dashboard and visit the "dev" branch. You will notice that our table has been successfully created.
Now, we will create some records using the PlanetScale CLI, specifically the integrated MySQL shell, to demonstrate its functionality.
Run the following command:
pscale shell movies devpscale shell movies devThis will prompt the shell. Here we can use a plain SQL language to create our first record:
INSERT INTO movies (title, releaseYear, rating) VALUES ('Scarface', 1983, 10);INSERT INTO movies (title, releaseYear, rating) VALUES ('Scarface', 1983, 10);Use the SELECT operation to check if the record has been successfully registered.
SELECT * FROM movies;
+----+----------+-------------+--------+
| id | title    | releaseYear | rating |
+----+----------+-------------+--------+
|  1 | Scarface |        1983 |     10 |
+----+----------+-------------+--------+
SELECT * FROM movies;
+----+----------+-------------+--------+
| id | title | releaseYear | rating |
+----+----------+-------------+--------+
| 1 | Scarface | 1983 | 10 |
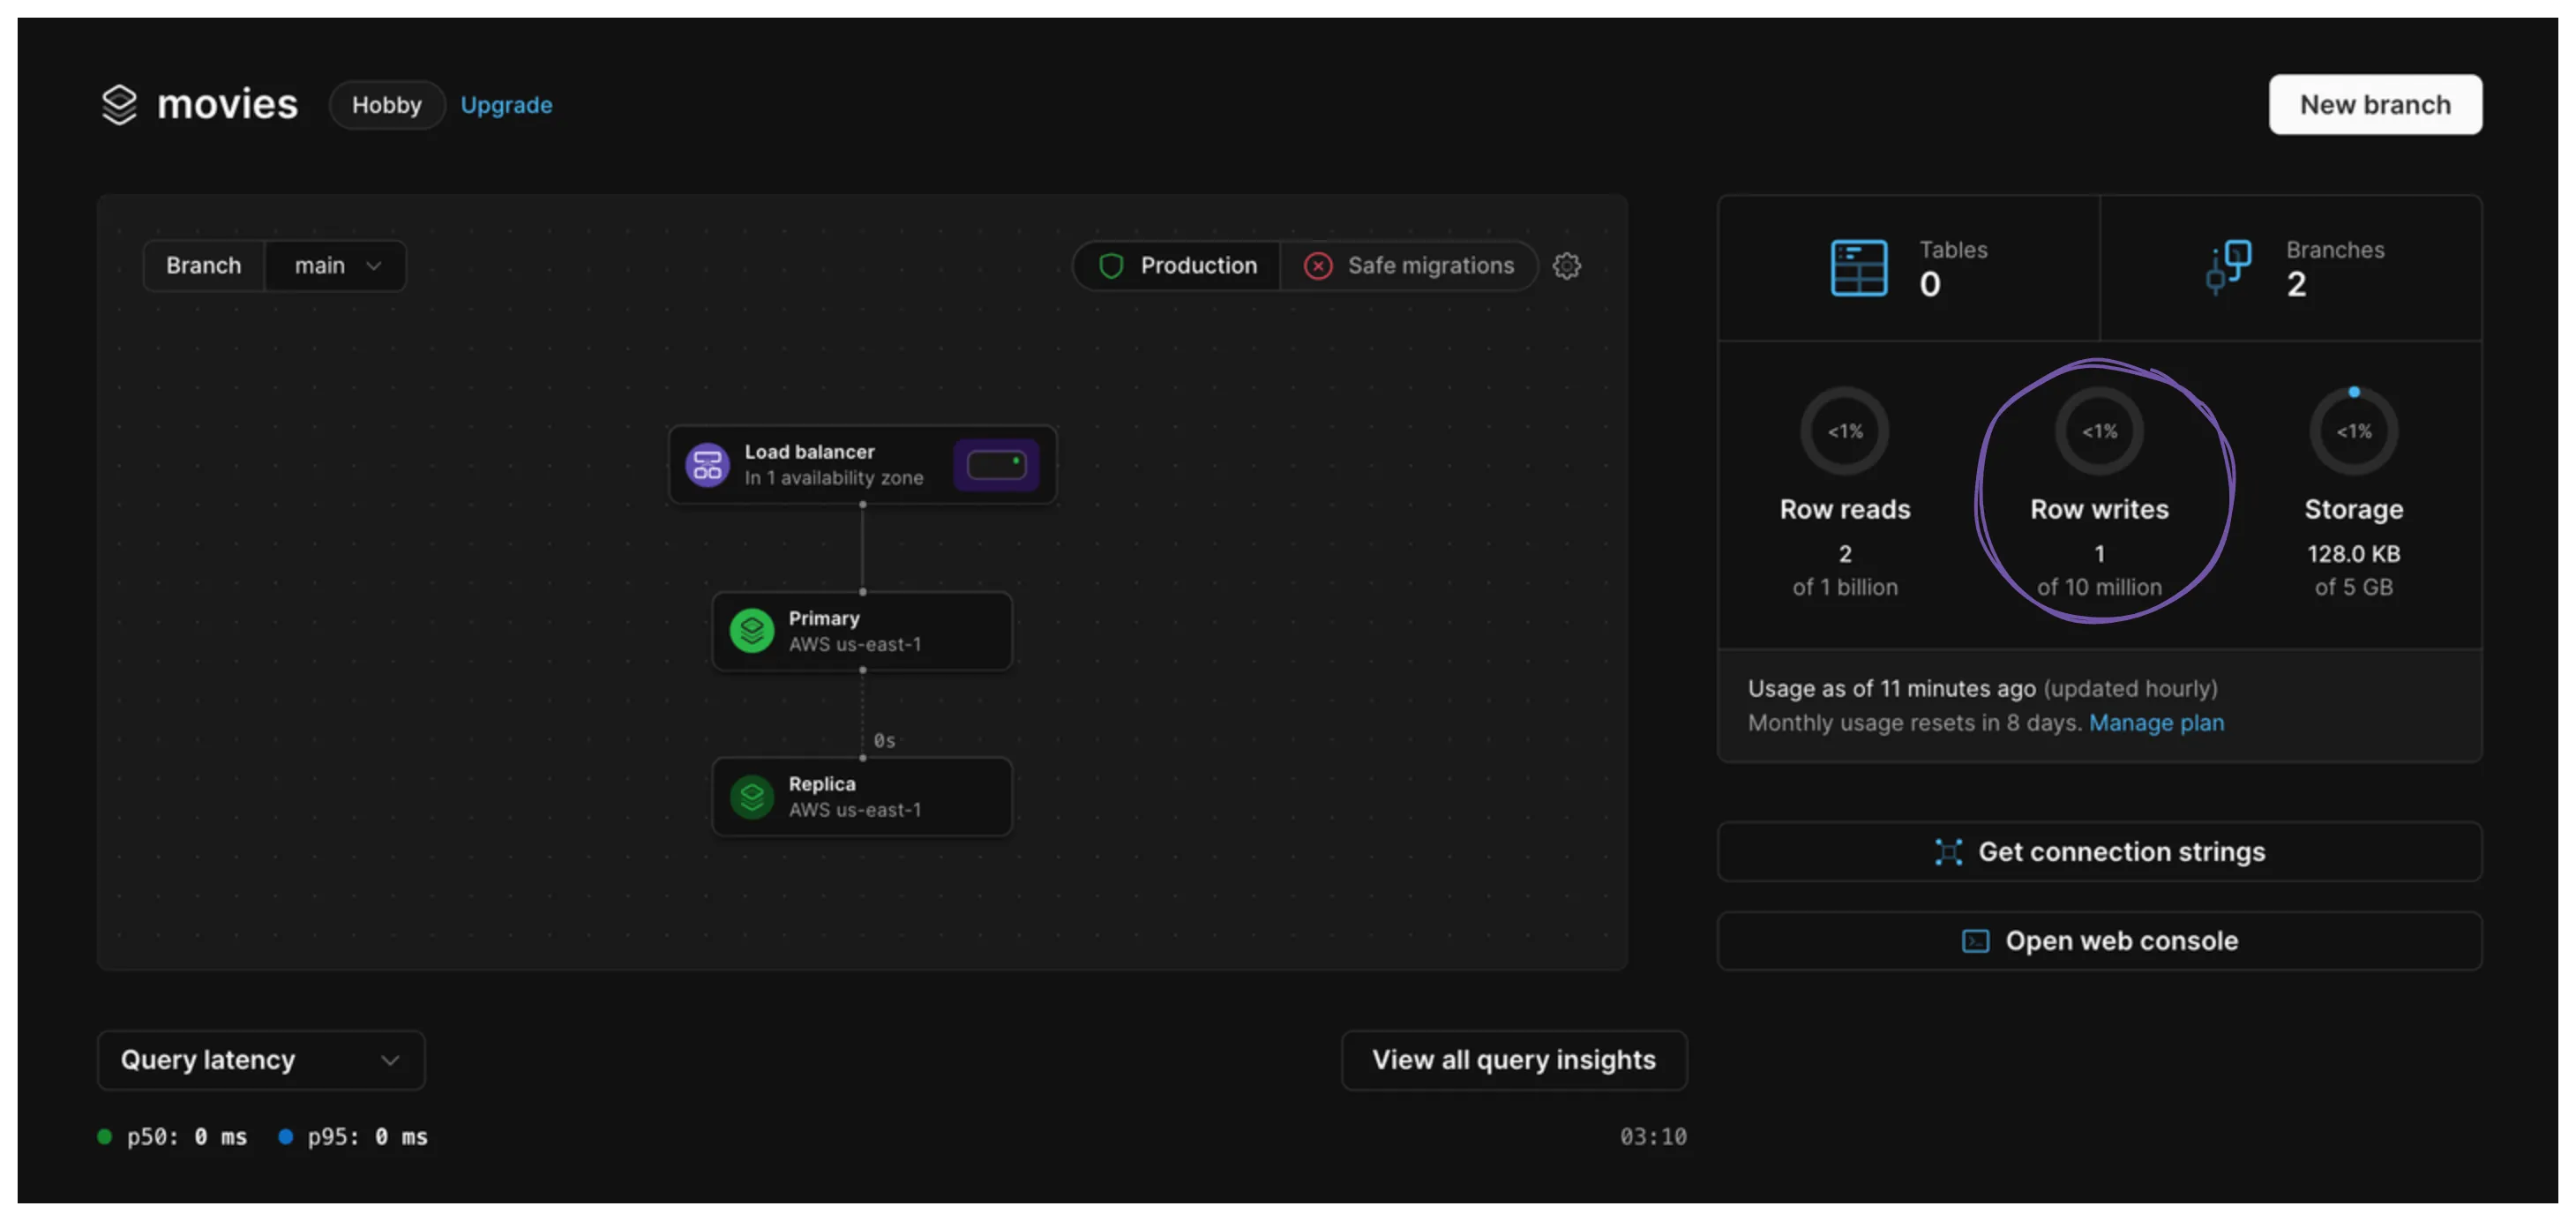
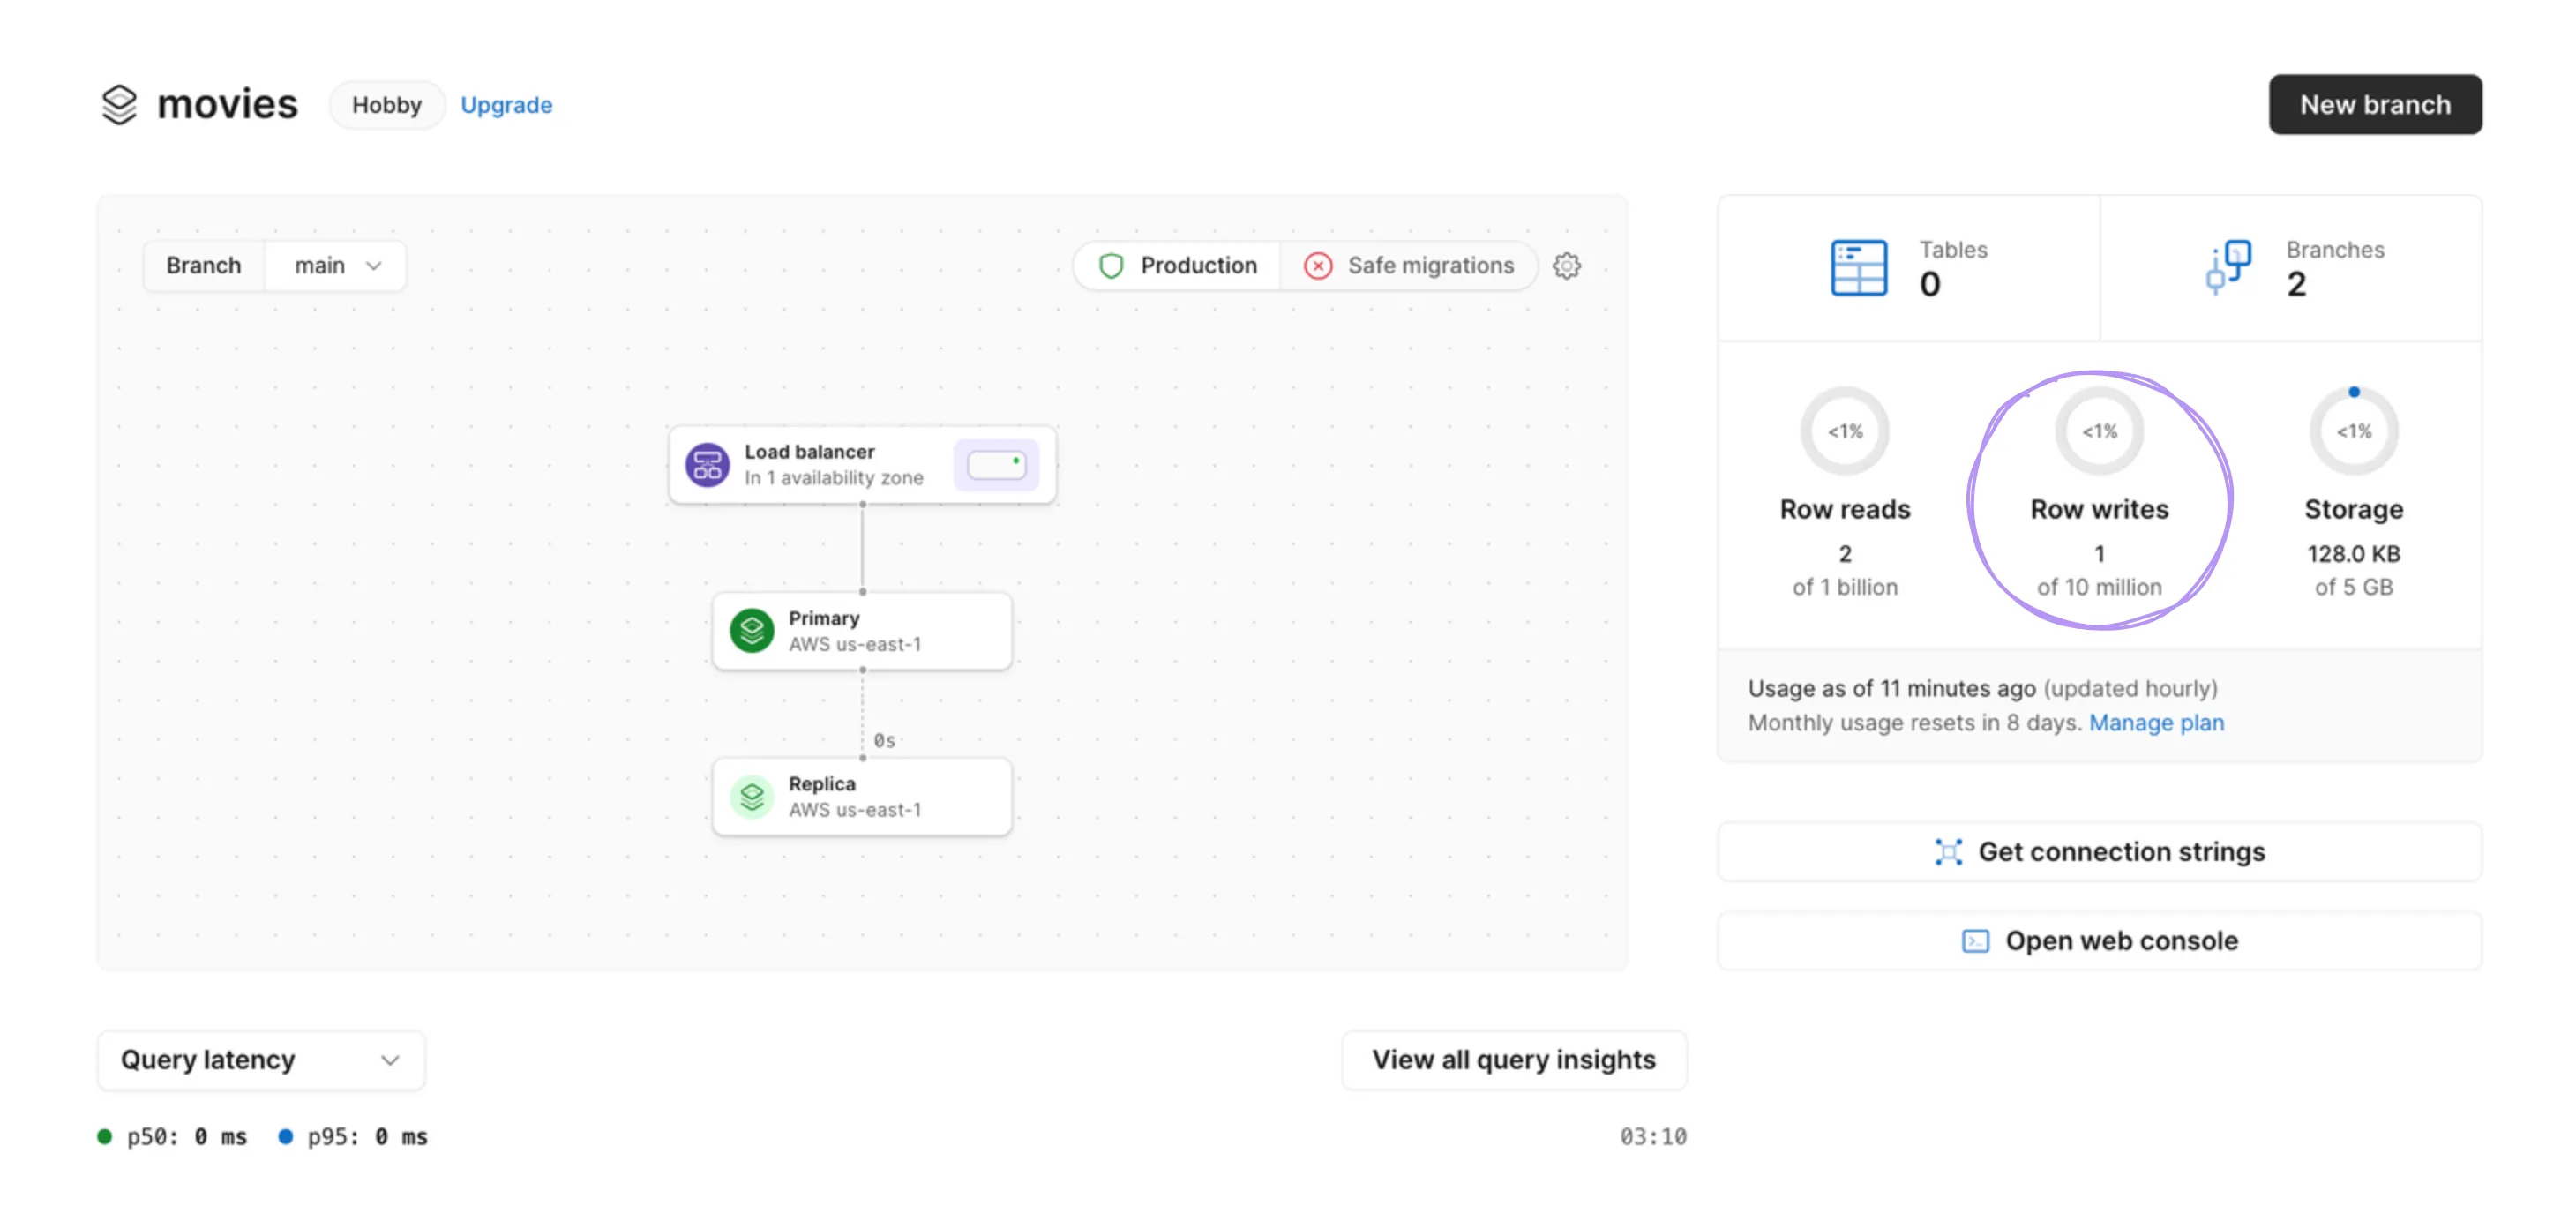
+----+----------+-------------+--------+You can also see that the new record is displayed in the PlanetScale dashboard.
While utilizing an ORM such as Drizzle for query building is possible, it's essential to consider their limitations, especially when dealing with complex queries. Additionally, these ORMs can impact performance.
Introducing Kysely, A type-safe SQL query builder.
Kysely Query builder
Kysely is a type-safe TypeScript SQL query builder that makes writing SQL queries easier and less error-prone. It works seamlessly with TypeScript, providing autocompletion and type safety based on your database schema. It supports popular databases like MySQL, PostgreSQL, and SQLite; it also supports 3rd party dialects like PlanetScale and SurrealDB, eliminating the need for additional engine binaries.
Install Kysely dependency by running the following command:
npm install kyselynpm install kyselyWe will also need to install the PlanetScale dialect for the Kysely SQL query builder that enables compatibility with PlanetScale's MySQL-based database.
npm install kysely-planetscalenpm install kysely-planetscaleCreate a new file called kysely.js in the lib folder and add the following code:
import { Kysely } from 'kysely';
import { PlanetScaleDialect } from 'kysely-planetscale';
import { Kyselify } from 'drizzle-orm/kysely';
import { movies } from './schema';

interface Database {
	movies: Kyselify<typeof movies>;
}

export const queryBuilder = new Kysely<Database>({
	dialect: new PlanetScaleDialect({
		url: process.env.DATABASE_URL,
	}),
});import { Kysely } from 'kysely';
import { PlanetScaleDialect } from 'kysely-planetscale';
import { Kyselify } from 'drizzle-orm/kysely';
import { movies } from './schema';
interface Database {
movies: Kyselify<typeof movies>;
}
export const queryBuilder = new Kysely<Database>({
dialect: new PlanetScaleDialect({
url: process.env.DATABASE_URL,
}),
});We use the kyselify utility to register typescript interfaces to Kysely table objects.
We can now execute queries against the PlanetScale database with the dialect configured. In the next section, we will create a simple user interface to display a list of movies retrieved from our database.
Kysely in action
Let's create a simple UI for displaying a static movie list. Modify the content of the page.tsx file located in the app folder to the following code snippet:
export default function Home() {
	return (
		<main>
			<div className="container">
				<div className="table">
					<div className="table-header">
						<div className="header__item">
							<span id="name" className="filter__link">
								Title
							</span>
						</div>
						<div className="header__item">
							<span className="filter__link">Release year</span>
						</div>
						<div className="header__item">
							<span className="filter__link">Rating</span>
						</div>
					</div>
					<div className="table-content">
						<div className="table-row">
							<div className="table-data">title example</div>
							<div className="table-data">2023</div>
							<div className="table-data">7</div>
						</div>
					</div>
				</div>
			</div>
		</main>
	);
}
export default function Home() {
return (
<main>
<div className="container">
<div className="table">
<div className="table-header">
<div className="header__item">
<span id="name" className="filter__link">
Title
</span>
</div>
<div className="header__item">
<span className="filter__link">Release year</span>
</div>
<div className="header__item">
<span className="filter__link">Rating</span>
</div>
</div>
<div className="table-content">
<div className="table-row">
<div className="table-data">title example</div>
<div className="table-data">2023</div>
<div className="table-data">7</div>
</div>
</div>
</div>
</div>
</main>
);
}Please refer to this file to get the CSS code. It's a little large and trivial to put here.
There are two approaches to using Kysely in a Next.js app. We can directly call it in the app.tsx file or create an API endpoint that returns the movies and then call that endpoint in the app.tsx file using the fetch method.
Let's start with the easy one, calling Kysely directly on page.tsx.
import { queryBuilder } from '@/lib/planetscale';

export default async function Home() {
	const movies = await queryBuilder.selectFrom('movies').selectAll().execute();
	return (
		<main>
			<div className="container">
				<div className="table">
					<div className="table-header">
						...
					</div>
					<div className="table-content">
						{movies.map((movie) => (
							<div className="table-row">
								<div className="table-data">{movie.title}</div>
								<div className="table-data">{movie.releaseYear}</div>
								<div className="table-data">{movie.rating}</div>
							</div>
						))}
					</div>
				</div>
			</div>
		</main>
	);
}
import { queryBuilder } from '@/lib/planetscale';
export default async function Home() {
const movies = await queryBuilder.selectFrom('movies').selectAll().execute();
return (
<main>
<div className="container">
<div className="table">
<div className="table-header">
...
</div>
<div className="table-content">
{movies.map((movie) => (
<div className="table-row">
<div className="table-data">{movie.title}</div>
<div className="table-data">{movie.releaseYear}</div>
<div className="table-data">{movie.rating}</div>
</div>
))}
</div>
</div>
</div>
</main>
);
}As you can see, we call the queryBuilder from the server component directly and treat it as any
async function.
The Kysely SQL builder utilizes method chaining to compose SQL commands. To become familiar with the syntax, you can use the Kysely playground. Additionally, you can explore these examples provided by Kysely to discover more methods.
Navigate to localhost:3000 in your web browser to see the list of movies retrieved from the database.
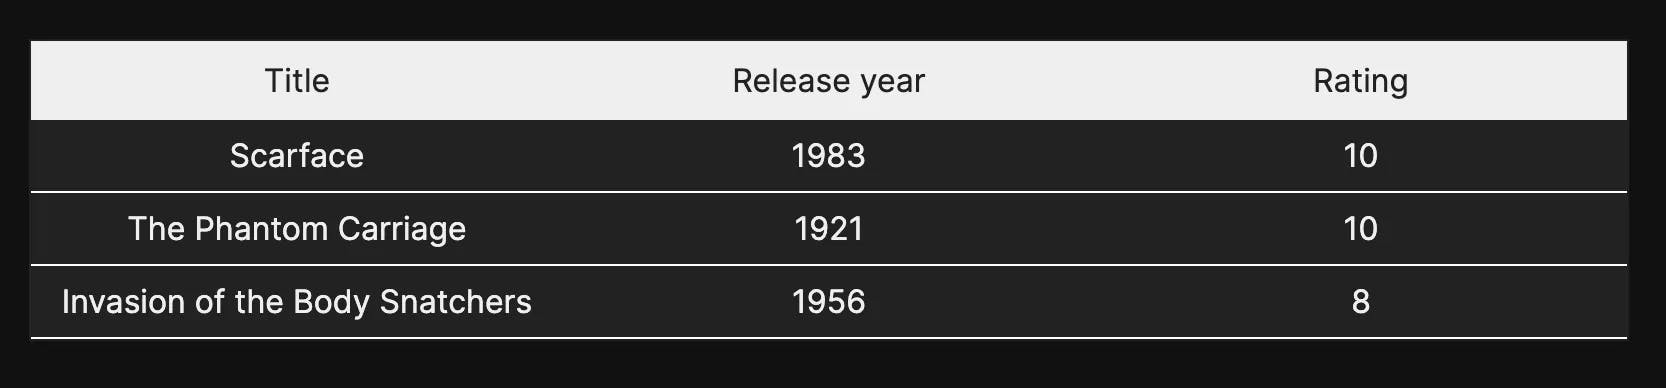
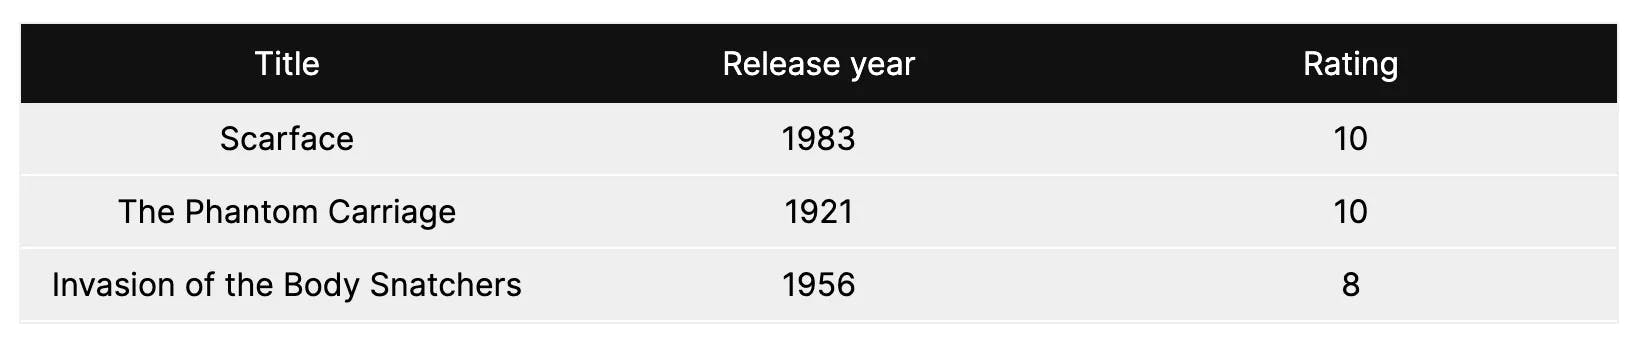
The approach described above is simpler and more straightforward for smaller applications. However, for larger applications with complex data retrieval requirements, it is better to use the route API approach to separate the database logic from the UI components, resulting in a more modular and maintainable codebase. Additionally, using the API allows you to fully leverage the enhanced fetch function, which provides caching capabilities, among other benefits.
Under the api folder, please create a new folder called movies and add a file named route.ts.
└── app
	    └── api
	        └── movies
		        └── route.ts
└── app
└── api
└── movies
└── route.tsSince Next.js utilizes the folder structure to associate paths with each endpoint, any endpoint defined inside the route.ts file will be accessed via the path /api/movies.
Let's add a GET method:
import { queryBuilder } from '@/lib/planetscale';
import { NextRequest, NextResponse } from 'next/server';

const GET = async (_: NextRequest) => {
	const movies = await queryBuilder.selectFrom('movies').selectAll().execute();
	return NextResponse.json(movies);
};

export { GET };import { queryBuilder } from '@/lib/planetscale';
import { NextRequest, NextResponse } from 'next/server';
const GET = async (_: NextRequest) => {
const movies = await queryBuilder.selectFrom('movies').selectAll().execute();
return NextResponse.json(movies);
};
export { GET };We are using the same query builder command as on the page.tsx file.
Now, on the page.tsx file, we can use the fetch method to call this endpoint.
import { Movie } from '@/lib/schema';

const getMovies = async (): Promise<Movie[]> => {
	try {
		const response = await fetch(`http://localhost:3000/api/movies`, {
			next: { revalidate: 3600 },
		});
		const movies: Movie[] = await response.json();
		return movies;
	} catch (error: any) {
		throw new Error(error.message);
	}
};

export default async function Home() {
	const movies = await getMovies();
	return (
		...
	);
}
import { Movie } from '@/lib/schema';
const getMovies = async (): Promise<Movie[]> => {
try {
const response = await fetch(`http://localhost:3000/api/movies`, {
next: { revalidate: 3600 },
});
const movies: Movie[] = await response.json();
return movies;
} catch (error: any) {
throw new Error(error.message);
}
};
export default async function Home() {
const movies = await getMovies();
return (
...
);
}You may notice the extra parameter we are passing to fetch. This parameter is not supported by the native fetch method. Next.js extends the fetch options object to enable each request to set its own caching and revalidating.
Deploying to Vercel
The dev branch now holds our initial schema. Let's create a deploy request to push these changes to the main production branch.
pscale deploy-request create movies devpscale deploy-request create movies devIf everything goes smoothly, you will see a success message with a link to the details of the deployment request.
Deploy request #1 successfully created.

View this deploy request in the browser: https://app.planetscale.com/ayoub-khial/movies/deploy-requests/1
Deploy request #1 successfully created.
View this deploy request in the browser: https://app.planetscale.com/ayoub-khial/movies/deploy-requests/1Click on the link to redirect you to the deploy request details. From there, you can deploy the changes or close the request.
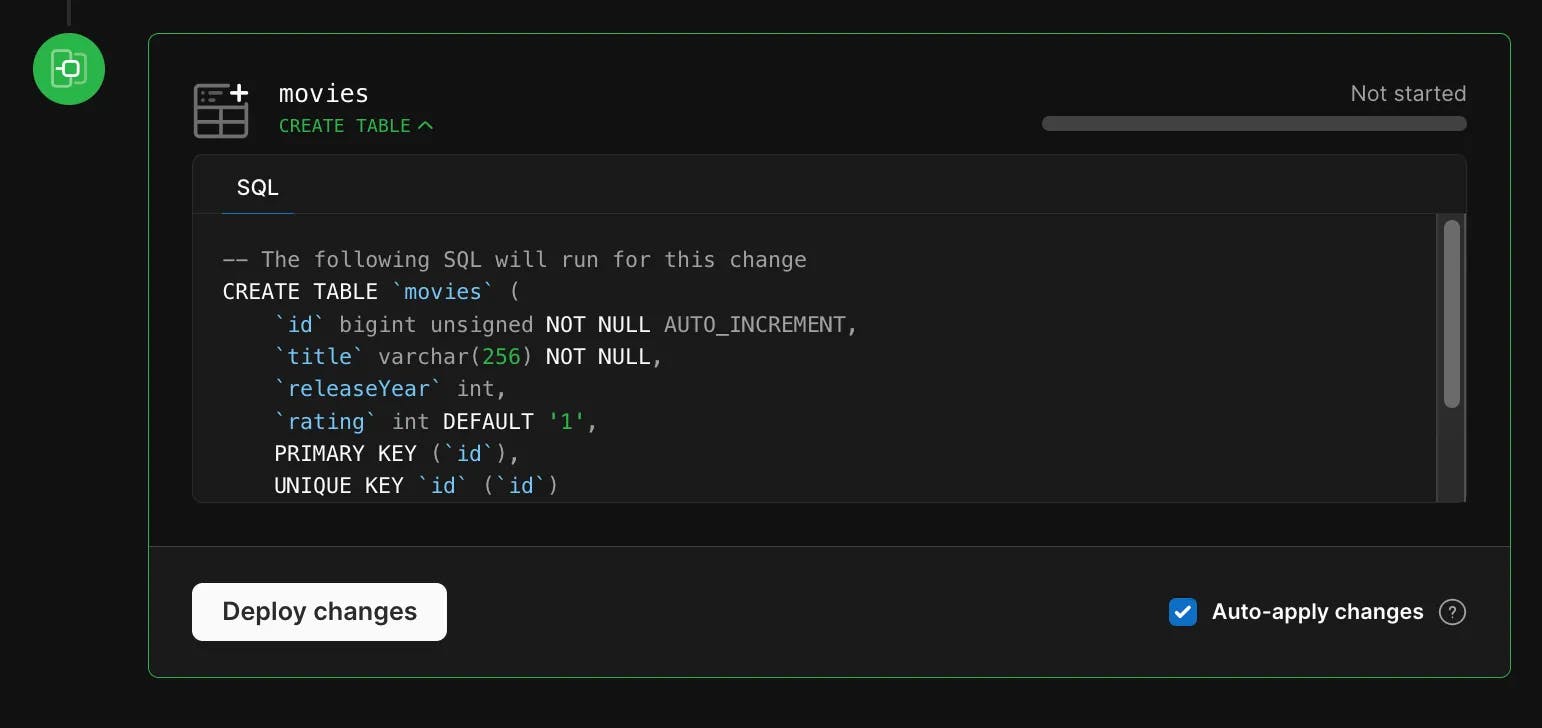
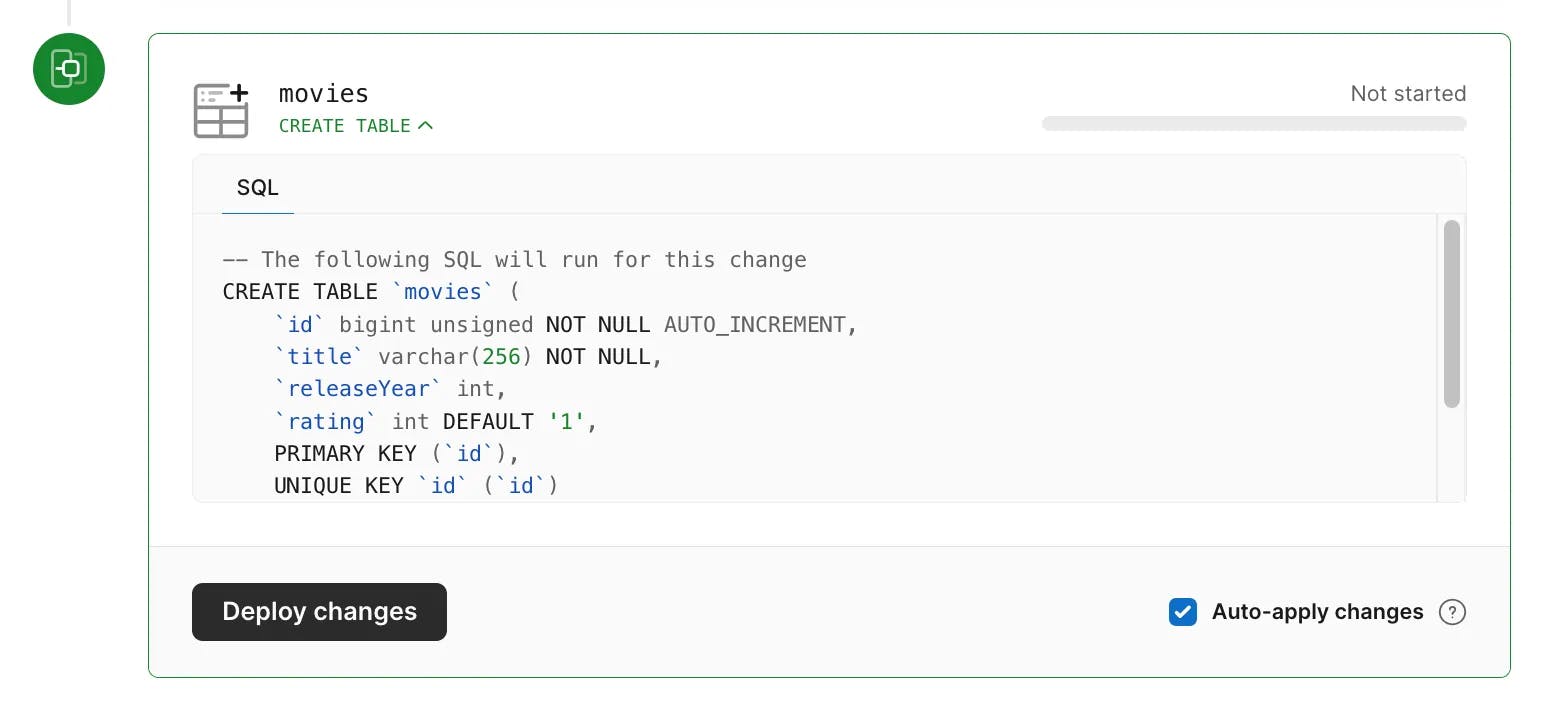
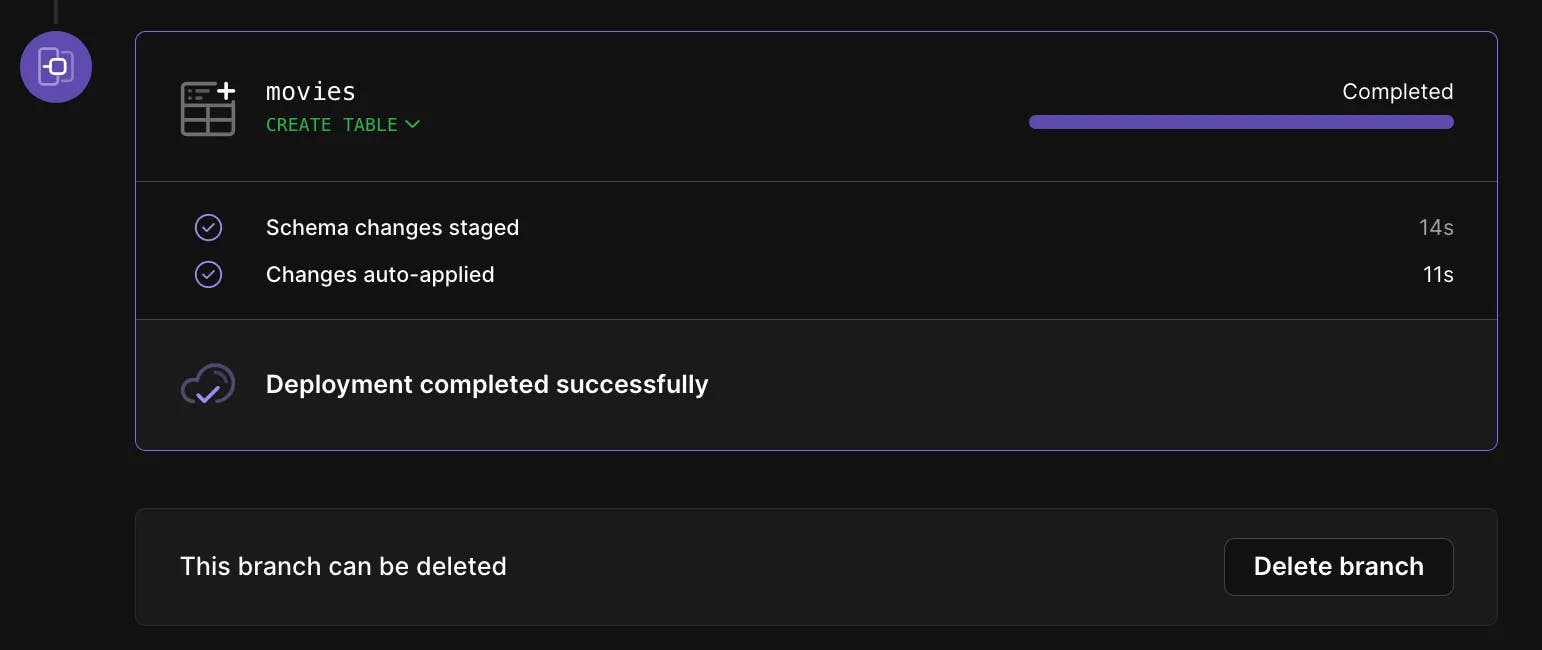
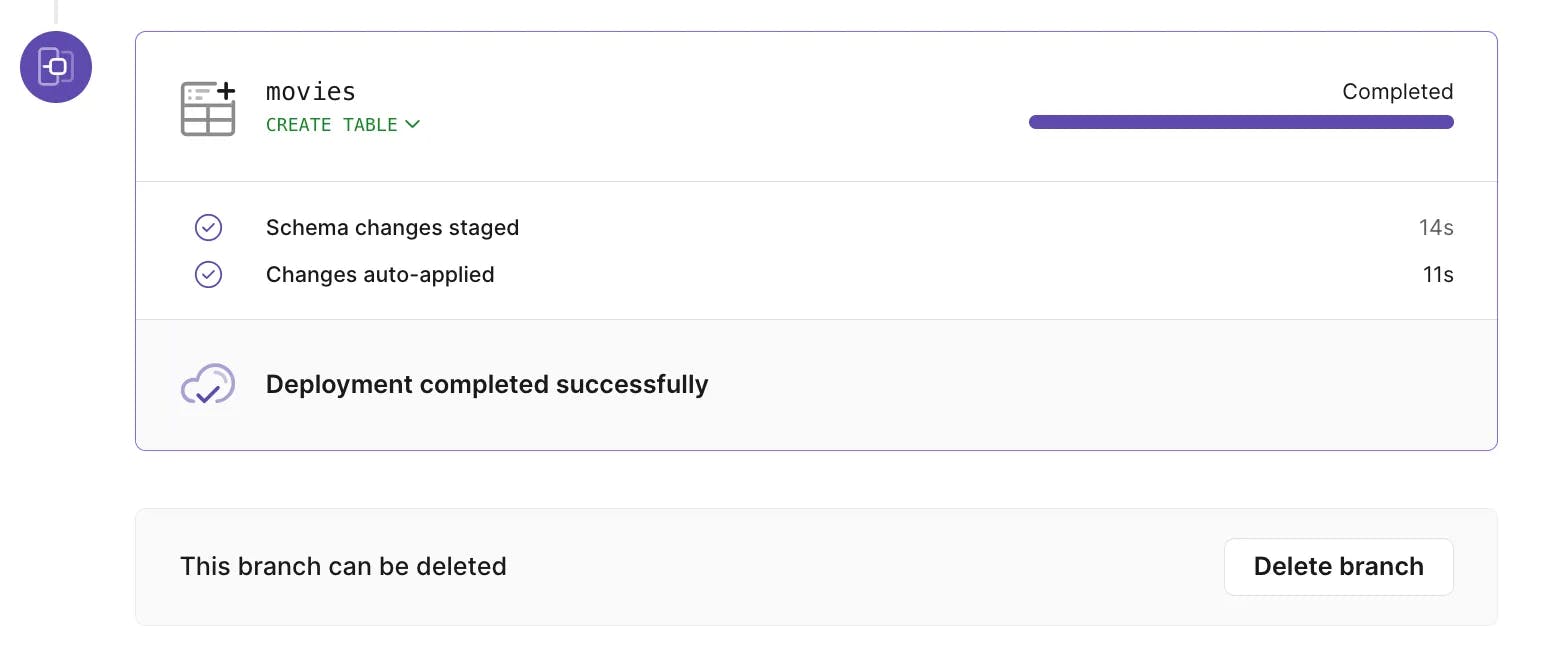
Click on the deploy changes button, and after a few seconds, you'll see a message indicating the deployment was completed successfully.
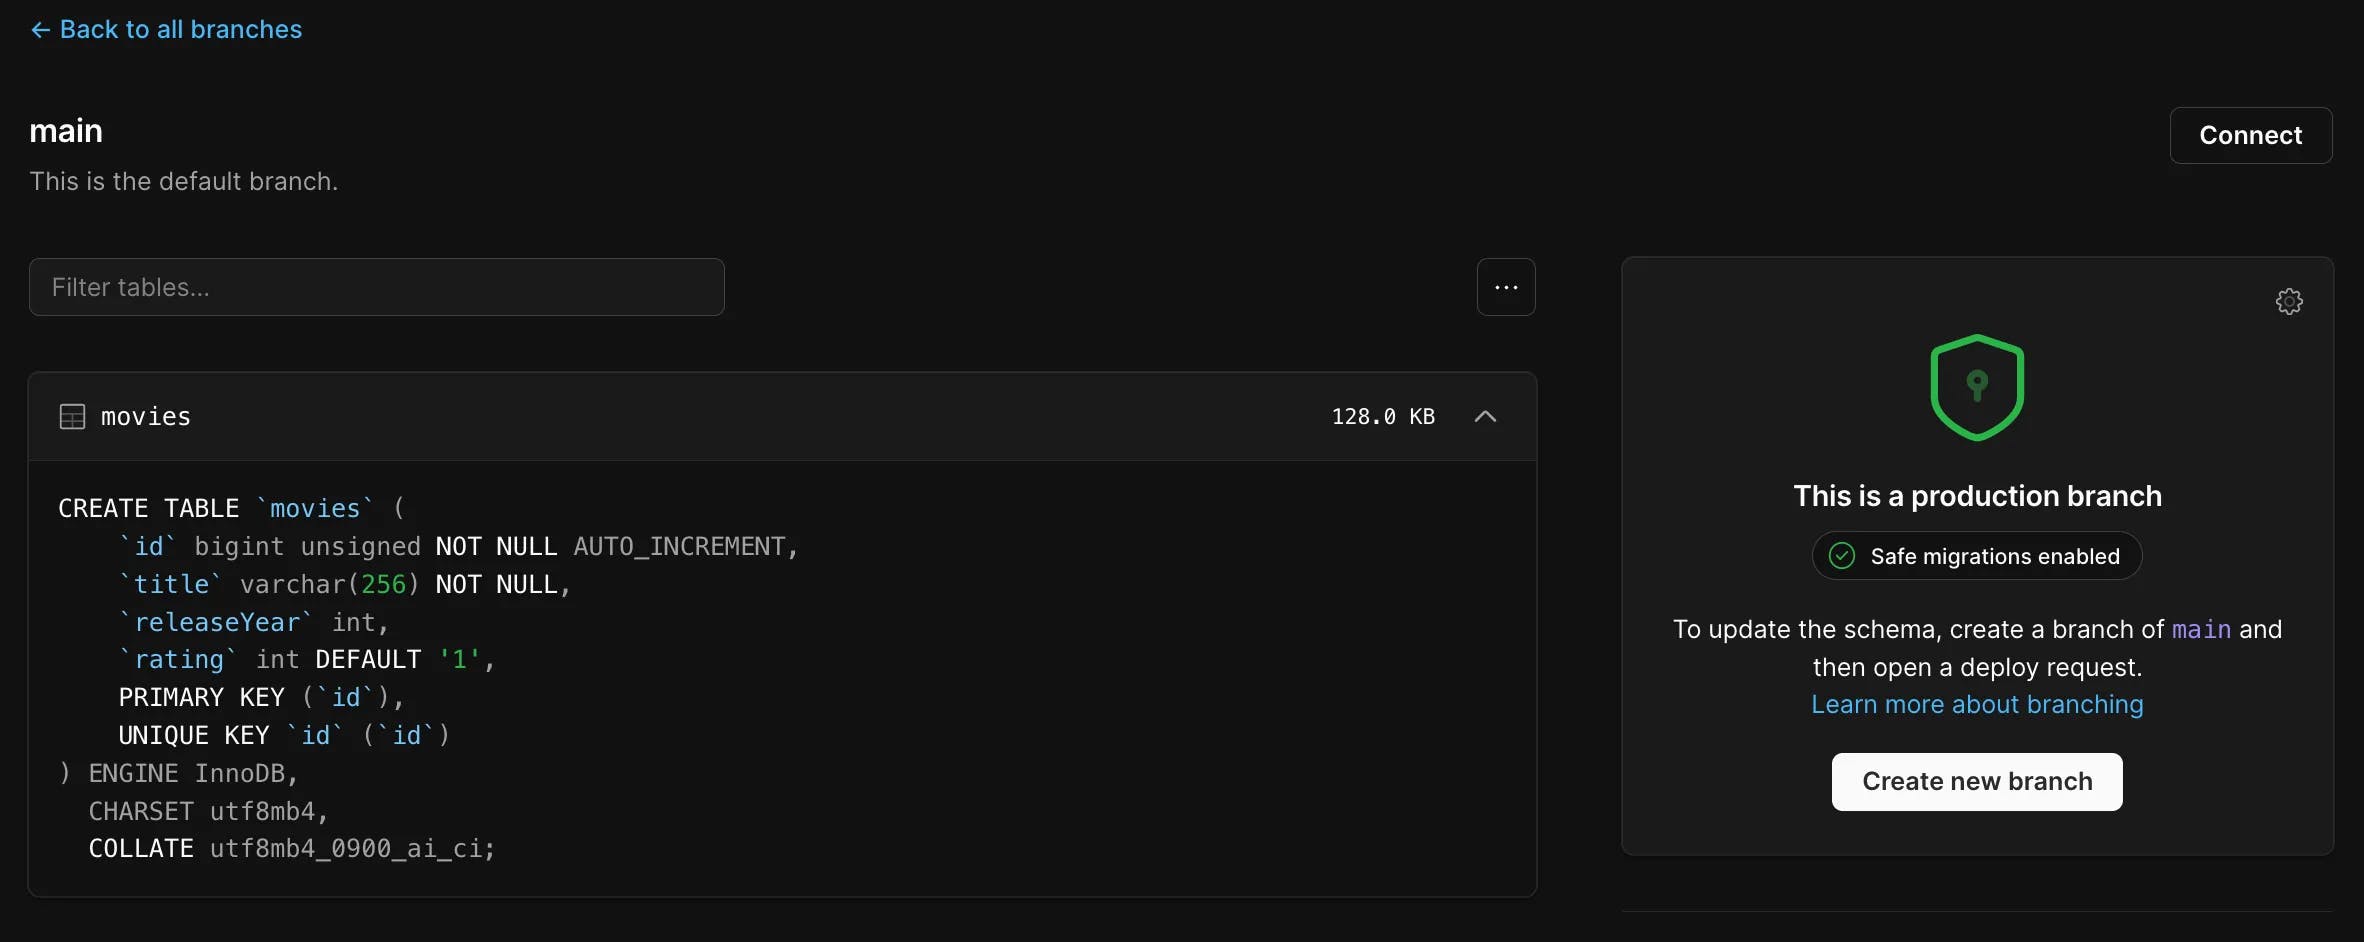
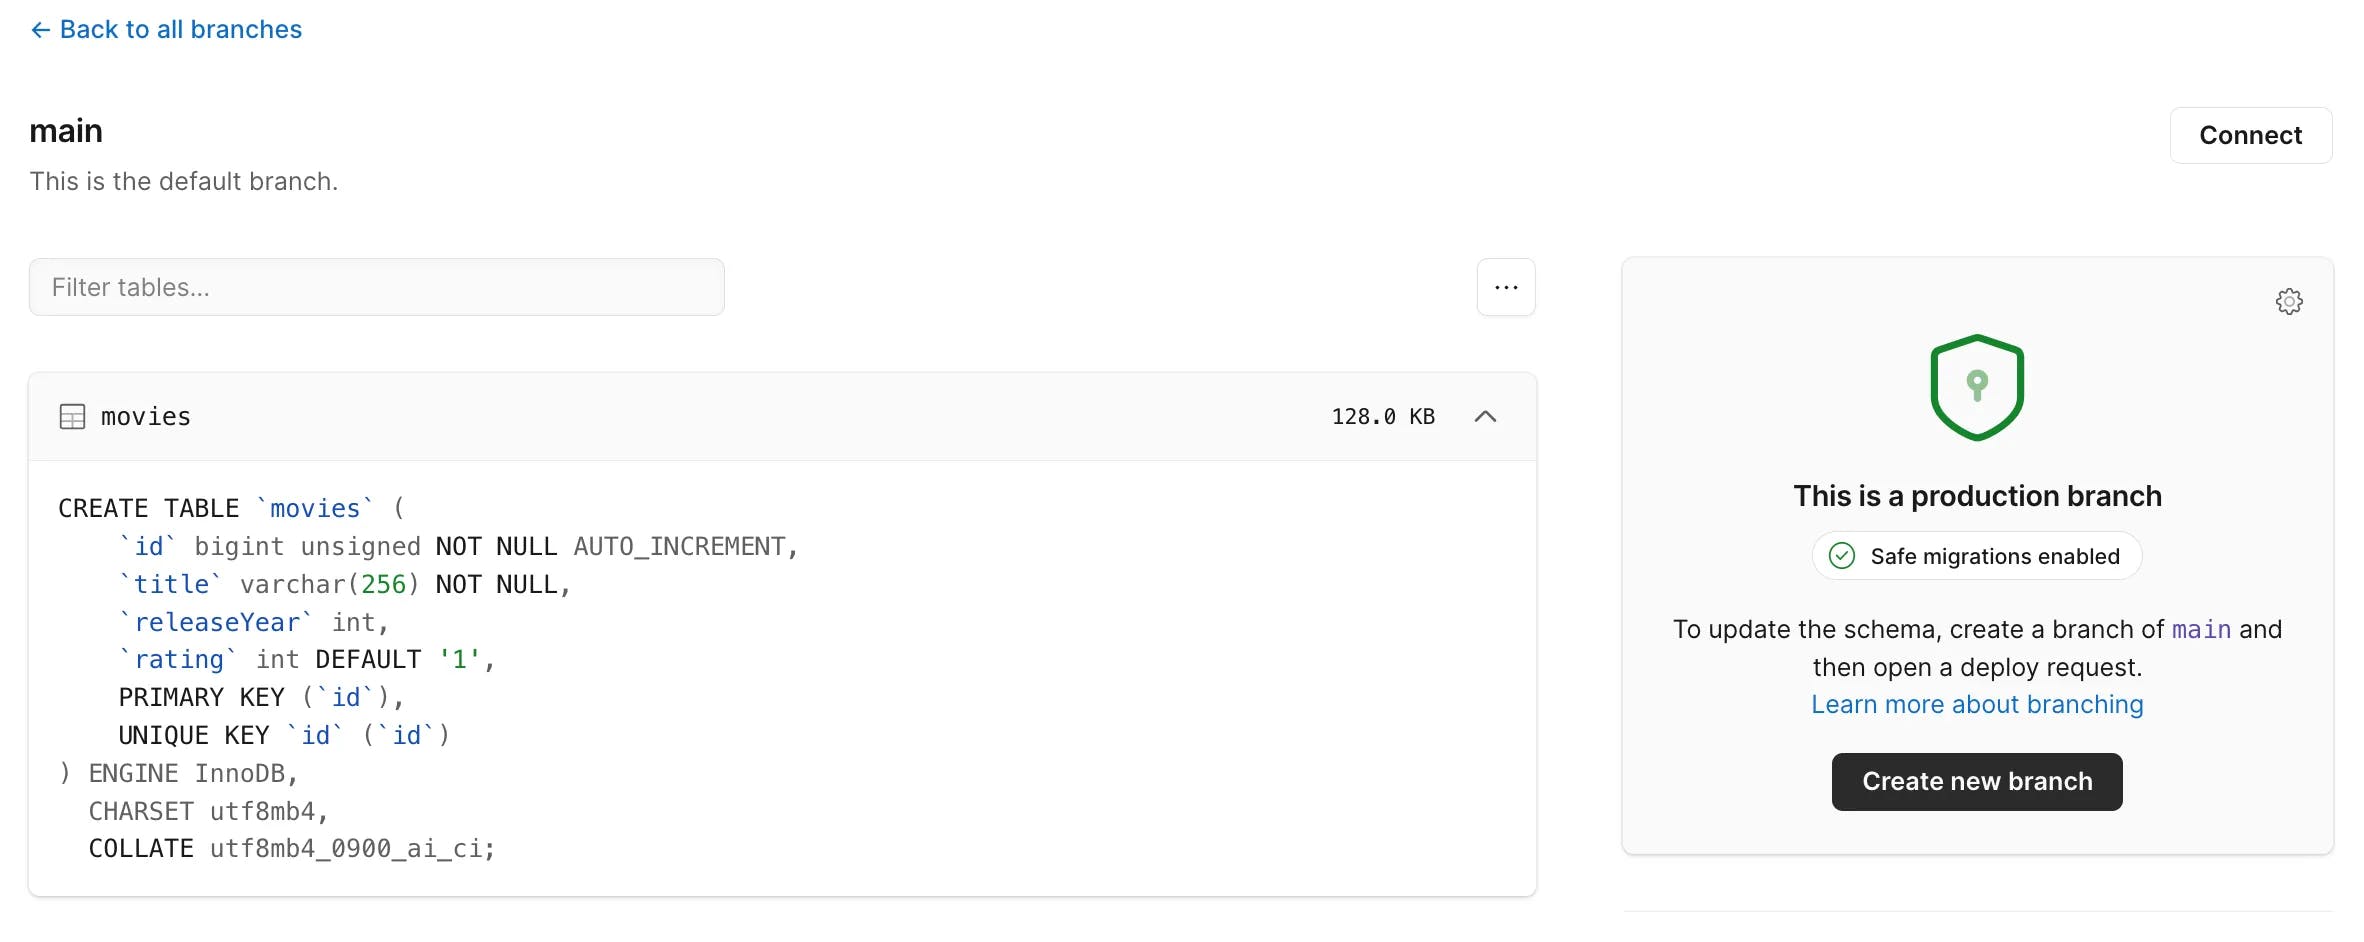
If you navigate to your main branch, you will find the newly created movies table.
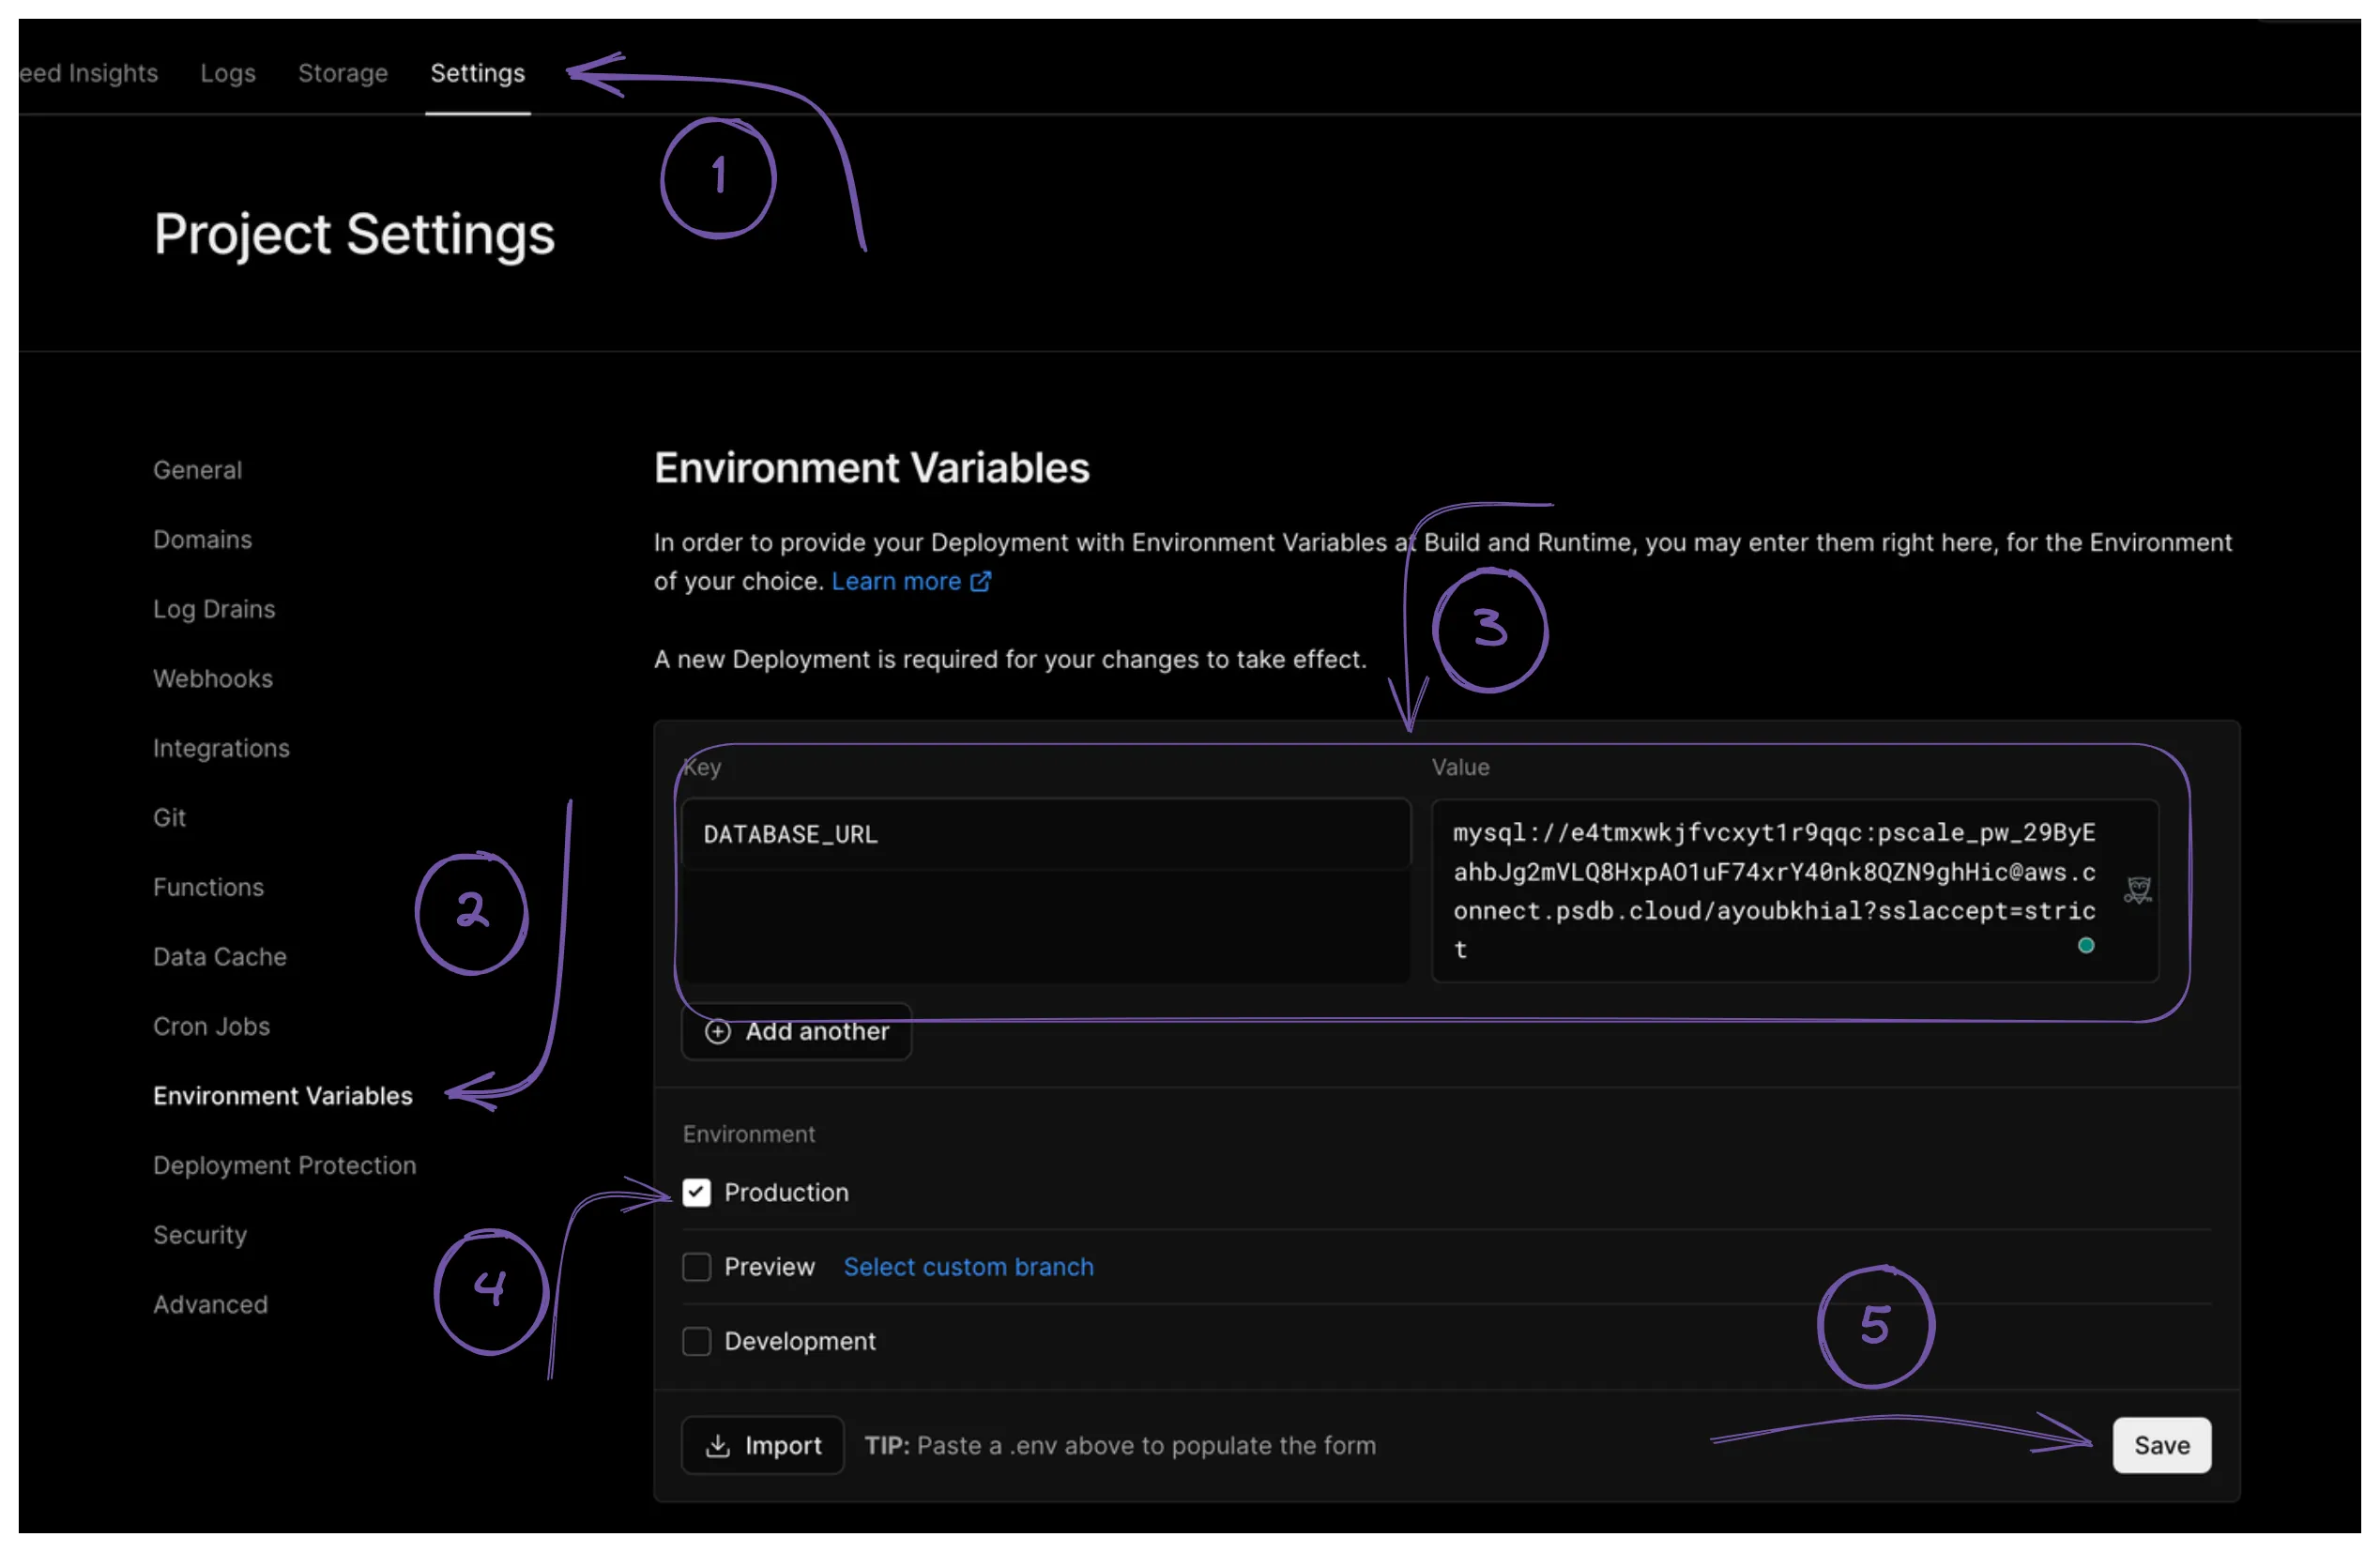
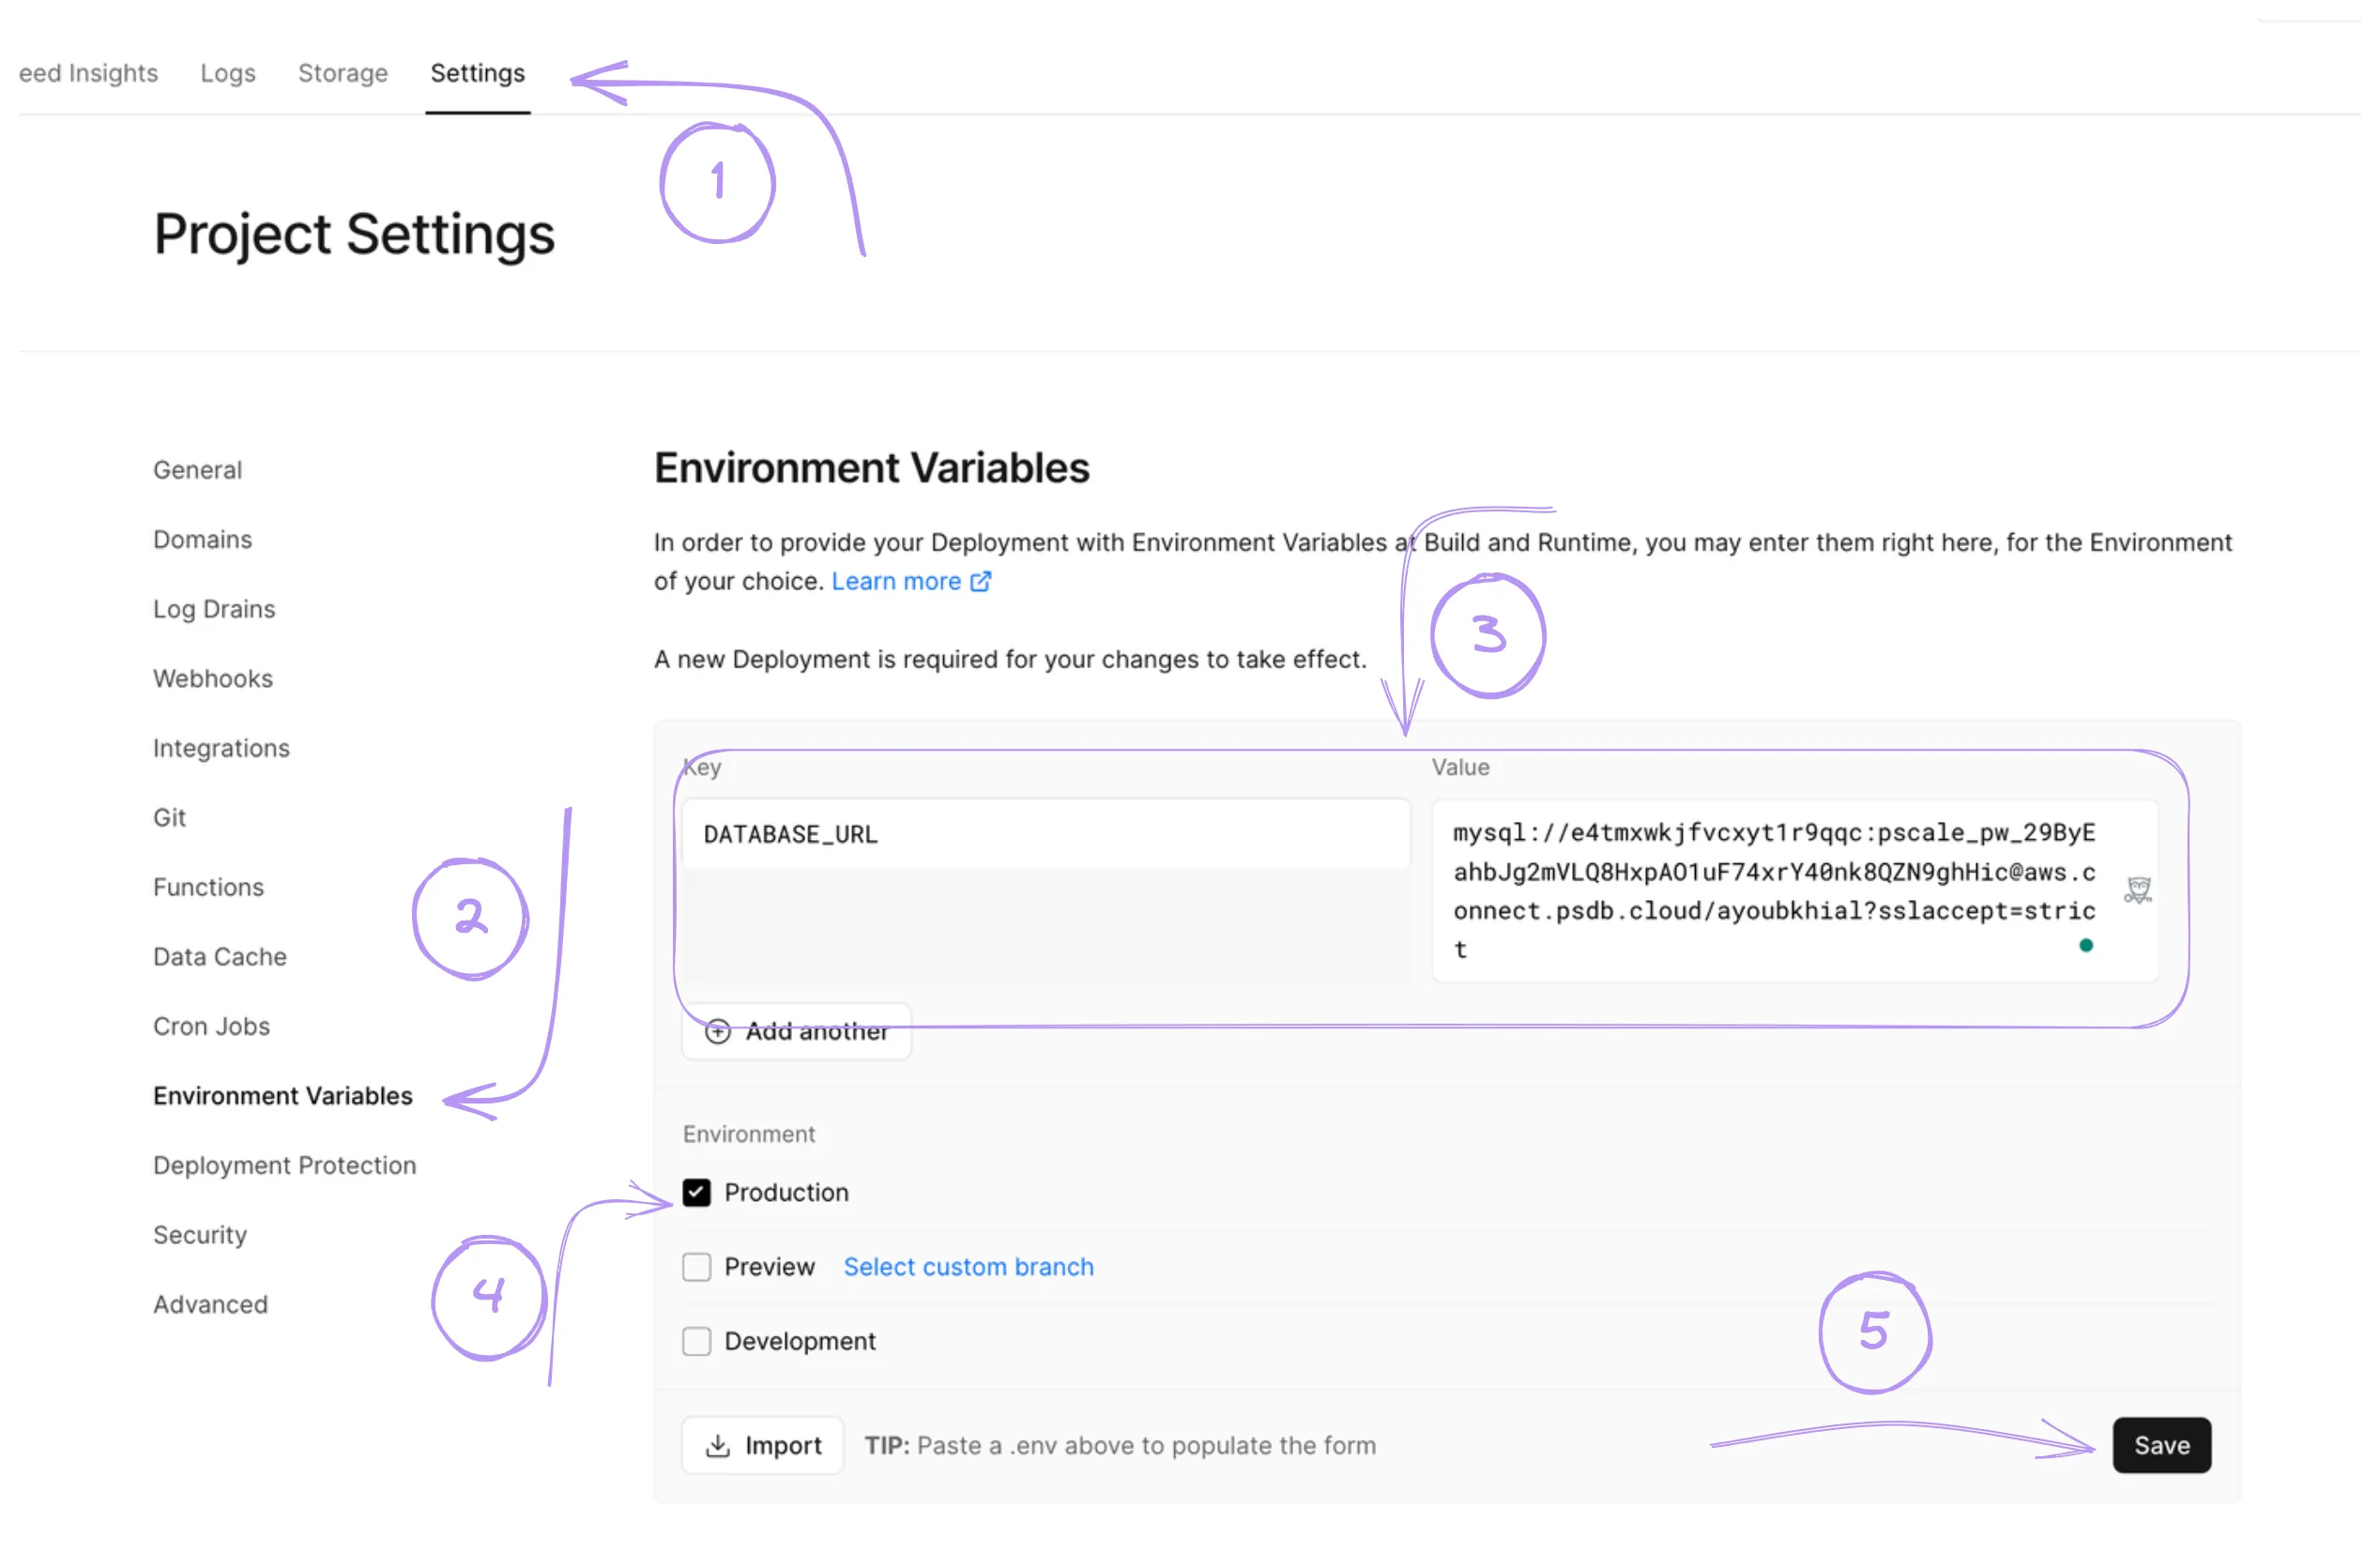
To set up your project on Vercel, commit it to Github and sync it with Vercel. Then, go to the Settings tab and select Environment Variables from the left menu. From there, please create a new variable for the production environment, similar to what you did in the .env file.
But before that, get the database string from PlanetScale just like we did with the dev branch. But this time you need to get it from the main branch.
You're all set! Your database schema is now synchronized between your branches, and each branch is accountable for a particular environment.
Conclusion
The synergy between Next.js, PlanetScale, Drizzle ORM, and Kysely is a winning combination for creating scalable and fully typed applications. These tools offer the flexibility and power needed to build robust and efficient database-driven applications.
You can find the complete code source in this repository; feel free to give it a star ⭐️.