Introduction
The previous article explored setting up TypeScript in an Express.js app. We discussed the advantages that TypeScript, a statically-typed extension of JavaScript, brings to developers, such as detecting errors during compilation, enhancing code browsing, and establishing a more sustainable code structure.
In a monorepo architecture, managing code quality and consistent style can become complicated due to the disparate nature of the codebase. This is where tools such as ESLint and Prettier come into play. They help to maintain code quality and consistent coding styles across multiple packages. This article provides a detailed guide on integrating ESLint and Prettier into a monorepo architecture.
Before we begin, let's talk about linters and formatters so we can better understand how to use them correctly.
Linters vs. Formatters
Linters are static code analysis tools that flag programming errors, bugs, stylistic errors, and suspicious constructs.
The main features of a linter are:
- Code Quality Rules: These rules relate to code correctness, i.e., they catch potential errors and programmer mistakes. Examples include flagging undeclared variables, warning when variables are unused, or catching faulty loop structures.
- Code Style Rules: These rules relate to style and formatting. Examples include enforcing indenting with tabs or spaces, requiring or disallowing semicolons at the end of lines, or enforcing the positioning of braces.
- Extensibility: Allows you to use third-party plugins to define your own rules. You can also extend it with shared configurations.
- Automated Fixing: Some linters can automatically fix specific issues, saving time and helping maintain consistency.
Formatters, on the other hand, focus more on the cosmetic aspects of your code. They enforce a consistent style by parsing your code and re-printing it with their own rules that take care of code formatting to ensure that all outputted code conforms to a consistent style.
Here are the main features of a formatter:
- Enforced Consistency: Formatters enforce a consistent coding style across your entire codebase. This makes the code more readable and eliminates unnecessary discussions about coding style among team members.
- Ease of Use: Most formatters are designed to be easy to use. They usually come with a command-line interface and can be integrated into most text editors or IDEs. You can set up a formatter to automatically format your code whenever you save a file.
- Support for Multiple Languages: Many formatters support various programming languages and file types. This can be particularly useful in multi-language projects.
While there are some overlaps in what linters and formatters can do, there are key differences:
- Scope: Linters can handle code quality and formatting rules, whereas formatters are primarily concerned with formatting rules. The focus of linters is broader, dealing with potential coding errors and style issues. The focus of formatters is narrower, ensuring that the style and syntax of your code adhere to predefined rules.
- Flexibility vs. Opinionated: Linters are highly customizable. You can switch rules on and off and even write your own or use plugins to extend the linter's functionality. Formatters, on the other hand, are often more opinionated and provide fewer customization options.
- Fixing Mechanism: Some linters can automatically fix certain types of issues, either by making suggestions or by modifying the code directly. Formatters, on the other hand, completely rewrite your code based on the formatting rules they're configured to follow.
In summary, linters are primarily used to catch potential bugs and maintain code quality, while formatters ensure a consistent coding style across the project. They both serve important roles and are often used together to maintain a clean, error-free, and consistently styled codebase.
Prettier - An opinionated code formatter
Prettier is an open-source, opinionated code formatter that enforces a consistent code style across your project. It supports many languages, including JavaScript, TypeScript, HTML, CSS, Markdown, and more. It removes all original styling and ensures all outputted code conforms to a consistent style.
Prettier parses your code into an Abstract Syntax Tree (AST), then re-prints it from scratch to ensure it conforms to its formatting rules. It discards all original styling and ensures that the re-printed code adheres to a consistent style.
To apply Prettier to any project, installing the Prettier extension is usually necessary, which can automatically format your code upon saving or even manually through the integrated extension. We recommend installing this extension if you're using Visual Studio Code. Rest assured, an extension is available for nearly all popular code editors.
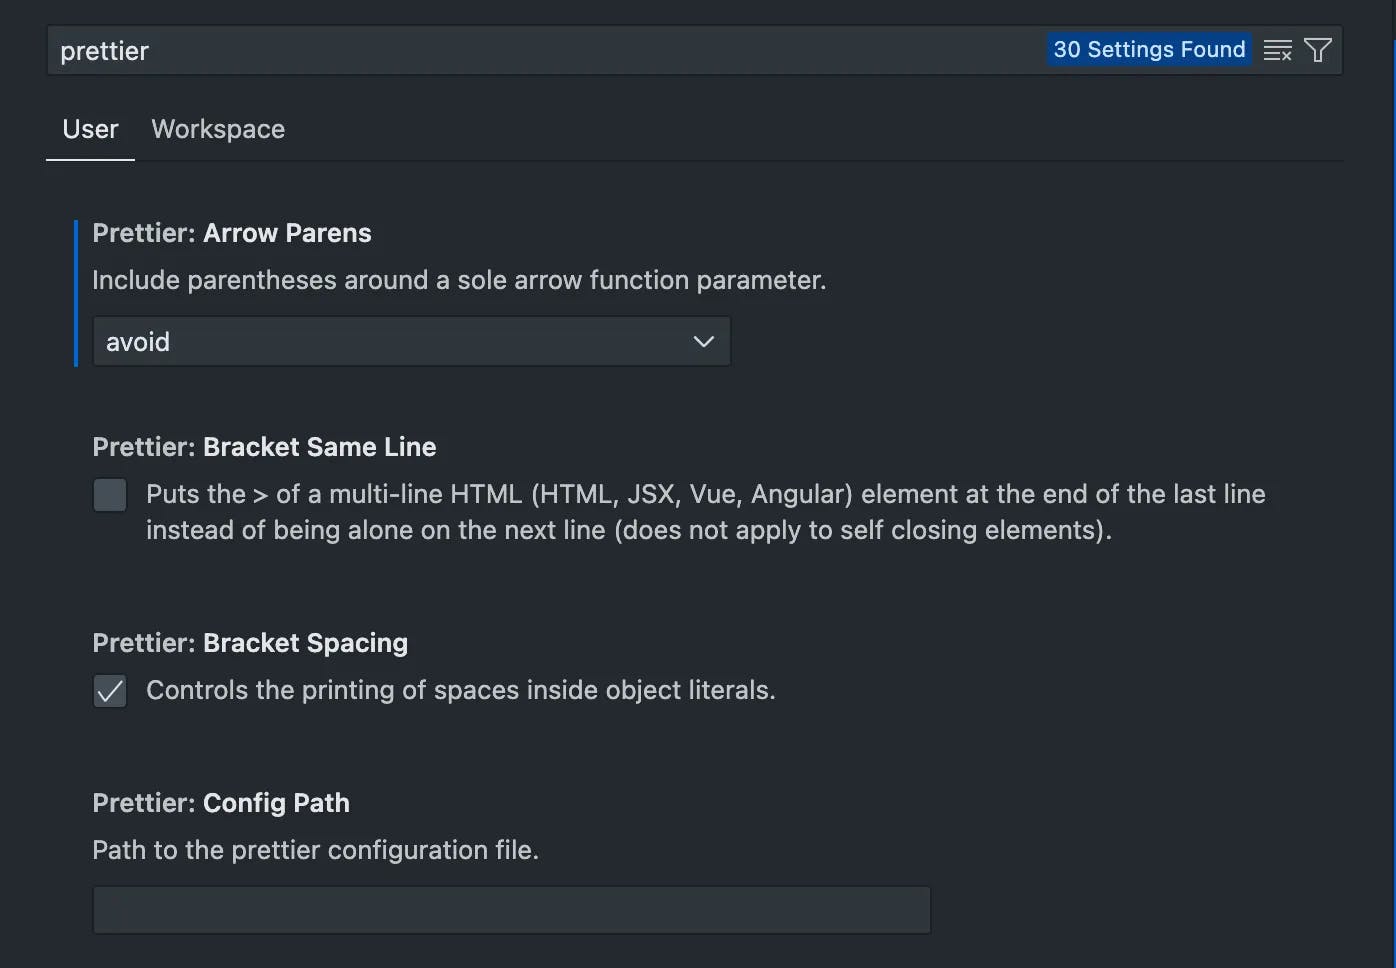
The extension provides default configurations, but you may want to customize some settings according to your preferences. To adjust Prettier settings, navigate to user settings by pressing cmd + , on MacOS or ctrl + , on Windows.
In the search bar, type "Prettier" to filter out Prettier-specific settings and easily access the relevant options.
In the Prettier settings, you have the flexibility to customize various options such as the print width, tab width, usage of semicolons, single vs. double quotes, and more.
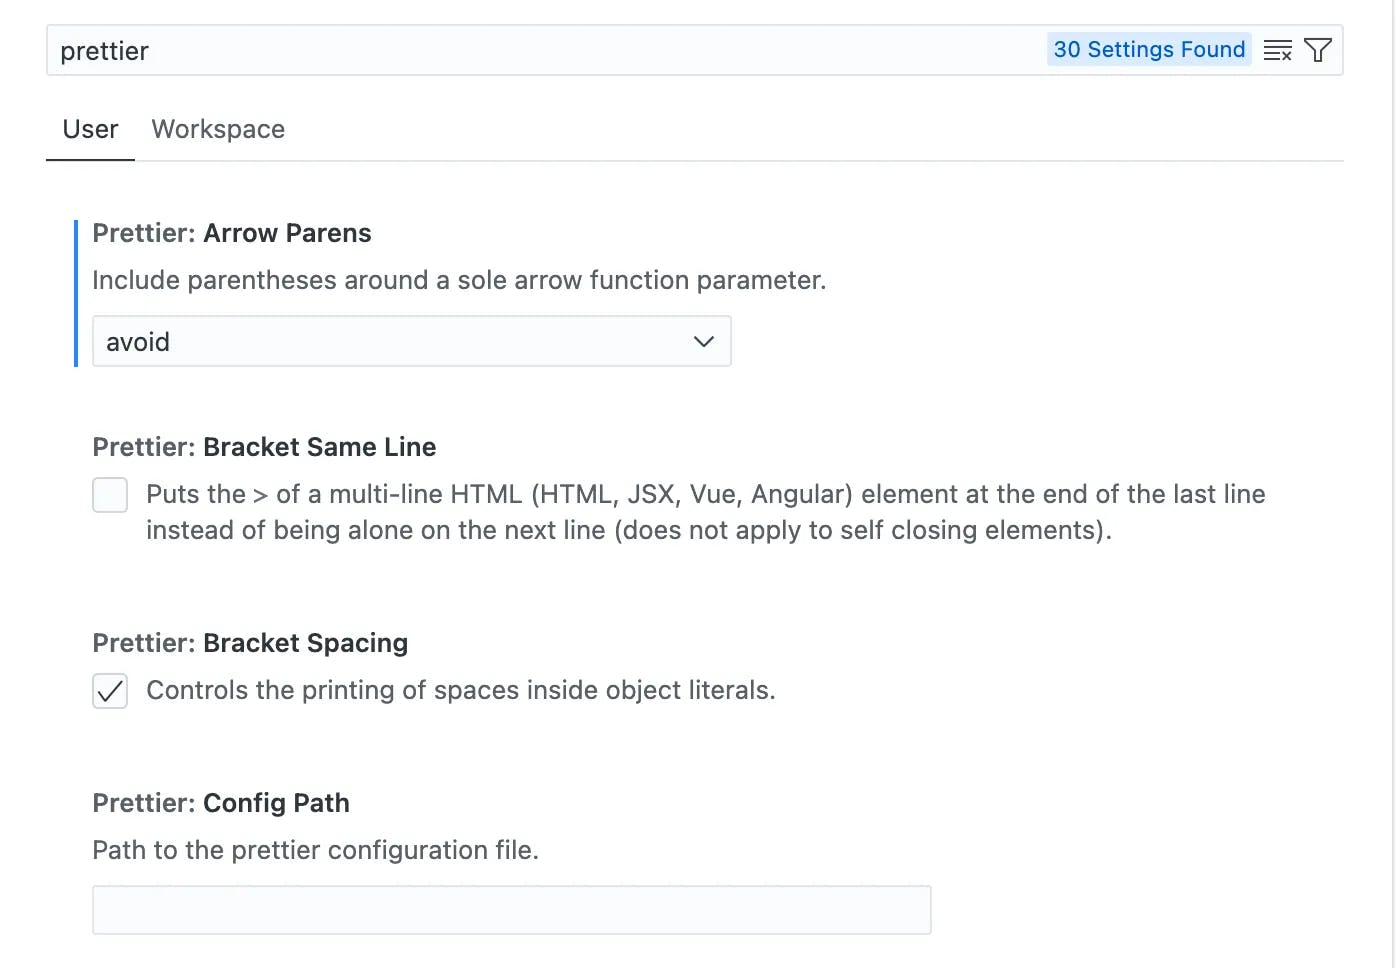
Alternatively, when using the JSON view, begin typing "prettier," and you'll see the complete list of fields you can modify.
{
	"prettier.tabWidth": 4,
	"prettier.printWidth": 120,
	"prettier.useTabs": true,
	"prettier.singleQuote": true,
	"prettier.arrowParens": "avoid"
}
{
"prettier.tabWidth": 4,
"prettier.printWidth": 120,
"prettier.useTabs": true,
"prettier.singleQuote": true,
"prettier.arrowParens": "avoid"
}To prioritize this extension over other installed extensions, set it as the default formatter in your VS Code settings.
{
	"editor.defaultFormatter": "esbenp.prettier-vscode"
}
{
"editor.defaultFormatter": "esbenp.prettier-vscode"
}I also suggest enabling formatting on save.
{
	"editor.formatOnSave": true
}
{
"editor.formatOnSave": true
}Installing Prettier as a project dependency instead of just the VSCode extension ensures consistent formatting across various environments, allows integration with build tools, and enhances compatibility with ESLint. It controls versioning and supports automated code formatting, benefitting multi-developer projects.
In a monorepo, it's best to have all apps and packages follow the same formatting rules to maintain consistency and make maintenance easier. Installing Prettier at the root of the monorepo is recommended to avoid the need for a separate package for its dependencies and configurations.
To install Prettier as a project dependency, navigate to your project directory in your terminal and run the following command:
pnpm -w add -D prettier --save-exactpnpm -w add -D prettier --save-exactBy specifying a specific version of Prettier, every team member working on the project will utilize the same version with its default configurations.
Although Prettier has default configurations, you can customize specific rules to match your preferred coding style. To achieve this, create a configuration file named .prettierrc.mjs in your project's root directory. Prettier will automatically detect and apply the settings specified in this file. This way, you can tailor Prettier to suit your coding requirements.
Below is an example of a simple configuration file:
export default {
	printWidth: 120,
	tabWidth: 4,
	useTabs: true,
	trailingComma: 'none',
	singleQuote: true
};export default {
printWidth: 120,
tabWidth: 4,
useTabs: true,
trailingComma: 'none',
singleQuote: true
};You can find the complete list of options you can configure in the official documentation.
Now the Prettier extension is smart enough to locate and utilize the rules specified in the .prettierrc.mjs file.
Like Git, you can exclude specific files or directories from being formatted according to your preferences using the .prettierignore file.
node_modules/
dist/node_modules/
dist/To format your entire codebase with a single command, add a script to your package.json file.
{
"name": "bugsight",
"version": "1.0.0",
"main": "index.js",
"scripts": {
"build:server": "pnpm --filter server build",
"dev:server": "pnpm --filter server dev",
"prod:server": "pnpm --filter server prod",
"format": "prettier . --write"
}
}{
"name": "bugsight",
"version": "1.0.0",
"main": "index.js",
"scripts": {
"build:server": "pnpm --filter server build",
"dev:server": "pnpm --filter server dev",
"prod:server": "pnpm --filter server prod",
"format": "prettier . --write"
}
}This script will allow you to quickly run Prettier on all the files in your project using this command:
pnpm run formatpnpm run format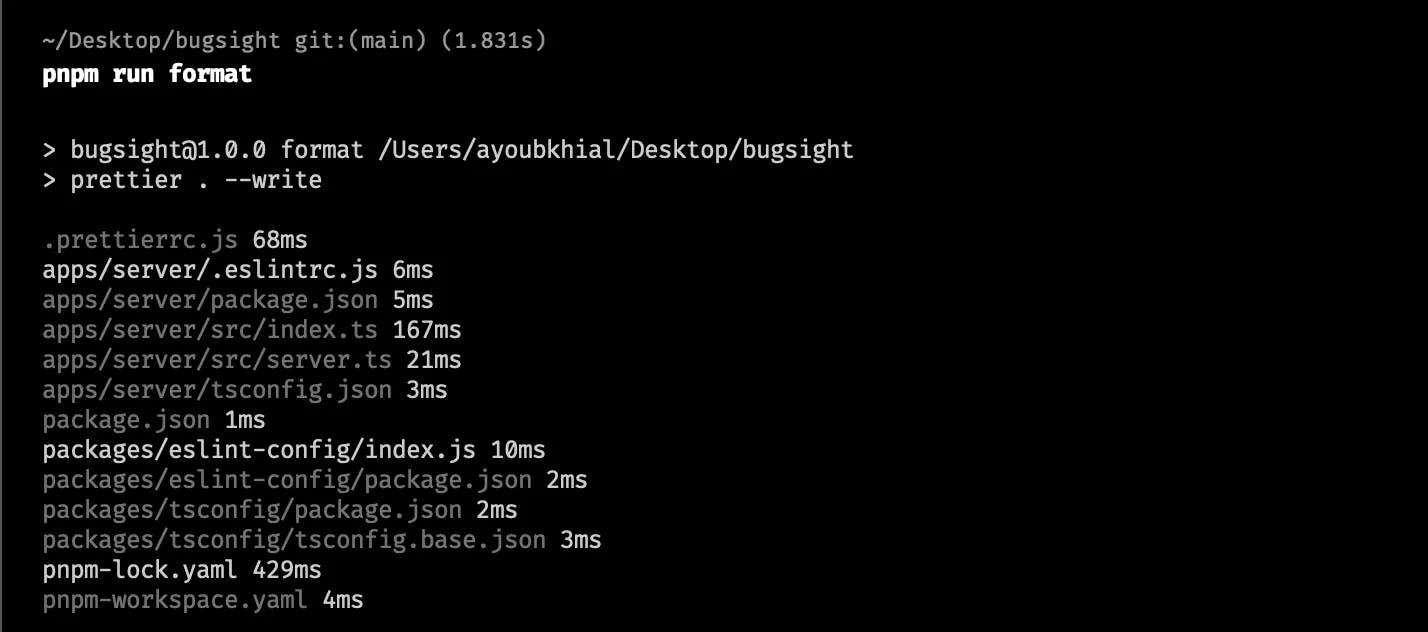
ESLint - A customizable JavaScript linter
ESLint is a pluggable and configurable linter tool for identifying and reporting patterns in JavaScript. Its primary goal is to help developers write better code by enforcing specific coding rules and detecting potential bugs and errors before they make it into production.
Let's dive into creating a new ESLint configuration package and utilizing it within the server app in our monorepo setup.
To organize your project effectively, head to the packages folder and create a new directory named eslint-config. This directory will serve as the container for your shared ESLint configuration package.
Initialize a new package.json file inside the eslint-config folder:
pnpm initpnpm initI will update the name field in the package.json to include either the company or the app name, following the same approach we used for the tsconfig package.
{
"name": "@bugsight/eslint-config-shared",
"version": "1.0.0",
"main": "index.js"
}{
"name": "@bugsight/eslint-config-shared",
"version": "1.0.0",
"main": "index.js"
}Now you'll need to install ESLint and its associated plugins and configurations.
pnpm add -D eslint @typescript-eslint/eslint-plugin @typescript-eslint/parser --filter @bugsight/eslint-config-sharedpnpm add -D eslint @typescript-eslint/eslint-plugin @typescript-eslint/parser --filter @bugsight/eslint-config-shared- eslint: The core package.
- @typescript-eslint/parser: A parser allowing ESLint to lint TypeScript code by converting it into an Abstract Syntax Tree.
- @typescript-eslint/eslint-plugin: A plugin adding TypeScript-specific linting rules to ESLint for enforcing good TypeScript practices.
Create an index.js file in the eslint-config directory and add your shared ESLint configuration.
module.exports = {
parser: '@typescript-eslint/parser',
plugins: ['@typescript-eslint'],
extends: ['plugin:@typescript-eslint/recommended'],
rules: {
'no-console': 1
}
};module.exports = {
parser: '@typescript-eslint/parser',
plugins: ['@typescript-eslint'],
extends: ['plugin:@typescript-eslint/recommended'],
rules: {
'no-console': 1
}
};Let's break down the configuration:
parser: The parser parses the code into an Abstract Syntax Tree (AST) that ESLint can understand and work with.@typescript-eslint/parser is a parser that understands TypeScript, which allows ESLint to lint TypeScript code effectively.plugins: Adds extra rules through plugins not included in the core ESLint package.@typescript-eslintis a plugin that adds several TypeScript-specific linting rules to ESLint.extends: This field is used to specify sets of rules to apply.plugin:@typescript-eslint/recommendedinvolves a group of recommended rules for TypeScript from the@typescript-eslintplugin.rules: Allows for custom rule specification. Rules dictate which code patterns ESLint will warn or error about. For instance,no-console: 1is a custom rule that triggers a warning whenconsolefunctions (e.g.,console.log) are used. In ESLint, rules can be disabled ('off'or0), provide warnings ('warn'or1), or trigger errors ('error'or2).
Check out the Awesome ESLint package for a curated list of awesome ESLint plugins, configs, etc.
You can also override any option from the extended plugin plugin:@typescript-eslint/recommended.
module.exports = {
...
rules: {
'no-console': 1,
'@typescript-eslint/no-explicit-any': 2
}
};module.exports = {
...
rules: {
'no-console': 1,
'@typescript-eslint/no-explicit-any': 2
}
};This configuration is meant to be shared across all packages in a monorepo, enforcing a consistent coding style and helping to catch common errors. In a monorepo, sharing an ESLint configuration like this can help ensure that all code adheres to the same rules and styles.
We'll install this ESLint configuration package in our server folder, allowing us to extend it and add specific properties tailored to our server-side codebase. You can easily install it through the CLI using the following command:
pnpm add @bugsight/eslint-config-shared --filter serverpnpm add @bugsight/eslint-config-shared --filter serverAlternatively, you can manually add the ESLint configuration package to your package.json file in the server folder, then run pnpm install to install the package and its dependencies.
{
"name": "server",
"dependencies": {
"@bugsight/eslint-config-shared": "workspace:*",
"@bugsight/tsconfig": "workspace:*",
"express": "^4.18.2"
}
}{
"name": "server",
"dependencies": {
"@bugsight/eslint-config-shared": "workspace:*",
"@bugsight/tsconfig": "workspace:*",
"express": "^4.18.2"
}
}Create a new file named .eslintrc.js within the server folder. This file will serve as the configuration file for ESLint in the server application, allowing you to customize and extend the shared ESLint rules specific to the server-side codebase.
module.exports = {
extends: ['@bugsight/eslint-config-shared'],
env: {
es2023: true,
node: true
},
parserOptions: {
ecmaVersion: 'latest',
sourceType: 'module'
}
};module.exports = {
extends: ['@bugsight/eslint-config-shared'],
env: {
es2023: true,
node: true
},
parserOptions: {
ecmaVersion: 'latest',
sourceType: 'module'
}
};Let's break it down:
extends: This line imports a predefined set of ESLint rules from@bugsight/eslint-config-shared, eliminating the need to redefine these rules in the current configuration.env: Used to define global variables that are predefined.es2023: truespecifies that this script is intended to be run in an environment that supports ES2023 globals.node: truespecifies that this is a Node.js environment, which comes with its own set of globals.parserOptions: Used to specify the JavaScript version and source type. TheecmaVersion: 'latest'option indicates that the parser should use the latest ECMAScript standard, andsourceType: 'module'indicates that the code should be treated as ECMAScript modules.
Like Prettier, we can create a .eslintignore file to specify paths that should be excluded from linting.
node_modules/
dist/node_modules/
dist/Add a new script to your package.json file, allowing you to run ESLint and enforce the defined rules on your server-side codebase.
{
	"name": "server",
	"scripts": {
		"build": "tsc --build",
		"dev": "nodemon src/index.ts",
		"prod": "npm run build && node ./dist/index.js",
		"lint": "eslint ."
	}
}{
"name": "server",
"scripts": {
"build": "tsc --build",
"dev": "nodemon src/index.ts",
"prod": "npm run build && node ./dist/index.js",
"lint": "eslint ."
}
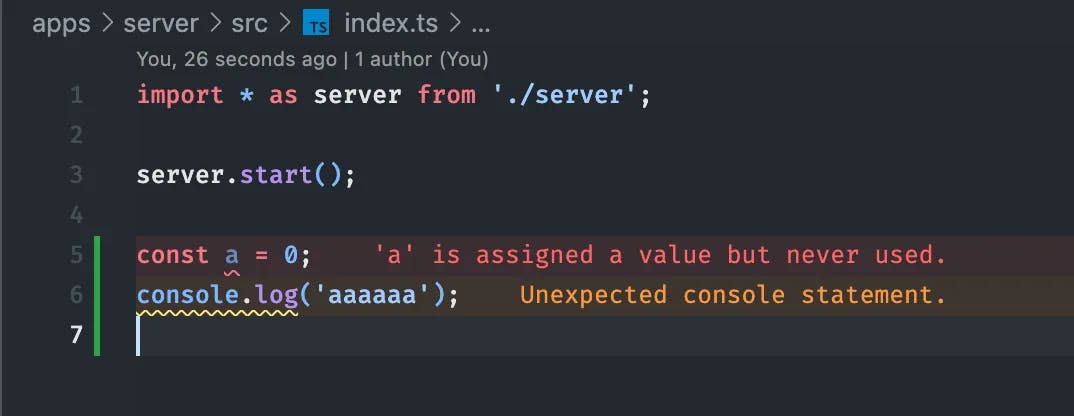
}Now, let's add two statements in our index.js file within the server folder to test if the linting works appropriately.
import * as server from './server';

server.start();

const number = 0;
console.log('hello world.');import * as server from './server';
server.start();
const number = 0;
console.log('hello world.');Let's go ahead and run the lint script now. Execute the following command in the server folder:
pnpm run lintpnpm run lintBy running this script, ESLint will analyze the code in the index.js file and any other files in the server directory, and it will display any linting warnings or errors detected based on the defined ESLint rules.
You will receive error messages in your terminal if your configuration is correct.
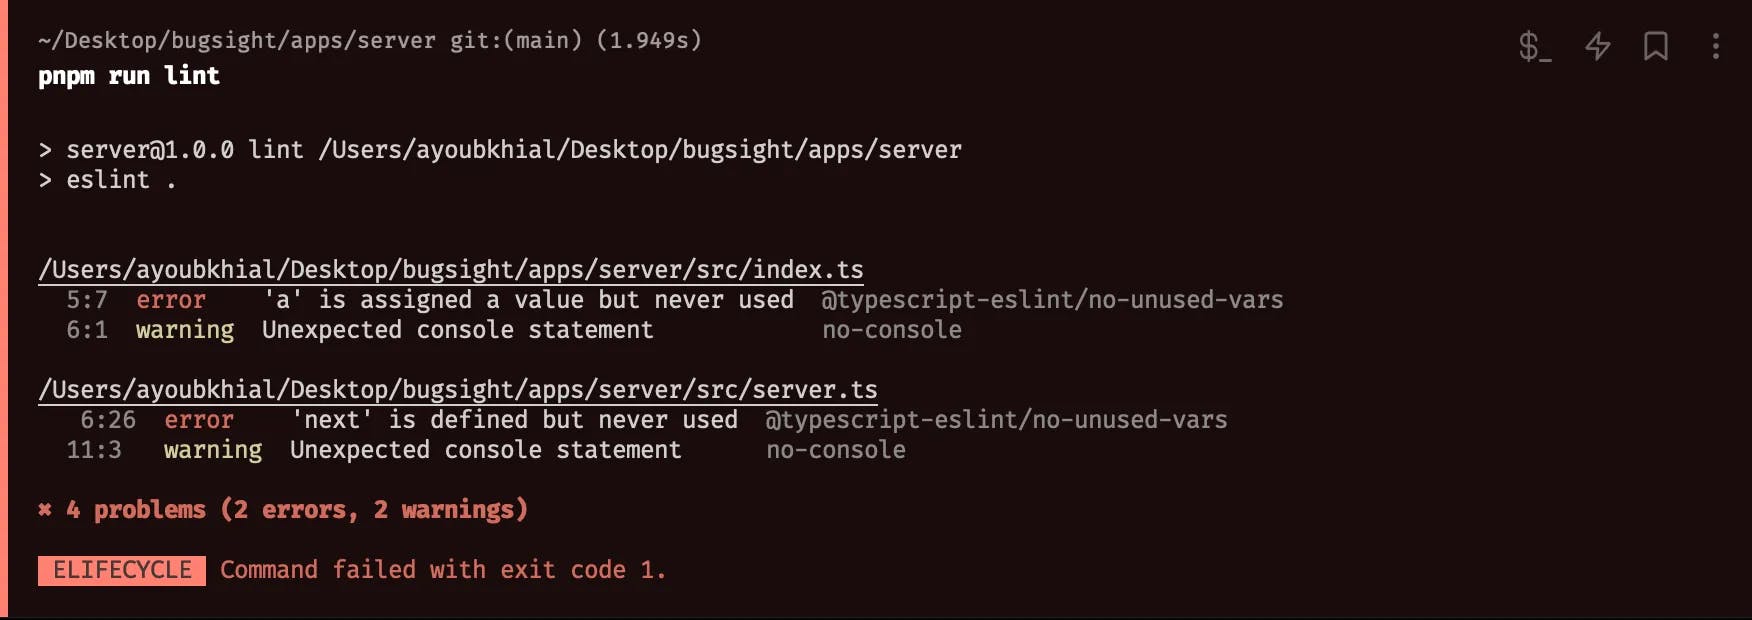
Let's focus on the errors in the index.js. The first error is caused by an unused variable a in the code, detected by the no-unused-vars rule from the @typescript-eslint plugin.
The second error results from a console statement, generally discouraged in production code. The no-console rule triggers this as a warning.
While running ESLint from the command line interface (CLI) can be effective, installing and using the ESLint extension in your code editor can make the linting process smoother and more integrated into your development workflow.
Installing the ESLint extension lets you receive immediate feedback as you write code, with real-time issue highlighting. This integration allows for a seamless development experience, making identifying and addressing potential problems more manageable.
Avoiding rules conflicts between ESLint and prettier
ESLint and Prettier are two powerful tools that, while serving similar purposes, work in slightly different ways. ESLint focuses on analyzing code to find and fix issues, while Prettier concentrates more on formatting code to ensure it adheres to a consistent style. The potential for conflict arises because ESLint also has rules that enforce code style.
For example, Both ESLint and Prettier provide the ability to enforce whether or not to use semicolons at the end of statements. This is configured using the semi rule. In both tools, this rule takes either true (semicolons are required) or false (semicolons should be omitted where possible) as its value.
Let's say you want to omit semicolons, and you've set up both your .prettierrc.mjs and .eslintrc.js files accordingly:
export default = {
    semi: false,
    // other rules...
};export default = {
semi: false,
// other rules...
};module.exports = {
rules: {
semi: ["error", "never"],
// other rules...
},
// other configurations...
};module.exports = {
rules: {
semi: ["error", "never"],
// other rules...
},
// other configurations...
};This seems OK initially, as both rules are set to the same value, meaning both tools will enforce the same style. However, when you run both Prettier and ESLint, the same piece of code is flagged by ESLint but then reformatted by Prettier, or vice versa. This can lead to conflicts, causing confusion and reducing the effectiveness of these tools.
To prevent ESLint from flagging formatting rules that Prettier will fix, we can use the eslint-config-prettier package. This package turns off all ESLint rules that conflict with Prettier.
pnpm add -D eslint-config-prettier --filter @bugsight/eslint-config-sharedpnpm add -D eslint-config-prettier --filter @bugsight/eslint-config-sharedThen, in your shared esling configuration, include prettier in the extends array:
module.exports = {
    extends: [
        "plugin:@typescript-eslint/recommended",
        "prettier" // make sure "prettier" is last
    ]
};module.exports = {
extends: [
"plugin:@typescript-eslint/recommended",
"prettier" // make sure "prettier" is last
]
};The order is important here; the prettier should be the extended array's last configuration to ensure it can override other configurations.
By configuring ESLint and Prettier correctly, you can ensure that these two powerful tools work harmoniously together, helping to improve your code quality and consistency without causing conflicts.
Conclusion
In conclusion, integrating ESLint and Prettier into a pnpm-driven monorepo enhances code consistency and quality while preventing common JavaScript/TypeScript errors. This combination leverages PNPM's package management efficiency within a TypeScript monorepo, offering a flexible and scalable coding environment that caters to your project's unique requirements and your team's coding standards.
You can find the complete code source in this repository; feel free to give it a star ⭐️.
If you want to keep up with this series, consider subscribing to my newsletter to receive updates as soon as I publish an article.